Feeds:
Posts
Comments

Archive for June, 2010

Locally grown strawberries are indescribably sweet and juicy treats right now, so I consider myself fortunate to live in an area where strawberry stands dot the roadsides. Strawberries have been players in my gastronomic memories. I remember going to an annual strawberry festival that helped raise funds to support a local children’s orphanage in my girlhood hometown. And when I was pregnant with my first child, I craved strawberries. Not a bad thing to crave because strawberries contain vitamins A, C, and K and also contain calcium. Fresh strawberries did little to ease my craving, though. I found that strawberry cake and strawberry pie did the trick and miraculously I was able to keep my weight gain down to the necessary minimum on that strawberry diet and gave birth to an under 6 pound baby. Currently, I live near a town that is reviving its aging strawberry festival and is promoting independent growers instead of wholesalers. Because delectable strawberry-based goodies are everywhere to be found, it’s my kind of festival!

Here are some strawberry tips to keep in mind: Strawberries will not ripen after they’ve been picked, so purchase strawberries that are firm and bright red with no white or green areas and ones that are also free of mold or damage. Look for berries with fresh looking green foliage caps. Strawberries can be refrigerated for one to three days, but do not wash or hull them until ready to be eaten. Whole unwashed berries can be frozen in airtight containers or bags for use all year long.

While I was rummaging through my recipe cards in my circa 1970’s shoebox, I came across a recipe for strawberry pie. With six baskets of berries sitting on my kitchen counter and company coming over for dinner tonight, I thought I’d dust off this recipe and give it another try. It’s a simple recipe and if it tastes as good as it looks, it should be fabulous!

Strawberry Glaze Pie
Ingredients:
1 9-inch pie crust, baked
About 4 cups of fresh strawberries, washed and hulled
1 cup sugar
3 T cornstarch
3/4 cup cold water
Whipping cream or ice cream

Directions:
Mash 1-1/2 cups of berries and combine with sugar in a medium saucepan. Place over medium heat and bring to a boil, stirring frequently.

In a small bowl, whisk together the cornstarch and cold water. Gradually stir cornstarch mixture into boiling strawberry mixture. Reduce heat and simmer until thickened, about 10 minutes, stirring constantly.

Pour thickened mixture into a mesh sieve over a bowl and stir to strain the glaze.

Place about 1-1/2 cup berries stem end down on baked pie crust and pour half of the glaze over the berries. Add remaining berries and pour remaining glaze over them.

Chill for several hours before serving.

Serve with whipped cream or ice cream.

Serves 8.

Read Full Post »


Summer’s heat has definitely arrived and the thought of being cooped up in a warm kitchen slaving over meals is enough to make me want to eat salads all summer long. Does the thought of juicy, sweet orange slices sprinkled with thinly sliced red onions and salty green olives sound refreshingly good? I recently had a salad in Greece with all those ingredients and came home with the desire to duplicate the sweet-saltiness of this colorful dish. Searching some of my Mediterranean food cookbooks, I came up with a good basic recipe that only needed a few slight changes. For the salad dressing I used an olive oil that had been infused with the peels of blood oranges and I added the frozen orange juice concentrate to thicken, sweeten, and flavor the dressing. Plating the oranges on a bed of fresh spring greens instead of directly onto the platter made it a more substantial and nutritious salad.

Orange, Onion, and Olive Salad
Adapted from Williams-Sonoma: Essentials of Mediterranean Cooking

Salad Ingredients:
4-5 navel oranges
1/4 small red onion, thinly sliced (plus or minus depending on your liking of onions)
1/2 cup olives, cut in half and pitted (I prefer green)
1 tablespoon chopped fresh Italian parsley
Mixed salad greens, optional

Dressing Ingredients:
Juice of 1/2 lemon
1/4 tsp ground cinnamon
1/8 tsp salt
1/8 tsp freshly ground pepper
3 T frozen orange juice concentrate
2 T Extra Virgin Olive Oil (infused with the essence of oranges, if possible)

Makes 1/2 cup of dressing.

Directions:
1. To slice the oranges stand one on a cutting board with the stem end up and the navel end down. Using a sharp knife, slice off the “north and south polar caps” of each orange so it has a flat base. Now cut “longitudinally” downward to cut both the peel and pith (white membrane) away from the orange, making sure you are following the contour of the fruit. Cut each peeled orange crosswise into 1/2-inch thick slices and save any juice that accumulates on the board.

2. Make the salad dressing by mixing the orange juice collected from the cutting board with the rest of the dressing ingredients, except for the extra virgin olive oil. Now whisk in the oil. Set aside.

3. Place mixed spring greens on a serving platter. Arrange orange slices on the bed of greens. Sprinkle the onion slivers over the oranges.

4. Scatter the olives over the oranges and drizzle with the dressing. Let sit at cool room temperature for 10-15 minutes for flavors to blend. Sprinkle with parsley and serve at once.

Serves 4-6

Read Full Post »

Hooray! I am the proud mother of a thirteen ounce cucumber! I just harvested my first cucumber of the season and although it may be the first and only one I ever harvest this summer, I can at least say that I finally grew something I could eat! Other veggies in the garden are looking good, too – the tomatoes are are still clinging to their vines and the “squashettes” and “eggplantettes” have not yet shriveled up. Life is good! Keep your fingers crossed for me!

#1 – Trip Tip
If you are planning a trip, I would recommend you check out TripAdvisor. Prior to planning our trips abroad, my husband and I consult the site and we’ve always found it to be extremely helpful. While searching for hotels we learn valuable information by reading reviews submitted by other travelers. The reviews often contain comments such as the pros and cons of staying at different hotels, location advantages, restaurant recommendations, numerous sight seeing tips, and photos taken from and of the hotels.

#2 – Seafood Savvy
How savvy are you when it comes to purchasing seafood at the market or ordering it at a restaurant? The Environmental Defense Fund’s website lists which seafoods are eco-best, eco-okay, or eco-worst. It also provides better alternatives and recipes. You can download a Seafood Pocket guide or a Sushi Pocket guide from the site, too.

Here’s a recap of the EDF’s categories:

Eco-Best choices describe:

  • wild fish from healthy, well-managed populations, caught using fishing gear that does little harm to sea life and marine habitats;
  • or farmed fish raised in systems that control pollution, the spread of disease, chemical use and escaped fish.

Most fish on this list are also low in environmental contaminants and can be safely eaten at least once per week.

Eco-OK fish have mixed records on:

  • how they are managed,
  • the health of their habitat,
  • or how they are caught or farmed.

Some fish on this list may have elevated levels of environmental contaminants – such as mercury or PCBs – and should be eaten in moderation.

Eco-Worst choices have one or more serious environmental problems, such as overfished populations, poor management, high bycatch, extensive habitat damage; or come from farms that allow widespread pollution, the spread of disease, chemical use and escaped fish.

We work with many of these fisheries to help them become more sustainable and keep fishermen on the water. As fisheries improve, they are moved up the list.

Many fish on this list have elevated levels of environmental contaminants – such as mercury or PCBs – and should be eaten in moderation, if at all.

#3 – Rainbow in Your Hand
There is no end to creativity. Someone created a flipbook that, instead of creating animated images as the pages are flipped, creates a three dimensional rainbow in your hand! How very clever!

#4 – Men’s Summer Style Tips
Askmen.com had an article called, “Men’s Summer Fashion Mistakes” that I read because I was curious to see what kind of fashion trouble men could get into during the summer months.

Read the article yourself, but otherwise I offer my quick synopsis:
1. Do not wear socks with sandals, boat shoes, or drivers.
2. Cargo shorts are out.
3. Switch to a lighter, more refreshing fragrance.
4. Do not wear flip flops, Teva-type sandals, or thin-strapped European sandals for any outing other than to a beach or a barbecue.
5. Do not wear tank tops.
6. Billowy board shorts don’t cut it anymore.
7. Outside of athletic activity don’t wear wraparound shades.

My husband scored fairly well. He only got dinged for two out of the seven entries and, believe me, I’ve been working on those two issues with him!

#5 – Fill Yourself Up
“What I know for sure is this: You are built not to shrink down to less, but to blossom into more. To be more splendid. To be more extraordinary. To use every moment to fill yourself up.” -Oprah

As always, enjoy your weekend!


Read Full Post »

Having already documented in my post “Living Off the Fat of the Land” my inability to grow vegetables of any quantity and quality, I’ve decided to focus my “need-to-grow-something-edible” on my herb garden. Rosemary is the king in my garden, and it’s too bad that one cannot survive on it alone, because a little 4-inch container planted in my yard has grown into a grand piano-sized bush. Does anyone need any rosemary? Besides rosemary, I also grow tarragon, lavender, oregano, sage, mint, chives, basil, thyme, dill, nasturtium, and lemongrass. And although it is not an herb, I have a kaffir lime tree whose leaves are used to flavor Southeast Asian dishes.

Pretty much all the herbs I grow are perennials. The only annuals I need to replant each year are dill and basil. Perennial herbs are like weeds – they may die off in the winter, but they come back again. That’s why I like them! A word of caution about a particular perennial herb, though. Because mint is invasive, it is best to plant it in a container unless you want it to take over your yard.

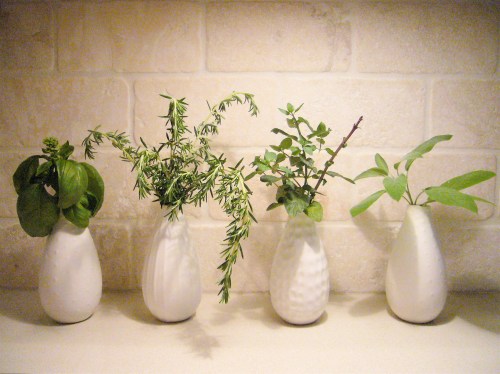
Many of the herbs I grow can be propagated in water. Mint, basil, sage, thyme, rosemary, oregano, and lemon grass should all form roots if you cut a 4 to 6 inch long piece of the herb, remove all the leaves from the bottom, and place the cutting in a glass or jar of water. Place the glass in a semi-shady location or where it will receive indirect light and change the water every day or two. The cutting should start setting roots in a few days and will be able to be transplanted carefully into the garden within one to two weeks. I’ve even had success rooting basil and lemongrass purchased at the market. On my kitchen counter I have a row of little vases lined up holding herb cuttings. They’re rooting and decorating my kitchen at the same time.

Here’s a simple and fragrant rice pilaf recipe that utilizes fresh rosemary sprigs. I’ve made it when I’ve needed a flavorful rice dish that wouldn’t detract from the main course.

Rice Pilaf
(Adapted from a Food Network Kitchen recipe)

Ingredients:
3 T butter
1 shallot, thinly sliced or chopped
1 to 1-1/2 tsp salt
Freshly ground black pepper
2 cups long grain rice (basmati is good)
3 cups chicken broth
1 bay leaf
1-2 sprigs fresh rosemary

Directions:
In a medium saucepan over medium-low heat, melt the butter and the shallot. Season with salt and pepper and cook until the shallots are soft. Add the rice and stir until coated with the butter. Increase the heat to medium-high. Let the rice cook until lightly toasted, stirring occasionally, but being careful not to let the rice burn – about 5 minutes. (Note: At this point, if desired, the rice can be transferred to a rice cooker to which the broth, bay leaf, and rosemary sprigs can be added).

To the saucepan of rice, stir in the broth, bay leaf, and rosemary. Bring to a simmer over low heat, cover, and cook until all the broth has been absorbed by the rice and the rice is tender, about 15 to 18 minutes. It is better to refrain from removing the lid and taking a peek during this steaming period. Remove the pan from the heat and let set for 5 minutes. Discard the rosemary and bay leaf. Fluff the rice with a fork before serving.

Makes about 5 cups of rice.

Read Full Post »

The Oprah Show was playing in the background, as I sat at my kitchen table with a stack of cookbooks trying to gain some inspiration for dinner. I was on a quest to find something different for dinner that was reasonably simple to prepare, did not require a ton of ingredients, and was on the healthier side. Then I heard Oprah say, “I believe [it] may be the best turkey burger in the entire world.” I thought to myself, “Good turkey burgers? Is there such a thing?” Because they lack a significant amount of fat, I was under the impression that turkey burgers were dry and flavorless unless you added back a lot of “bad” stuff. Oprah brought Jeff O’Neill, the chef from Donald Trump’s private club Mar-a-Lago, on her show to prepare the burgers on stage. His turkey burgers looked juicy and had ingredients that were different from other burgers. I sped off to the market to pick up a few ingredients and zipped back home to test the recipe and to find out if Oprah’s praise for these burgers was deserved or not. They did not disappoint and they are among my daughter’s friends’ favorites when they come to visit.

Mar-a-Lago Turkey Burgers

Ingredients:

1/4 cup thinly sliced scallions

1/2 cup finely chopped celery

3 Granny Smith apples, peeled and diced

1/8 cup canola oil

4 pounds ground turkey breast

2 Tbsp. salt

1 Tbsp. black pepper

2 tsp. Tabasco® chipotle pepper sauce

1 lemon, juiced and grated zest

1/2 bunch parsley, finely chopped

1/4 cup Major Grey’s Chutney, pureed

Directions:

Sauté the scallions, celery and apples in the canola oil until tender. Let cool.

Place the ground turkey in a large mixing bowl. Add sautéed items and the remaining ingredients. Shape into eight 8-ounce burgers. Refrigerate for 2 hours.

Season the turkey burgers with salt and pepper. Place on a preheated, lightly oiled grill. Grill each side for 7 minutes until meat is thoroughly cooked. Let sit for 5 minutes.

Serves 8.

Linnell’s Notes: I never add the full 2 tablespoons of salt, however, my taste buds have adjusted to a lower sodium diet. Also, depending on how chunky the chutney is, sometimes I puree it and sometimes I don’t. I also play with the amounts of apple, celery and green onion. If I have a bit more than the required measurements leftover, such as a few slices of apple, half a celery stalk or a green onion, I go ahead and add them. The last time I made these I only had 2 pounds of ground turkey and I made at least six patties. My husband usually grills the burgers for 4-5 minutes on each side and not the 7 minutes mentioned in the instructions. Of course, this is all a function of how thick you make your patties.

Enjoy this great recipe!

Read Full Post »

There are always so many reasons to celebrate life, but this weekend is special. My youngest child celebrates her 21st birthday today and I feel so blessed that she has become such an extraordinary adult.  And when I count my blessings, I always include the amazing men in my family. Today’s post is dedicated especially to my dad and my husband, and to all the fathers who work hard, sacrifice a lot, and love beyond measure.

#1 – Top Ten Father’s Day Gifts
Weigh AskMen.com‘s top ten Father’s Day gift suggestions against gift suggestions from What About This?:

1. Landscaping services versus Go to the park or work in the garden with your dad
2. Sports tickets versus Playing his favorite sport with him
3. Meat versus Prepare your dad a tasty and nutritious meal
4. Driving gloves versus Plan a nice drive or day trip with him
5. Wine versus Take him wine tasting
6. Leather wallet versus Create a digital inventory of his valuable personal property for him
7. Set of golf clubs versus Play a round with him, go to the driving range, play miniature golf
8. Fishing gear versus Take him fishing
9. Alcohol versus A nice dinner out together
10. Grilling tools versus Clean his grill for him

You get my drift. Spending time and doing is better than buying.

#2 – Power Breakfasts
Menshealth.com has an article called “Abs Diet Super Bowls” that caught my attention because the ingredients listed in its “Honey, I Shrunk My Gut” bowl are similar to those I eat for breakfast every morning! Check out these recipes and please, no wise cracks about my gut!

#3 – Graduation Thank You Cards
I make my own thank you cards using photos that I take and card stock. Here’s an idea for graduation thank you cards: Print photos of the graduate or of some aspect of the graduation ceremony (hats thrown in the air, close up of the diploma, family photo at graduation, etc.) and using either double stick tape or glue that is photo safe, adhere it to a piece of 8.5″ x 5.5″ card stock folded in half. That would be a sheet of 8.5 ” x 11″ card stock cut in half. Personalizing the card with a photo makes the thank you card extra special for those who could not be there for the celebration or have not seen the graduate in a while. Envelopes can be purchased at any office supply or paper goods store.

#4 – You Peel Tomaaaato, I Peel Toooomato
To peel tomatoes (peaches, and plums, too):  Wash and remove any stickers. Gently remove the stem. With a paring knife, cut a small, shallow “x” on the bottom. Plunge the tomato into boiling water for about 15 – 25 seconds, then put it into a bowl of ice water to cool. After it’s completely cooled, wipe it dry and gently peel off the skin.

#5 –  A Father’s Greatest Gift
“My father gave me the greatest gift anyone could give another person, he believed in me.” -Jim Valvano-

Have a joyful weekend and a happy Father’s Day wish to all those wonderful dads out there!

Read Full Post »


It’s around this time of year that I start receiving requests for my “Ultimate College Packing List.” Making lists helps me prioritize and bring order to my projects and so ten years ago when my first born was headed off to college, I began a list on my computer of the many things my artistic, right-brained child would need for life in a college dormitory. After asking advice from friends with older children and checking lists given out by stores, I compiled this Ultimate College Packing List, which I’ll refer to as the List in this post. A few years later I revised it for my second child, and then again for my third child. With the changes and updates throughout the years, the List is now in its eighth version.

Word eventually got around that I had a college packing list and for ten years now I’ve mailed it or emailed it to friends, friends of friends, family, friends of family, and so on. It has been circulated way beyond my local area and I’m always amazed when people I don’t know mention my List! For example, I was in a store one day last year and the clerk asked my name and when I mentioned my name, another customer exclaimed, “Are you the Linnell of The Ultimate College Packing List?” When I said I was, she thanked me for the list and told me the story of how she came about receiving it! Yet another reminder of what a small world it is!

The List is pretty comprehensive and maybe a bit outdated with today’s technological advances, but my suggestion, as stated at the top of the List, is to use it as a springboard or a starting point. Personalize it for your child; delete items you know your child won’t use and add items as you are reminded of things your child will need. Some of the items on the List will seem far-fetched and unnecessary, but it is, after all, the “ultimate” packing list. I’ve heard back from moms who didn’t think their child would need a particular item only to find out he/she actually needed it and had to go out and buy it. And as thorough as I’ve tried to be, I’m sure there are more things that could be included in the List. For the most part, there’s a reasonable explanation for almost everything on the List. I should also preface this introduction to the List by saying that my children went to colleges six to eight hours away from home and did not have cars in college. Some of the items listed were based on availability – like needing medications in the middle of the night or being hungry while studying. So depending on whether or not your child has a car and depending on what his proximity to supplies is, this list could be easily adapted.

Another suggestion related to the List is that it’s a financial drain to buy everything on this list, so look around the house for extras such as desk supplies, cleaning & kitchen supplies, and things like pillows and desk lights. Ask friends whose children have finished their freshman year in college to save their bed lifters, shower totes and such. Save coupons from stores like Bed, Bath, and Beyond. Shop throughout the entire summer and look for bargains on these items. Designate a room or part of the house to deposit your finds and purchases. It’s a lot of stuff to organize! Check with your student’s college housing department to find out specifics on what is allowed and what is provided.

Needless to say, my kids were the most prepared kids in their dormitories, and continued to be so in their college apartments. Stay tuned – my Apartment Inventory List (a good one for students moving into their first apartments) will be posted sometime this summer!

Read Full Post »

There’s a wonderful little bakery and cafe not too far away from my home that serves an interesting Mediterranean-type pasta salad that I order every time I’m there.  There’s a subtle sweet, spicy, and salty juxtaposition of flavors in the salad dressing that has had me playing detective trying to dissect its complexity.  I’ve been playing around with ingredients and I think I’ve got it pretty close to the original salad now –  but knowing me, I will continue to tweak this recipe long after this post is printed!

This recipe uses orecchiette, which is a kind of pasta typically made in Puglia, a region of Southern Italy. In Italian, “orecchio”, means ear, and the suffix “etto” means small. If the thought of “small ears” on your plate creates a bad visual for you, then think of this pasta as resembling “small hats” instead! These slightly domed ovals have centers that are thinner than their rims, creating dense and somewhat chewy pasta. Orecchiette is perfect for pasta salad, because it’s sturdy enough to be tossed around and it catches and holds the tantalizing dressing.

Here’s my basic recipe for Orecchiette Pasta Salad. It’s the type of recipe that is adaptable to many variations. Here are some of my ideas for variations:

*Add some citrus into the dressing
*Toss in some cubed or crumbled feta cheese
*Substitute sweet golden raisins for the currants
*Toss in some thinly sliced prosciutto

My Orecchiette Pasta Salad:
Note: The amounts listed for the ingredients can be easily reduced or added upon depending on taste.

Salad Ingredients:

1 pound of orecchietta
12 ounces sweet grape or cherry tomatoes, halved lengthwise
2/3 cup red onion, chopped
1-1/4 cup Kalamata olives, halved lengthwise
2/3 cup currants
2/3 cup pine nuts, toasted
Bunch of basil, chiffonade leaves

Dressing Ingredients:

3/4 cup extra virgin olive oil
1/4 tsp ground cumin
3/4 – 1 tsp curry powder
1/4 -1/2 tsp freshly ground black pepper
½ tsp sea salt
¼ tsp season salt
¼ tsp paprika

Directions:

  1. Following the package directions, cook the orecchiette until al dente. While cooking make sure you stir the orecchiette frequently to prevent the pieces from “nesting” into each other and forming doughy globs. Drain in colander.
  2. Make salad dressing by whisking all salad dressing ingredients into a small bowl. Set aside for flavors to meld.
  3. Slice olives and tomatoes and set aside.
  4. Chop red onion and set aside.
  5. Lightly toast the pine nuts in a heavy frying pan, making sure to keep an eye on them constantly – the oil in them can burn quickly. Let cool.
  6. Rinse the basil leaves and blot them dry. Chiffonade the basil leaves by stacking the leaves, rolling them lengthwise (like a cigar) and then cutting them crosswise into long, thin strips. Set aside.
  7. Put the cooked orecchiette in a large bowl. Add the rest of the salad ingredients except for the basil.
  8. Whisk the dressing again and then pour it into the salad ingredients. Toss all together. Sprinkle the basil on top and gently toss again.

This salad will taste better the next day after the flavors have a chance to blend and soak in. It is best served at room temperature.

Read Full Post »

My garden is so lush and lovely right now and would be perfect, if not for the glaring exception of the fountain in the backyard. Thick, icky green was the only way to describe it yesterday. So what to do? Well, a little algaecide goes a long way or so I’ve just learned – now I have a fountain full of bubbles! It’s fun to look at, but I’m really concerned about little birds taking bubble baths in it. It’s time to use elbow grease instead of chemicals! Be kind to the earth.

#1 – Random Acts of Kindness
“Random acts of kindness are those sweet or lovely things we do for no reason except that, momentarily, the best of our humanity has sprung into full bloom. When you spontaneously give a stranger the bouquet of red carnations you had meant to take home to your own dinner table, when you give your lunch to the guitar-playing homeless person who makes music at the corner between your two subway stops, when you anonymously put coins in someone else’s parking meter because you see the red “EXPIRED” medallion signaling to the meter maid – you are doing not what life requires of you, but what the best of your human soul invites you to do.” Daphne Rose Kingma

Make someone’s life a little easier, a little better, perhaps a little happier, by performing a random act of kindness for them. Here are a just a few suggestions that I’ve not mentioned before on this blog:

*Call a soup kitchen to find out how many people they generally serve. Then offer to prepare and deliver muffins, salad, or dessert for one of their meals.

*Share a recipe.

*Tell someone you appreciate them.

*Park farther out, giving others the choice parking spots.

*Offer to return a shopping cart to the store for someone loading a car.

*After loading your groceries into the car, return your shopping cart.

*Invite someone new over for dinner.

*Invite a college/apartment-bound student over for a cooking lesson.

*Open the door for another person.

*Give your full attention and simply listen to someone.

*Pay a compliment at least once a day.

*Roll an elderly neighbor’s garbage cans back up the driveway at the end of trash pick-up day.

*Volunteer to drive a sick friend to his doctor’s appointment or to his chemo appointment.

*Donate blood.

Please send me your ideas for random acts of kindness so I may share them with others.

#2 – Cutting Roses
What time of day is it best to cut roses from your garden? According to Rayford Clayton Reddell’s book A Year In The Life of a Rose, “Rosebushes begin drawing in moisture with the first hint of approaching dusk, and they hold it until the morning light gets strong. Since you want blooms with as much moisture in them as possible, cut either before midmorning or after midafternoon . . . . What you most want to avoid is cutting during midday, especially during hot weather, when blooms are limp.”

#3 – Reuse Those Plastic Storage Bags
Why waste plastic bags? As long as ziploc-type plastic storage bags can be washed out, I reuse them. Unless they contained something gross or raw, I wash them out in sudsy water, rinse them, and then let them air dry. The best way to air dry them is to open them and invert them over something like a bottle or a vase. I separate these used bags from the new ones and use them only for storing nonfood items. These used bags came in very handy during my recent trip to Greece; they held sundries, medicines, cosmetics, scarves, etc.

#4 – Unkind Food
According to the most recent issue of Nutrition Action, The Cheesecake Factory’s Chocolate Tower Truffle Cake ” . . . weighs in at three-quarters of a pound . . . Just 1,670 calories and 2-1/2 days’ worth of saturated fat (48 grams), nearly all of it from chocolate, sugar, cream, white flour, and butter.”

#5 – Make a Living and Making a Life
We make a living by what we get. We make a life by what we give.”
Winston Churchill

It’s going to be a warm weekend in my part of the world and I’m ready for it! Have a good weekend!

Read Full Post »


My husband receives the same Father’s Day gift every year, yet he never complains about it and he always delights in it. More impressively, he thinks I planned his gift pretty darn well. So here’s what his perennial gift is – it’s our daughter! She was born on Father’s Day over two decades ago and ever since then, I just haven’t been able to top that gift!

Since my hubby already knows what his gift is and since Father’s Day is just a few weeks away, I’ve started thinking about what items I’m going to serve him to make his brunch extra special. Wanting to serve him something healthy, yet tasty, I searched my infamous stacks of clippings and came across this Martha Stewart recipe for Quinoa Muffins. Interestingly, this recipe calls for using whole cooked quinoa seeds instead of quinoa flour.

Quinoa, as you will recall from my previous Quinoa Shrimp Salad post, is a tiny Peruvian seed that is a complete food and contains a balanced set of amino acids. It is also gluten-free (however, this muffin recipe is not). It’s a staple in my pantry and I continue to search for interesting quinoa recipes. Don’t forget to rinse quinoa with clear running water prior to cooking it to remove the bitter protective coating.

Martha Stewart’s Quinoa Muffins:

Ingredients
* 1 cup quinoa, rinsed
* 1/4 cup vegetable oil, such as safflower, plus more for pan
* 2 cups all-purpose flour, plus more for pan
* 3/4 cup packed dark-brown sugar
* 1 1/2 teaspoons baking powder
* 1 teaspoon salt
* 1/2 cup raisins**
* 3/4 cup whole milk
* 1 large egg
* 1 teaspoon pure vanilla extract

**I used 1/2 cup of mixed dried fruit: blueberries, currants, and orange-flavored craisins.

Directions
1. Preheat oven to 350 degrees. In a medium saucepan, bring quinoa and 1 cup water to a boil. Reduce to a simmer; cover, and cook until water has been absorbed and quinoa is tender, 11 to 13 minutes.
2. Meanwhile, brush a standard 12-cup muffin pan with oil; dust with flour, tapping out excess. In a medium bowl, whisk together flour, sugar, baking powder, salt, raisins, and 2 cups cooked quinoa; reserve any leftover quinoa for another use.
3. In a small bowl, whisk together oil, milk, egg, and vanilla. Add milk mixture to flour mixture, and stir just until combined; divide batter among prepared muffin cups.
4. Bake until toothpick inserted into the center of a muffin comes out clean, 25 to 30 minutes. Cool muffins in pan, 5 minutes; transfer to a wire rack to cool completely. Store in an airtight container up to 5 days.

Makes 12.

Linnell’s Note: Despite their chicken pox appearance, these muffins were surprisingly crunchy on the outside and very moist on the inside. It’s a good basic recipe that lends itself to many possible variations. I will be making these again and will try substituting organic blue agave sweetener for the sugar, a banana for the oil, and will add some cinnamon and nutmeg. I’ll let you know how my experiments turn out. Oh, and if I’m lucky and my husband is even luckier, we’ll get our food-loving second son to make his fabulous Crab Benedict for Father’s Day brunch!

Read Full Post »

Older Posts »