Feeds:
Posts
Comments

Posts Tagged ‘food blog’

Lasagna With Turkey Sausage 
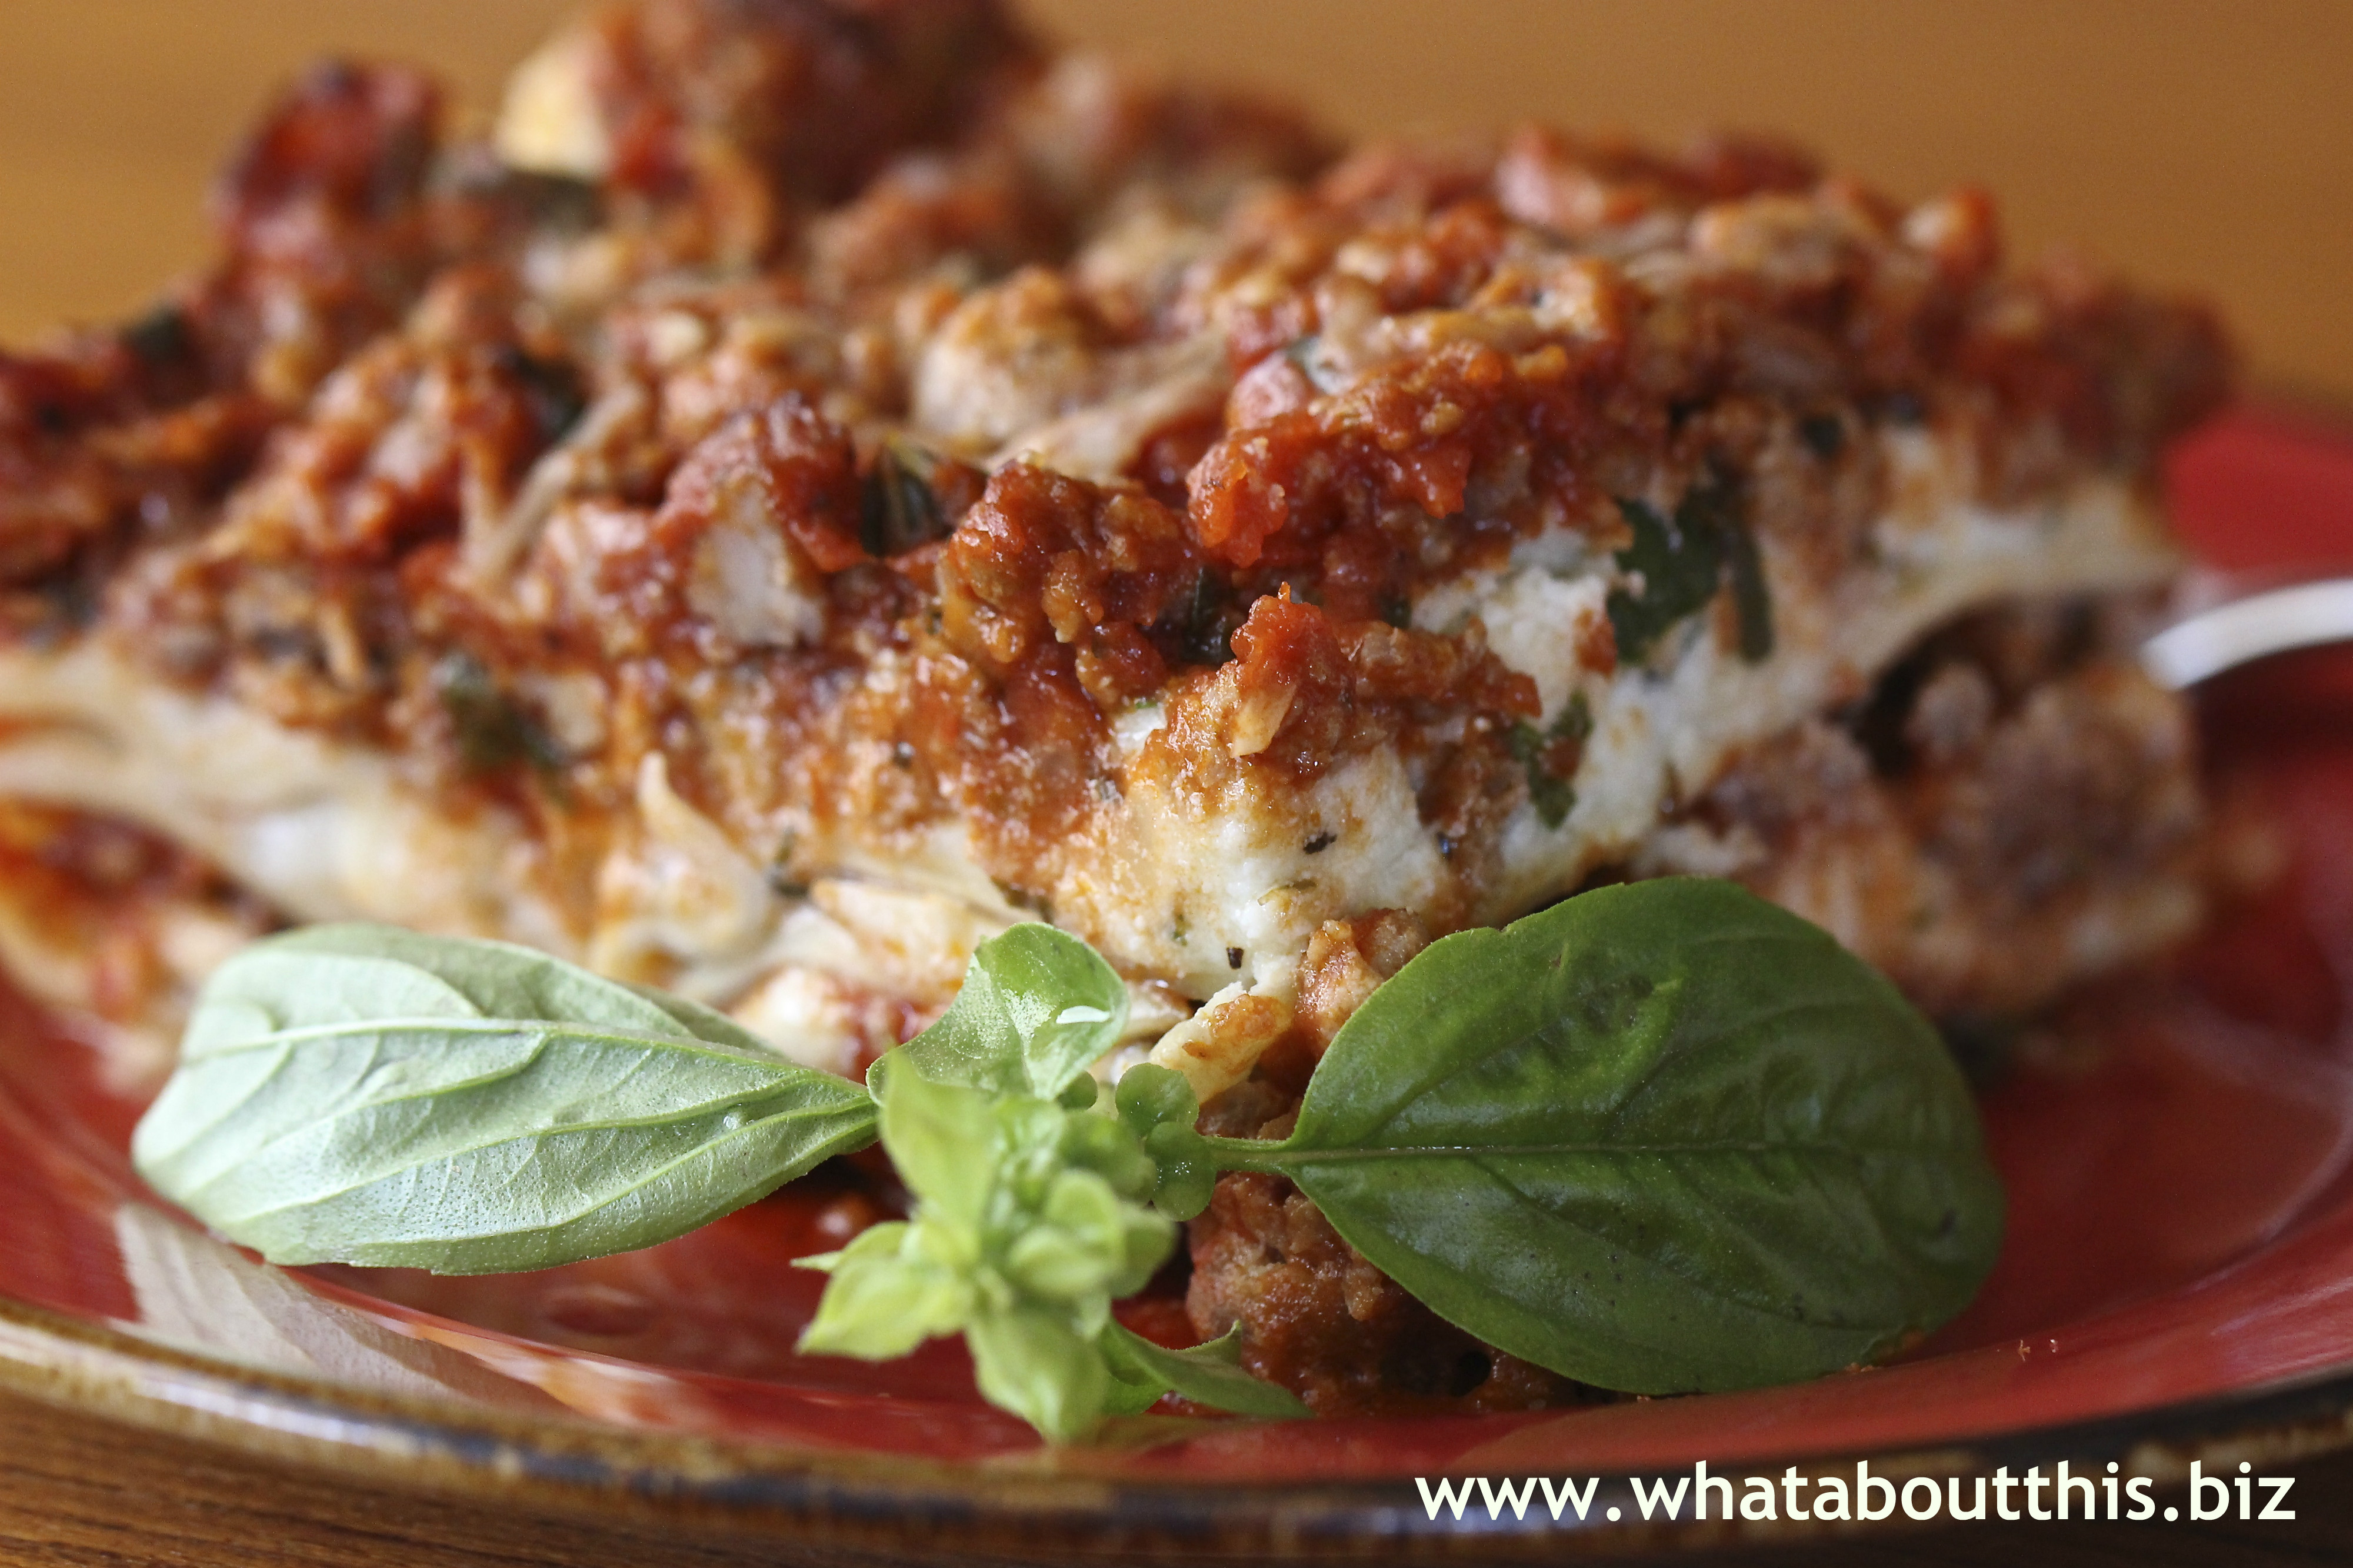
Serve lasagna in the summer? You bet! Tender noodles sandwich layers of flavorful tomato-turkey sauce and creamy three-cheese blend. Fresh herbs and mozzarella add a bright flavor and a classic texture. Just add a crisp green salad and a glass of wine and you have a perfect summer meal.

Lasagna with Turkey Sausage
Ina Garten

INGREDIENTS
2 tablespoons olive oil
1 cup chopped yellow onion (1 onion)
2 garlic cloves, minced
1½ pounds sweet Italian turkey sausage, casings removed
1 (28-ounce) can crushed tomatoes in tomato purée
1 (6-ounce) can tomato paste
1/4 cup chopped fresh flat-leaf parsley, divided
1/2 cup chopped fresh basil leaves
Kosher salt
Freshly ground black pepper
1/2 pound lasagna noodles
15 ounces ricotta cheese
3 to 4 ounces creamy goat cheese, crumbled
1 cup grated Parmesan, plus 1/4 cup for sprinkling
1 extra-large egg, lightly beaten
1 pound fresh mozzarella, thinly sliced

DIRECTIONS
1. Preheat oven to 400 degrees F.

2. Heat the olive oil in a large (10 to 12-inch) skillet. Add the onion and cook for 5 minutes over medium-low heat, until translucent.

3. Add the garlic and cook for 1 more minute.

4. Add the sausage and cook over medium-low heat, breaking it up with a fork, for 8 to 10 minutes, or until no longer pink.

5. Add the tomatoes, tomato paste, 2 tablespoons of the parsley, the basil, 1½ teaspoons salt, and 1/2 teaspoon pepper. Simmer uncovered, over medium-low heat, for 15 to 20 minutes, until thickened.

6. Meanwhile fill a large bowl with the hottest tap water. Add the noodles and allow them to sit in the water for 20 minutes. Drain.

7. In a medium bowl, combine the ricotta, goat cheese, 1 cup of Parmesan, the egg, the remaining 2 tablespoons of parsley, 1/2 teaspoon salt, and 1/4 teaspoon pepper. Set aside.

8. Ladle 1/3 of the sauce into a 9 by 12 by 2-inch rectangular baking dish, spreading the sauce over the bottom of the dish. Then add the layers as follows: half the pasta, half the mozzarella, half the ricotta, and one third of the sauce. Add the rest of the pasta, mozzarella, ricotta, and finally, sauce.

9. Sprinkle with 1/4 cup of Parmesan. Bake for 30 minutes, until the sauce is bubbling.

Yields: 8 servings

LINNELL’S NOTES
1. I used 2 pounds of turkey sausage and 1 pound of ground turkey meat for a heartier sauce.

2. I also added half of a jar of spaghetti sauce that I had in the refrigerator.

3. I purchased a chub of pre-sliced fresh mozzarella. In order to distribute it more evenly, I sliced each round in half (half-moons).

4. I put my 9 by 13-inch baking pan on a parchment paper-covered baking sheet before putting it in the oven. I’m glad I did, because the bubbling lasagna overflowed.

5. To aid preparation, the sauce can be made the night before serving and reheated a bit before layering the lasagna the following day.

Enjoy!

Read Full Post »

Plum Dipping Sauce for Shrimp A gift of perfect plums and and sweet peaches needs to be devoured while at the peak of their perfection. This means I only have a few days to eat them. Is that a big problem? Not really. Besides eating them au naturel, I plan on using them to test out new recipes. The first new recipe uses three ripe plums to give this spicy plum sauce a sweet and fruity flavor, while rice vinegar and spices make it piquant. This is not a run-of-the-mill dipping sauce for shrimp. Thank goodness!

Plum Dipping Sauce For Shrimp
Food Network, recipe courtesy of Ritz-Carlton Rose Hall Resort, Jamaica

INGREDIENTS
3 plums, peeled, pitted and sliced
1 cup water
1/2 teaspoon minced fresh ginger
3 tablespoons rice vinegar
1/2 teaspoon ground cloves
1/2 teaspoon ground cinnamon
1 teaspoon chopped habaneros
Cornstarch, optional
Sugar

DIRECTIONS
1. Place the plums in a blender or food processor. Add the water and mix at high speed until the plums are puréed.

2. Pour the purée into a 1-quart saucepan. Add the remaining ingredients and simmer over low heat for 20 minutes to reduce the sauce. If necessary, add cornstarch to thicken the sauce.

3. Remove from heat. Add sugar, to taste. Serve hot or cold.

Yield: 4-6 servings

LINNELL’S NOTES
1. Although not as hot as habanero chilies, I used serrano chiles in this recipe, because I had them on hand.

2. I reduced the sauce longer than 20 minutes and still added a little cornstarch to thicken up the sauce.

3. I added a pinch of salt and about 2 teaspoons of sugar to the reduction.

4. I prefer serving this sauce chilled.

Enjoy!

Read Full Post »

Greek Salad with Orzo and Black-Eyed Peas Better together? Sometimes marriages work and sometimes they don’t. But magic occurs when two entities come together and bring out the best in each other. That is exactly what happens in the case of this Greek Salad. In actuality it is composed of two distinct salads, each possessing the substance and flavors to stand alone. The orzo component is light and refreshing with hints of lemon and oregano. By comparison, the black-eyed peas component brings in a certain earthiness with its flavors of tomatoes and parsley. Combining all components together creates a more interesting flavor-complex. This marriage definitely works.

Greek salad with Orzo and Black-Eyed Peas
Paul Grimes and Shelley Wiseman, Gourmet (August 2008)

INGREDIENTS
3/4 cup orzo
1 (15-ounce) can black-eyed peas, drained and rinsed
1 large tomato, diced (1 cup)
2 tablespoons chopped flat-leaf parsley
2 tablespoons red-wine vinegar
2 tablespoons extra-virgin olive oil, divided use
1/2 seedless cucumber, halved lengthwise, cored, and diced (1 cup)
1/2 cup pitted Kalamata olives, slivered
1/3 cup thinly sliced red onion
1 teaspoon grated lemon zest
2 tablespoons fresh lemon juice
1 tablespoon finely chopped oregano
2 to 3 cups coarsely chopped romaine
1/2 pound feta, crumbled (1 cup)
4-8 peperoncini
Salt and freshly ground pepper

EQUIPMENT: 4 (16-ounce) wide jars or container with lids
ACCOMPANIMENT: pita chips

DIRECTIONS
1. Cook orzo according to package instructions. Drain in a sieve and rinse under cold water until cool. Drain well.

2. Toss black-eyed peas, tomato, and parsley with vinegar, 1 tablespoon oil, 1/2 teaspoon salt, and 1/4 teaspoon pepper. Marinate, stirring occasionally, 15 minutes.

3. Meanwhile, toss together orzo, remaining tablespoon oil, cucumber, olives, onion, lemon zest and juice, oregano, 1/2 teaspoon salt, and 1/4 teaspoon pepper in a large bowl.

4. Divide black-eyed pea mixture (with juices) among jars and layer orzo salad, romaine, and feta on top. Add 1 or 2 peperoncini to each jar.

Cooks’ note: Assembled jars can be chilled up to 6 hours. Serve at room temperature.

Makes 4 servings

LINNELL’S NOTES
1. I only had Meyer lemons on hand and the results were wonderful.
2. I chopped a few small springs of basil from my garden and added it to the orzo mixture. I loved the added flavor it brought to the salad.
3. If you don’t want to serve the salad in jars, try layering the components in a clear glass salad bowl.
4. For a vegan version, leave off the feta cheese.

Enjoy!

Read Full Post »

Javanese Marinade for Lamb Shish Kebabs To share or not to share? That was my dilemma. Should I reveal a family favorite recipe or should I keep it a family secret? Recognizing that life is infinitely better when shared and acknowledging that my mother-in-law graciously gave this recipe to me, I gladly present this tried-and-true Javanese Marinade for Lamb Shish Kebabs for you to enjoy. The remarkable flavor combination and the ease of preparation make it a winning entrée. It’s so good, you, too, may find yourself questioning whether or not to share the recipe!

Javanese Marinade for Lamb Shish Kebabs
From the recipe collection of Mrs. Y. Chang

INGREDIENTS
1 cup oil
3/4 cup soy sauce
1 cup chopped onions
3 tablespoons ground ginger
1 tablespoon coriander seed
3 tablespoons vinegar
3 heaping tablespoons of brown sugar
Curry powder, to taste
Chili powder, to taste
Ground cumin, to taste
Leg of lamb, cut into chunks

DIRECTIONS
1. If using bamboo skewers, immerse them completely in a 9-inch by 13-inch baking pan filled with water for about 30 minutes.

2. Debone the leg of lamb or purchase a boneless leg roast, trim fat, and, cut meat into 1-inch chunks.

3. In a large bowl combine oil, soy sauce, chopped onions, ground ginger, coriander seeds, vinegar, brown sugar, curry powder, chili powder, and cumin. Stir to mix ingredients.

4. Add lamb chunks to the bowl of marinade; stir to coat all pieces of meat. Cover bowl and let marinade overnight in the refrigerator (or a minimum of 4 to 6 hours), stirring periodically.

5. Before grilling, let meat come to room temperature. Thread chunks of meat onto skewers.

6. Grill the kebabs.

LINNELL’S NOTES
1. I use canola oil and light soy sauce in the marinade.

2. My husband, who usually makes this recipe for family events, told me that he always adds way more spice and brown sugar than the recipe calls for. Since the last three spices are added to taste, here are the amounts that I generally use with good results: about 3 teaspoons of curry, 1½ teaspoons of chili powder and around 3/4 of a teaspoon of cumin. Start with those quantities and then add more seasonings and brown sugar as you see fit.

3. I also add a couple of twists of my black pepper mill to the marinade.

4. There is no added salt, because of the amount of sodium in the soy sauce.

5. If my husband and I make lamb shish kebabs for a crowd, we divide the meat into large zip-type plastic bags and pour some of the marinade into each bag. While marinating, we periodically flip the bags over and massage the bags to distribute the marinade.

6. I like to intersperse fresh mushrooms, chunks of onion, and green peppers in between the pieces of meat to add color and interest.

7. Don’t overcook the lamb; in my family, medium-rare is preferred.

Enjoy!

Read Full Post »

Savory Brunch Muffins 12 – 1 = 11. But in the world of muffins, 12 muffins – 1 muffin = 1 very happy tummy. Combine traditional brunch ingredients – eggs, smoked salmon, and fresh dill – and present them in a delightful and portable manner. These muffins, topped with crunchy and salty potato chips, make for one fabulous brunch-to-go, or serve them hot at your next brunch gathering.

Savory Brunch Muffins
Better Homes and Gardens

INGREDIENTS
2 cups all-purpose flour
1 Tbsp. sugar
1½ tsp. baking powder
1/2 tsp. baking soda
1/4 tsp. salt
1/2 cup buttermilk
1/2 cup sour cream
2 eggs
3 Tbsp. butter, melted
2 Tbsp. snipped fresh dill
2 oz. lox-style smoked salmon, chopped
2 hard-cooked eggs, peeled and chopped
1 cup wavy potato chips, crushed

DIRECTIONS
1. Preheat oven to 400°F. Grease twelve 2½-inch muffin cups or line with parchment paper squares; set aside.

2. In a large bowl stir together flour, sugar, baking powder, baking soda, and salt. Make a well in center of flour mixture; set aside.

3. In a 2-cup measure whisk together buttermilk, sour cream, eggs, butter, and dill; add to flour mixture. Stir just until moistened (batter should be lumpy). Gently fold in salmon and chopped eggs.

4. Spoon batter into prepared muffin cups, filling each three-fourths full. Sprinkle crushed potato chips over batter in cups.

5. Bake 15 minutes or until golden-brown. Cool in cups on wire rack 5 minutes.

Makes 12 servings

LINNELL’S NOTES
1. I cut parchment paper into roughly 5-inch by 5-inch squares. Try not to get any batter on the paper when filling the cups. After baking, any batter stuck to the paper will appear as dark brown spots. This is not the worst thing in the world, but it will look a little messy.

2. Place the potato chips in a plastic bag and crush with your fingers. Some of the potato chips should be slightly pressed into the batter or else they will all fall off after baking.

3. Don’t overbake these muffins or they will be dry.

4. The next time I make these I will add a pinch of black pepper and some snipped chives or chopped green onions to the batter to enhance their flavor.

5. Because of the salty potato chips and smoked salmon, there is not a lot of additional salt added to the batter. If you like your food saltier, cautiously add more salt only after you have determined the degree of saltiness of the salmon and potato chips you are using. Not all smoked salmon or potato chips have the same amount of sodium.

Enjoy!

Read Full Post »

Coconut Curry Chili He wanted curry. I wanted chili. Lucky for him, I compromised by making a chili dish with an interesting flavor twist. Coconut Curry Chili looks like a typical chili and packs the heat of a chili, but sports an Asian-inspired flavor combination. It’s a snap to throw together, but don’t hurry this curry. The flavors need time to meld. A bowl of this hot spicy chili fills you up and fires up your taste buds.

Coconut Curry Chili
Adapted from an Allrecipes.com submission

INGREDIENTS
1/2 pound ground turkey
2 (10.75-ounce) cans tomato soup*
1¼ cups water
1 tablespoon minced garlic
1 (15-ounce) can chickpeas/garbanzo beans, drained and rinsed**
1 (15-ounce) can red kidney beans, drained and rinsed**
1/2 cup chopped carrot
1/4 cup mango chutney
3 tablespoons curry powder
1 teaspoon onion powder
Salt and pepper, to taste
1/2 cup coconut milk, divided use
Chopped cilantro, optional for garnish
Light sour cream or plain Greek yogurt, optional

DIRECTIONS
1. Cook the ground turkey in a skillet over medium heat. With a spatula or spoon, break it up into small pieces. Cook until completely browned, about 5 to 7 minutes. Drain off as much grease as possible.

2. Combine tomato soup, water, and minced garlic in a large pot and bring to a boil.

3. Add the turkey to the pot and return the mixture to a boil and reduce heat to medium-low.

4. Stir chickpeas, red kidney beans, carrot, chutney, curry powder, onion powder, salt and pepper into the turkey mixture; bring to a simmer; place cover on the pot and cook until the chickpeas are tender, about 15 minutes.

5. Stir in 1/4 cup coconut milk into the chili, return cover to the pot and simmer another 15 minutes. Pour the remaining 1/4 cup coconut milk into the chili, stir, and simmer 30 minutes more.

Serves 6

LINNELL’S NOTES
1. I used ground beef, because that’s what I had on hand.

2. *In order to make this recipe lower in sodium and more flavorful, I substituted a 32-ounce box of low-sodium roasted red pepper and tomato soup for the two cans of tomato soup and the 1¼ cups of water.

3. I added a whole carrot, chopped. The more veggies, the better!

4. **To make this chili more substantial, I would add one more can of garbanzo beans or one more can of red kidney beans.

5. To make this a vegetarian dish, replace the ground meat with firm tofu, cubed. Add it towards the end.

6. This chili is great over freshly-cooked brown rice. Top with chopped cilantro and light sour cream or plain Greek yogurt, if desired.

Enjoy!

Read Full Post »

Crispy Roasted Chickpeas Crunch a munch or is it munch a crunch? Either way, roasted chickpeas, also known as garbanzo beans, make for a crunchy and healthy snack when you have the munchies. Chickpeas roasted in olive oil, salt, and pepper become a simple and satisfying treat – or kick up the flavors by using your own favorite combination of spices or by adding one of the spice mixtures included below. According SELF Nutrition Data: This food is very low in Saturated Fat and Cholesterol. It is also a good source of Dietary Fiber, Vitamin B6 and Folate, and a very good source of Manganese.

Crispy Roasted Chickpeas
Adapted from a Rachael Ray Recipe

BASIC INGREDIENTS
1 15.5 ounce can chickpeas (garbanzo beans)
1/2 T to 1 T olive oil
Salt to taste (approximately 1/4 teaspoon)
Pepper to taste, optional
Spice or spice mixture of your choice, to taste (approximately 1/2 to 1 tsp)

DIRECTIONS
1. Preheat oven to 400°F.

2. Open can of garbanzo beans and pour into a colander, wire-mesh sieve, or salad spinner.

3. Drain, rinse well with cold water, and drain again for about 10 minutes.

4. Pour onto towels (paper or kitchen) on a flat surface and cover with another towel. Roll the chickpeas between the towels to dry. This also helps to remove any loose skin from the chickpeas. Discard skin.

5. Combine the chickpeas with oil in a large bowl. Add selected spices or spice mixture. Stir to evenly distribute spice mixture.

6. Pour the seasoned chickpeas out onto a parchment paper-lined baking tray and bake until crunchy, about 35 to 45 minutes.

Moroccan-Style Spice Mix:
Fine Cooking Magazine
2 tsp ground cumin
1 tsp ground coriander
1/2 tsp chile powder
1/2 tsp sweet paprika, preferably Hungarian
1/2 tsp ground cinnamon
1/4 tsp ground allspice
1/4 tsp ground ginger
1/8 tsp cayenne pepper
Pinch of ground cloves

In a small bowl, mix all of the spices. Store in an airtight container.

Cajun Spice
Whole Foods Cookbook
1/4 cup plus 1 tablespoon paprika
1/8 cup dried thyme
1/8 cup dried oregano
1 T cumin powder
1 T onion powder
1/8 cup garlic powder
1/8 cup dried sweet basil
1 T freshly ground black pepper
1 T freshly ground white pepper
1 T cayenne pepper
1/8 cup salt

Combine all ingredients. Keep stored in a covered jar in a cool dark place for up to 6 months. Makes 1¼ cups.

Mexican Spice Mixture
Whole Foods Cookbook
1 T chili powder
2 tsp cumin
1 tsp dried oregano
2 tsp unsweetened cocoa powder

Combine all ingredients. Keep stored in a covered jar in a cool dark place for up to 6 months.

Homemade Ranch Dressing Seasoning Mix
$5 Dinners
2 Tbsp dried parsley
1 tsp dried dill
1 tsp garlic powder
1 tsp onion powder
1/2 tsp dried basil
1/2 tsp pepper

Add each of the dried spices to a bowl and gently stir. Store in a resealable plastic baggie or small ball canning jar with tight fitting lid in your spice cabinet.

LINNELL’S NOTES
1. Canned chickpeas have a fair amount of sodium. To control sodium levels and to have more flavorful chickpeas, it is best to soak and cook chickpeas yourself. Check out this link on How to Soak and Cook Chickpeas. At the very least, to keep this a healthy snack, use low sodium canned chickpeas.

2. Keep in mind that the chickpeas dehydrate while roasting, so one can does not yield a lot of the finished product. You’ll probably want to double the recipe.

3. Bake the chickpeas until they are Corn-Nut-crunchy, unless you prefer them chewy in the center.

4.  About halfway through the baking time, I took the tray out of the oven, stirred the chickpeas around, and then put the tray back into the oven to finish baking.

5. I roasted chickpeas with the Moroccan-Style Spice Mix for the photo.

Enjoy!

Read Full Post »

Corned Beef Potato Salad Take the usual St. Patrick’s Day fare and serve it up with a new twist. Toss corned beef, cabbage, and potatoes together with a few other ingredients and a homemade dressing and you have a potato salad good enough to catch a leprechaun. Every now and then, while searching for a recipe, I come across two similar recipes and can’t decide which one to try. This recently happened with two corned beef potato salad recipes, so I decided to do a head-to-head taste test. The recipes are much the same, but with a few interesting differences. One recipe uses horseradish and mustard for kick and the other recipe gets additional flavor boosts from celery and mustard seeds. One recipe uses sauerkraut and the other uses freshly shredded cabbage. Subtle, but distinct differences. I liked them both. I say po-tay-to and you say po-tah-to. You choose.

Dublin Potato Salad (Top Photo)
Taste of Home

INGREDIENTS
3 large white potatoes (about 1½ pounds)
2 tablespoons white vinegar
2 teaspoons sugar
1 teaspoon celery seed
1 teaspoon mustard seed
3/4 teaspoon salt, divided use
2 cups finely shredded cabbage
12 ounces cooked or canned corned beef, cubed
1/4 chopped dill pickle
1/4 cup sliced green onion
1 cup mayonnaise
1/4 cup milk

DIRECTIONS
1. Cover potatoes in lightly salted water and boil until tender. Drain, peel and cube.
2. Combine vinegar, sugar, celery seed, mustard seed, and 1/2 teaspoon salt; drizzle over still-warm potatoes. Cover and chill.
3. Just before serving, gently fold in cabbage, corned beef, pickle and onion.
4. Combine mayonnaise, milk and remaining 1/4 teaspoon salt; pour over salad. Gently toss. Serve in cabbage-lined bowl.

Serves 8

LINNELL’S NOTES
1. The evening before, I placed a five-pound piece of corned beef into a crock pot, so that it would be cooked and ready to use by morning.
2. I used shredded cabbage purchased in bags at my local grocery store.
3. This recipe seemed slightly easier to make than the next recipe, because it had fewer ingredients and required less preparation.
4. Of the two recipes, this one yielded a slightly sweeter and creamier potato salad.
5. For my taste buds, this salad required no additional salt. The corned beef brings plenty of sodium to it.
6. This salad tastes better the next day.

Corned Beef Potato Salad (Bottom Photo)
Razzle Dazzle Recipes

INGREDIENTS
Salad Ingredients:
1 can corned beef (the kind you have to open with the attached key) chilled, fat scraped off, and cut into 1/2-inch cubes
3 large potatoes, any kind, about 1½ lbs
4 green onions, minced
1 can (about 1½ C) sauerkraut, drained, rinsed and chopped
3 stalks celery, chopped/diced
1/3 C minced dill pickles
1 small jar diced pimentos (optional, for color)

Dressing Ingredients:
1/2 C low-fat mayo or salad dressing
1 C low-fat sour cream
2 to 4 T spicy brown prepared mustard
1 to 2 T horseradish
1/4 C milk, broth or pickle juice
1/8 tsp black pepper
1/4 tsp salt

DIRECTIONS
1. Combine dressing ingredients in a large bowl.
2. Boil whole potatoes in skins until barely tender.
3. Peel and cut into large pieces (2-inches by 2-inches), and place in dressing mixture while still warm. Toss to coat thoroughly.
4. Stir in other ingredients.
5. Refrigerate. Taste and adjust for salt several hours later.
6. Serve cold lettuce. Garnish with cherry tomatoes, sliced

Serves 4 to 6 servings as a main dish

LINNELL’S NOTES
1. I used the same five-pound piece of corned beef that I placed into a crock pot the evening before. I don’t know how the recipe would have tasted with canned corned beef.
2. The 2-inch by 2-inch chunks of potatoes seemed too large, so I cut them smaller.
3. Tasting the salad after adding the minimum amounts of horseradish and mustard, I decided to put in the full amounts.
4. I used the pickle juice from the dill pickle jar.
5. Again, for my taste buds, this salad required no additional salt. The corned beef adds plenty of sodium to it.
6. This salad has a little more crunch, kick, and flavor than the other one. The horseradish and mustard bring out the flavor of the corned beef. It is a less creamy potato salad, though.
7. This salad also tastes better the next day.
8. Finally, did you know that sauerkraut is considered a “belly blaster?” According to Dr. Oz’s website: Why it’s a superfood: Directly translated from German as “sour cabbage,” this traditional fermented food delivers gut-friendly flora that boost digestion and can reduce belly inflammation. Sauerkraut’s signature sour taste comes as the added bacteria ferment the naturally occurring sugars in the cabbage into lactic acid; it should keep for months.

Dr. Oz’s Prescription: Check the label carefully and buy only traditional fermented sauerkraut and not one of the more commercially heat-treated brands (which many are), as that will destroy the beneficial bacteria.

Enjoy!

Read Full Post »

Curry-Coconut Shrimp Want curry in a hurry? If that’s the case, try this recipe. With its ease of preparation and subtle coconut and curry flavors, this dish will become a favorite for quick dinners and easy entertaining.

Curry-Coconut Shrimp
Epicurious, courtesy of Ying Chang, Cooking with an Asian Accent

INGREDIENTS
1/4 cup unsweetened coconut milk
1½ tablespoons fish sauce
1 tablespoon fresh lemon juice
3 tablespoons seeded and finely chopped red bell pepper
1 tablespoon minced fresh cilantro leaves
1 teaspoon sugar
1 teaspoon curry powder
1½ pounds shrimp, peeled and deveined
2 cups cooked brown rice
4 lemon wedges, for serving
Fresh cilantro sprigs, for garnish, optional

DIRECTIONS
1. Combine the coconut milk, fish sauce, lemon juice, bell pepper, minced cilantro, sugar, and curry powder in a 10-inch glass pie plate. Add the shrimp, cover, and marinate in the refrigerator for 30 minutes.

2. Bring water to a boil over high heat in a covered steamer or pot large enough to hold the pie plate. Wearing oven mitts, carefully place the pie plate into the steamer. Cover, lower the heat to medium, and steam for 4 to 6 minutes, or until the shrimp are just cooked through.

3. Using oven mitts, carefully lift the lid of the steamer away from you, and remove the pie plate from the steamer. Serve the shrimp over brown rice. Garnish with the lemon wedges and cilantro sprigs, if using.

Makes 4 servings

LINNELL’S NOTES
1. I buy shrimp that are already deveined. I peel them and they are ready to go. Peeled and deveined shrimp are also available, but I save the shells to enrich the flavor of soup stock.

2. Start the rice before you prepare the rest of the ingredients. This allows the rice enough time to steam.

3. How long the shrimp take to cook is dependent on what size shrimp you’re using. You do not want to overcook the shrimp, so I would check the shrimp after 4 minutes. If they still appear translucent and have not curled, let them cook one more minute. Continue to check after every minute. Once they are removed from the heat they will continue to cook a little more.

ENJOY!

Read Full Post »

Jjim-Dak: Korean Vegetable Chicken Stew Whether it’s a pot-au-feu from France, a goulash from Hungary, or a moqueca from Brazil, stews from around the world warm the tummy and soothe the soul. From a cookbook that contains recipes from the best Korean restaurants in Los Angeles, comes this easy to make Korean stew. This fiery and fragrant stew will definitely spice up your stew repertoire!

Jjim-Dak – Korean Vegetable Chicken Stew
Discovering Korean Cuisine, edited by Allisa Park

INGREDIENTS
1½ pounds chicken, cleaned and chopped into 2-inch pieces
1 potato, cut into 1-inch slices crosswise
3½ cups water
5 scallions, halved lengthwise and then cut into 4-inch pieces
1/2 large onion, cut into 1/4-inch thick slices
1/4 carrot, peeled and cut diagonally into 1/4-inch pieces
1 jalapeño chile, cut into 1/4-inch rounds
1/4 red bell pepper, seeded, cut into 1/4-inch strips
5  leaves spinach, cut into 2-inch pieces
3 ounces Korean sweet potato vermicelli (dang myun), soaked in warm water for 1 hour
1 tablespoon minced garlic
2 tablespoons soy sauce
1 tablespoon red pepper powder
1 tablespoon Korean hot pepper paste (gochujang)
1 tablespoon granulated sugar
1 tablespoon mirin
2 tablespoons corn syrup
1/4 pack enoki mushrooms, roots trimmed
1 tablespoon sesame seeds, toasted

DIRECTIONS
1. Soak sweet potato vermicelli in warm water.

2. In a large pot (or wok), combine chicken, potato, water, minced garlic, soy sauce, red pepper powder, hot pepper paste, sugar and mirin.

3. Boil over high heat for about 20 minutes with the lid on (or until chicken is fully cooked).

4. Remove the lid and add corn syrup, scallions, onion, carrot, jalapeño chile, and red bell pepper. Quickly mix together and continue cooking for another 5 minutes.

5. Add spinach and prepared sweet potato vermicelli on top and put the lid on (do not mix in). Heat for an additional 2 minutes and then remove from heat.

6. Open the lid and gently mix, then transfer to a serving plate.

7. Put the enoki mushrooms on top and sprinkle on sesame seeds to garnish.

Serving size: 2

LINNELL’S NOTES
1. Korean Ingredients Sweet potato vermicelli and the Korean hot pepper paste (gochujang) can be purchased at most Asian markets or ordered online. Here’s a link to a listing of online stores that carry Korean ingredients.

2. Because it didn’t make sense to use just a quarter of a carrot and because I like a lot of vegetables in my stews, I used a whole carrot.

3. I had baby spinach leaves on hand, so I didn’t need to cut them into 2-inch pieces. I used a large handful.

4. In step 3 of the directions, I turned the temperature down to medium, because it had reached a rapid boil. I wanted more time for the flavors to mingle and I didn’t want to overcook the chicken.

5. Not having authentic Korean red pepper powder, I substituted ground red pepper (cayenne pepper). 1 tablespoon of cayenne pepper seemed like a lot of heat to me (along with the jalapeño chile and the Korean hot pepper paste), so I cut it back to 1/2 tablespoon. The recipe still had quite a bit of kick. I’m not sure what the heat difference or flavor difference is between cayenne pepper and Korean red pepper powder, but I’ll try it with the authentic red pepper powder the next time I make it. I’d also recommend adding any heat element to taste.

6. I researched enoki mushrooms and found differing opinions on their preparation. Mushroom growers said to just cut off the root end, but some online “experts” said to run it under water and then cut off the root end. The Korean cookbook said, “Sold in plastic bag. Chop off the roots without removing the bag and discard,” so I ultimately followed the cookbook’s instructions.

7. I buy pre-toasted sesame seeds that I keep in my freezer. Before using, I quickly re-toast the needed amount. Toasting sesame seeds brings out their flavor. To toast sesame seeds, put them in a small sauté/frying pan over medium to medium-high heat. Stir constantly until they are a light golden brown. Pour them on a plate to cool.

8. Although this dish contains sweet potato noodles, I served it with rice. I wanted the rice to soak up every last bit of the delicious sauce!

ENJOY!

Read Full Post »

Older Posts »

%d bloggers like this: