Feeds:
Posts
Comments

Archive for the ‘Recipes’ Category

Southwest Quinoa Salad 
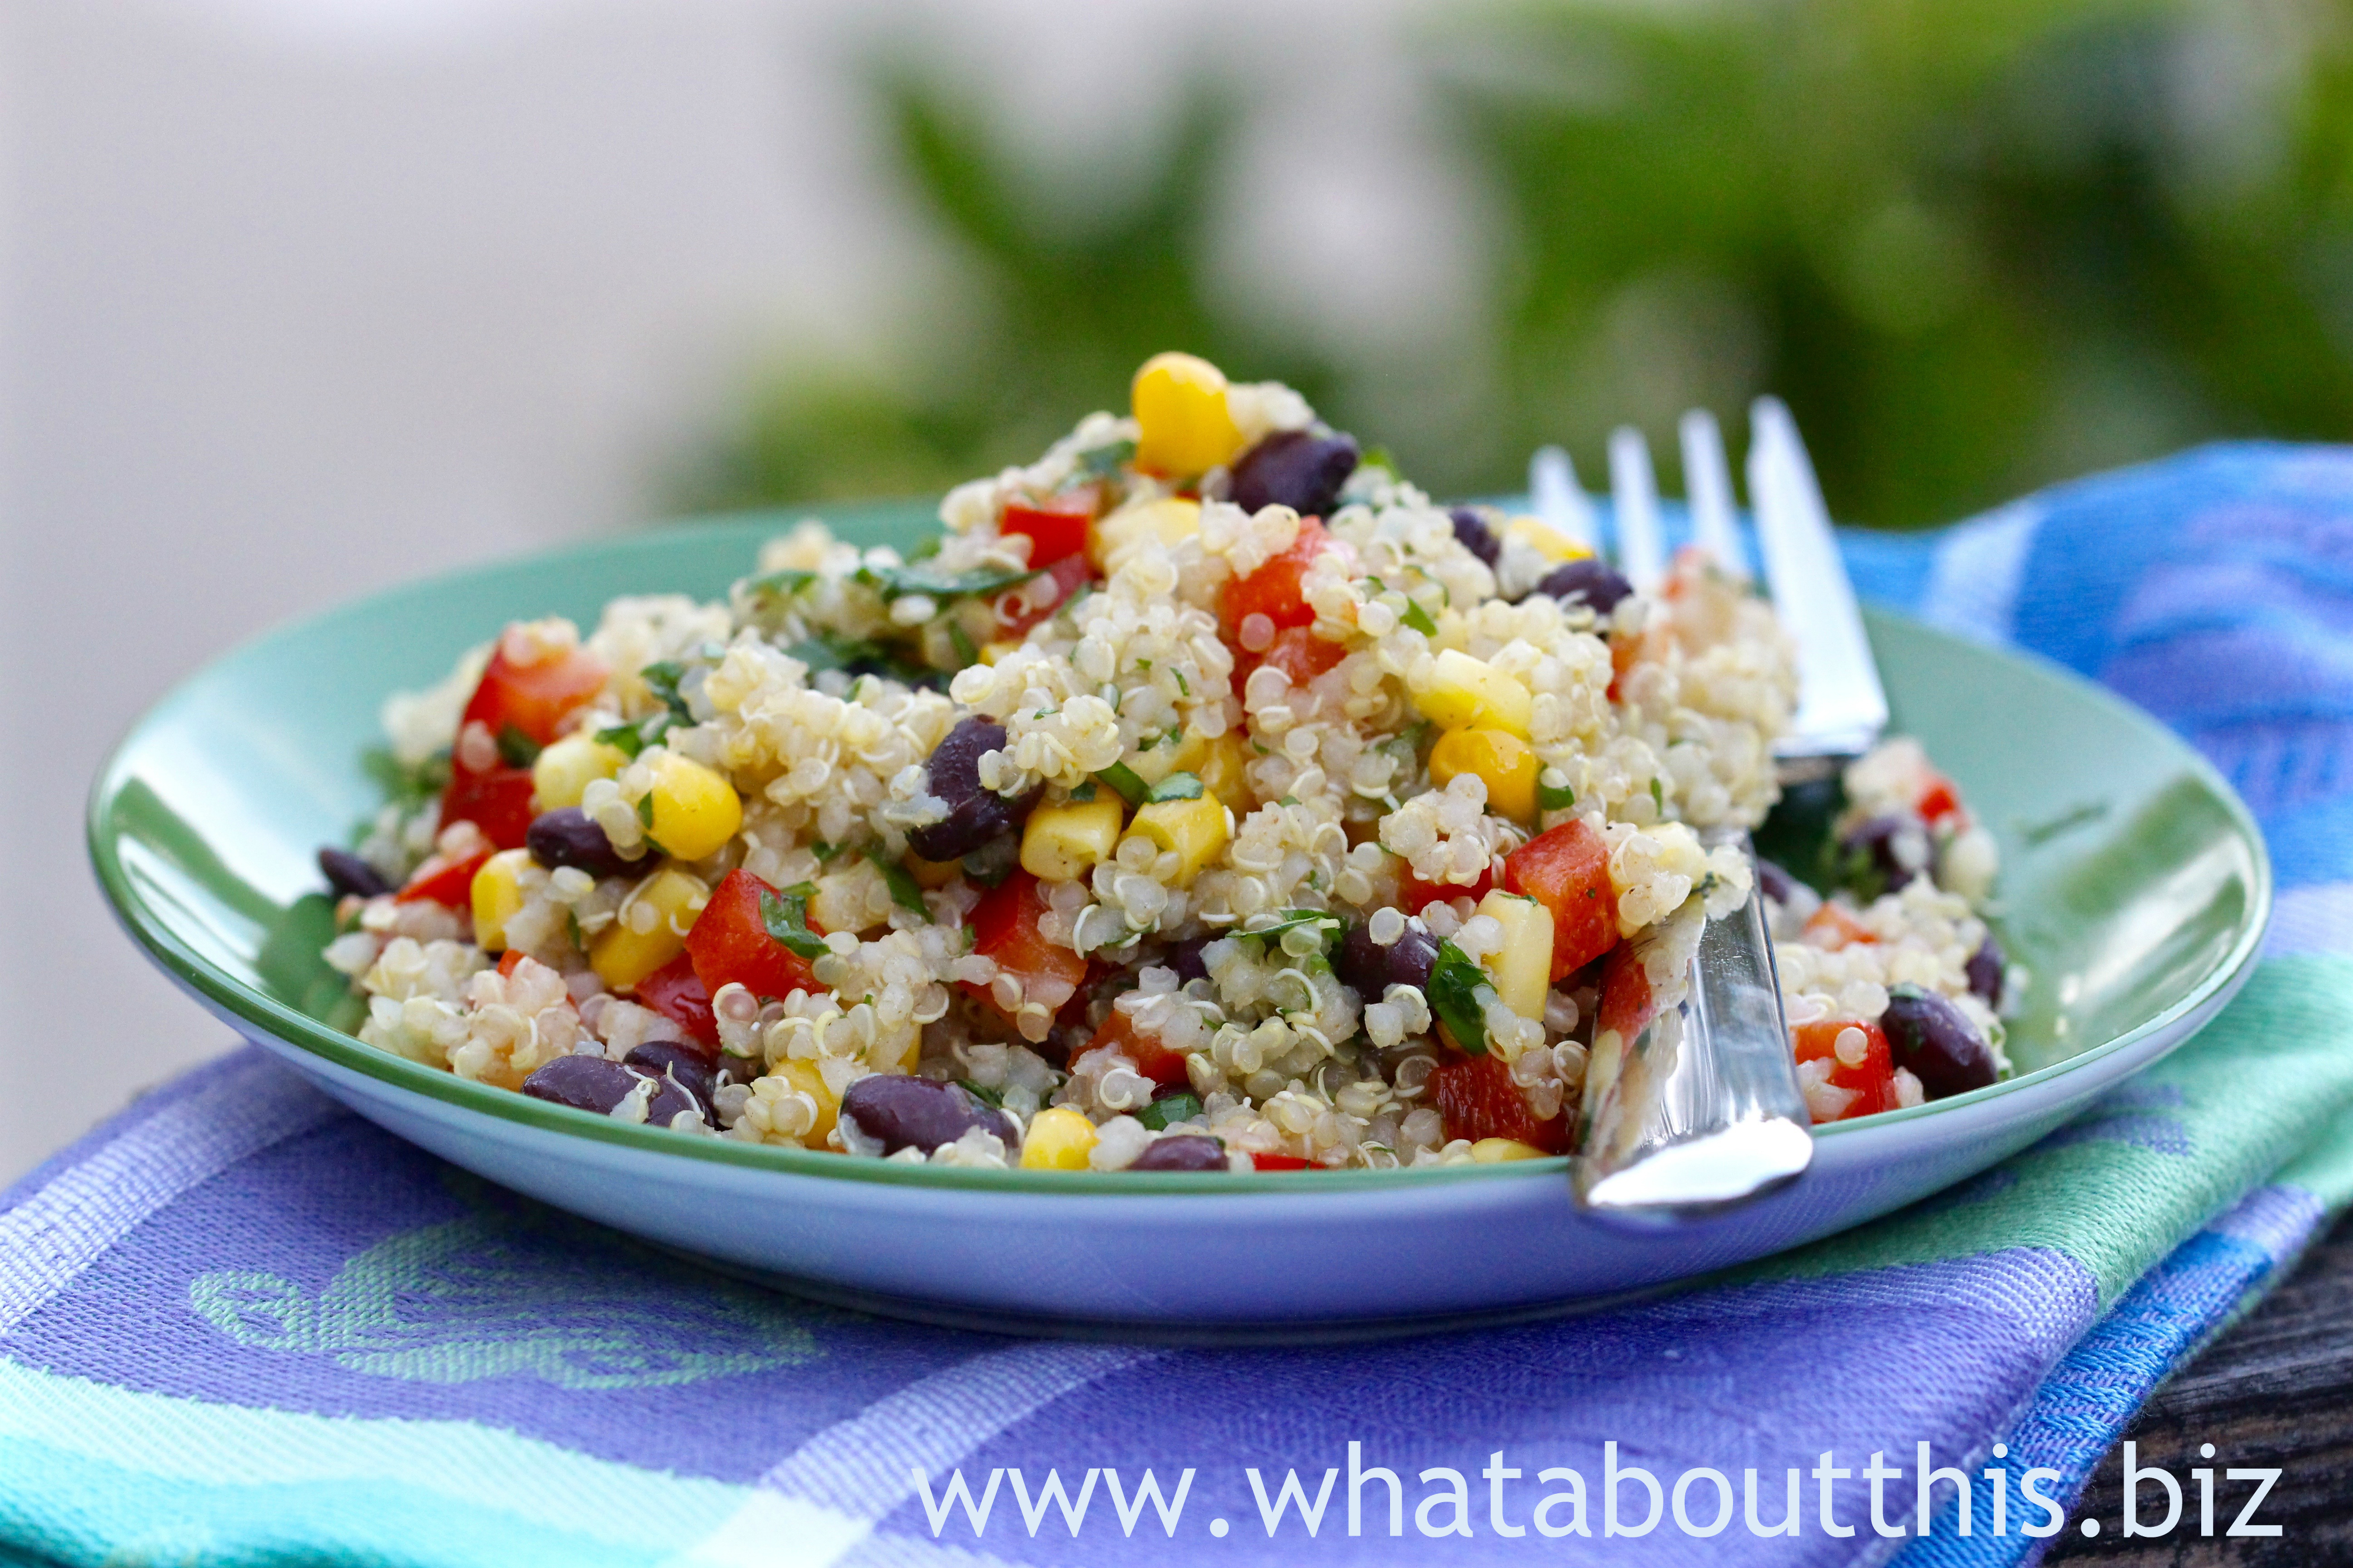
Like Superman, quinoa possesses super powers. Well, maybe not, but quinoa is an excellent source of protein and it contains all eight essential amino acids. If you’re looking for a tasty way to prepare this “superfood,” look no further. Boasting the southwestern combination of corn, peppers, beans, cilantro and lime, this colorful and nutritious salad might disappear from your plate “faster than a speeding bullet.”

Southwestern Quinoa Salad
Recipe From Quinoa 365: The Everyday Superfood by Patricia Green & Carolyn Hemming

INGREDIENTS
2 cups water
1 cup quinoa
1/3 cup olive oil
1/3 cup fresh lime juice (about 2 to 3 limes)
4 tsp apple cider vinegar
2½ tsp ground cumin
1 tsp finely minced jalapeño, Fresno or Mirasol pepper (optional)
1¼ cups frozen corn kernels, thawed
1 cup diced red bell pepper
One 14 oz can black beans, drained and rinsed
1/3 cup chopped fresh cilantro
1/4 tsp salt

DIRECTIONS
1. Bring the water and quinoa to a boil in a medium saucepan. Cover, reduce to a simmer and cook for 10 minutes. Turn the heat off and leave the covered saucepan on the burner for another 4 minutes. Fluff with a fork and allow the quinoa to cool.

2. Whisk the oil, lime juice, apple cider vinegar, cumin and jalapeño (if using) in a small bowl.

3. Place the cooled quinoa in a large bowl. Stir the dressing into the quinoa.

4. Toss in the corn, red pepper, black beans, cilantro and salt.

5. Serve immediately or cover and refrigerate in a sealed container for up to 3 days.

Serves 4 to 6

LINNELL’S NOTES
1. Quinoa naturally has a bitter coating of saponins. As a matter of habit, I always rinse quinoa in a strainer under cold running water prior to cooking to remove any residual saponin. Some brands of quinoa state that they are pre-washed.

2. I added some fresh ground black pepper.

3. I also added a pinch of sugar to counterbalance some of the combined acidity of the vinegar and lime juice.

4. I prefer serving this salad chilled. It seems more refreshing that way.

Enjoy!

Read Full Post »

Firecracker Ice Pops Sweet ripe berries of summer combine with wholesome yogurt to create swirling frozen treats. These ice pops will refresh you even on the hottest days of summer. They’re pretty good at soothing the mouths of teething baby granddaughters too!*

Firecracker Ice Pops
Martha Stewart

INGREDIENTS
1/2 pound strawberries, hulled and quartered (1½ cups)
1/4 cup sugar
1/2 pound blueberries (1½ cups)
1¼ cups low-fat plain yogurt

DIRECTIONS
1. In a food processor, purée strawberries with 1 tablespoon sugar. Transfer to a small bowl.

2. In processor, purée blueberries with 1 tablespoon sugar.

3. In another small bowl, whisk together yogurt and 2 tablespoons sugar.

4. Pour the 3 mixtures, alternating, into ten 3-ounce ice-pop molds, making 3 to 5 layers in each.

5. With a skewer or thin-bladed knife, swirl mixtures together in an up-and-down motion.

6. Insert ice-pop sticks and freeze until solid, 2½ to 3 hours (or up to 1 week).

Cook’s Notes: for tropical pops, use 4 kiwis and 1 large mango (about 1/2 pound each) instead of the berries.

LINNELL’S NOTES
1. Taste your fruit before adding any sugar. There’s no reason to add extra sugar, if the fruit is already sweet.

2. I used nonfat plain yogurt, because that is what I had on hand. The pops turned out fine without the additional fat.

3. My ice pop molds are smaller, so I was able to get a dozen pops from one batch of recipe.

4. *These pops are great for teething babies, providing that your baby is able to eat dairy products.

Enjoy!

Read Full Post »

Balsamic-Glazed Salmon Simple and easy recipes make dining during the hot days of summer more enjoyable. Brush a sweet-tangy glaze over salmon fillets and you’re half way there to an effortless meal. Yes, this recipe requires you to turn your oven on, but only for a short time. Even better, get out of the hot kitchen and throw those salmon fillets on your barbecue!

Balsamic-Glazed Salmon Fillets
Allrecipes.com

INGREDIENTS
6 (5 ounce) salmon fillets
4 cloves garlic, minced
1 tablespoon white wine
1 tablespoon honey
1/3 cup balsamic vinegar
4 teaspoons Dijon mustard
Salt and pepper to taste
1 tablespoon chopped fresh oregano

DIRECTIONS
1. Preheat oven to 400 degrees F (200 degrees C). Line a baking sheet with aluminum foil, and spray with non-stick cooking spray.

2. Coat a small saucepan with non-stick cooking spray. Over medium heat, cook and stir garlic until soft, about 3 minutes. Mix in white wine, honey, balsamic vinegar, mustard, and salt and pepper. Simmer, uncovered, for about 3 minutes, or until slightly thickened.

3. Arrange salmon fillets on foil-lined baking sheet. Brush fillets with balsamic glaze, and sprinkle with oregano.

4. Bake in preheated oven for 10 to 14 minutes, or until flesh flakes easily with a fork. Brush fillets with remaining glaze, and season with salt and pepper. Use a spatula to transfer fillets to serving platter, leaving the skin behind on the foil.

Yields 6 servings

LINNELL’S NOTES
1. Instead of purchasing small individual salmon fillets, I purchased a large fillet and sliced it into 6 pieces.

2. About 1½ tablespoons of honey went into the glaze to counterbalance the acidity of the vinegar.

3. To reduce the risk of contaminating the glaze, I recommend in step 3 segregating some of the glaze into a small bowl for later use. Brush the glaze in the pot onto the uncooked salmon. Then in step 4, brush the glaze that has been set aside onto the cooked fillets.

4. The fillets can be grilled on your barbecue. Use a piece of foil to avoid sticking. Because of the sugar in the honey and in the reduced balsamic vinegar, the glaze could burn easily.

Enjoy!

Read Full Post »

Orange Popsicle Ice Cream One part nostalgia and two parts warm weather call for an iconic dessert flavor. The taste of Orange Popsicle Ice Cream transports you to summer days passed and the tinkling song of the ice cream truck in your neighborhood. The fresh flavors of orange juice and orange zest conspire with the creamy goodness of sour cream and half-and-half to bring out the child in you.

Orange Popsicle Ice Cream
Recipe from the Perfect Scoop by David Lebovitz

INGREDIENTS
⅔ cup (130 g) sugar
Grated zest of 3 oranges, preferably unsprayed
1¼ cups (310 ml) freshly squeezed orange juice (from 4 or 5 large oranges)
1 cup (240 g) sour cream
½ cup (125ml) half-and-half
2 teaspoons Grand Marnier or another orange liqueur

DIRECTIONS
1. In a blender, pulverize the sugar and orange zest until the zest is very fine.

2. Add the orange juice, sour cream, half-and-half, and Grand Marnier and blend until the sugar is completely dissolved.

3. Chill the mixture thoroughly in the refrigerator, then process it in your ice cream maker according to the manufacturer’s instructions.

Yields: About 1 quart (1 liter)

LINNELL’S NOTES
1. For fun, the next time I make this, I’ll pour the ice cream mixture into frozen pop molds.

2. My husband tripled the recipe, because 1 quart is not enough to serve my ice cream-loving family!

Enjoy!

Read Full Post »

Korean Bulgogi Taco Recipe Tender pieces of grilled Korean bulgogi on top of a spicy slaw and wrapped in a soft corn tortilla, exemplify fusion cuisine. Sriracha sauce replaces taco sauce. Taking a favorite Mexican dish and reworking it with Asian flavors, yields a mighty tasty combination. You might even say it’s “Seoul food” at its very best.

Korean Bulgogi Taco Recipe
Recipe courtesy of Garbo’s Grill

INGREDIENTS
3 pounds beef short ribs, off the bone
1 cup soy sauce
1/2 cup mirin
1/2 cup dark brown sugar
1/4 cup sesame oil
6 cloves garlic
6 scallions
2 teaspoons peeled and grated fresh ginger

Korean-Style Slaw:
3 cups roughly chopped Napa cabbage
1 cup matchstick-size daikon slices
3 tablespoons chopped fresh cilantro
6 scallions, diced

Soy Lime Dressing:
2 limes, juiced
1/4 cup soy sauce
2 tablespoons mirin
2 tablespoons Sriracha
2 tablespoons extra-virgin olive oil

Taco Assembly:
Twelve to fifteen 6-inch yellow corn tortillas or flour tortillas
Sriracha, for serving

DIRECTIONS
1. Cut off any excess fat from the short ribs then thinly slice the beef and cut into 1½-inch pieces. Place in a large bowl or in a plastic resealable bag.

2. In a blender or food processor, blend the soy sauce, mirin, sugar, sesame oil, garlic, scallions and ginger. Pour half of the sauce over the short ribs, ensuring all the beef is covered. Seal tightly and marinate the short ribs in the refrigerator for at least 3 hours and up to 24 hours.

3. Place the other half of the marinade in a pan and reduce over medium heat, stirring occasionally, until the mixture is thick. Place in a serving bowl and reserve to drizzle on the tacos.

4. For the slaw: Place the cabbage, daikon, cilantro and scallions together in a medium to large bowl.

5. For the dressing: In a small bowl, whisk together the lime juice, soy sauce, mirin and Sriracha. Slowly whisk in the olive oil. Place the dressing in the fridge until ready to use.

6. For the taco assembly: Heat your griddle to high. Flash cook the meat while simultaneously caramelizing the marinade. Place your short ribs on the griddle. Cook for 2 to 3 minutes and flip. Cook an additional 3 minutes, then wrap the meat in foil and set aside.

7. Grill up your tortillas. Flip after 45 seconds. Grill for another 45 seconds and remove.

8. On the grilled tortillas, pile some Korean slaw, dressing, beef, reserved and reduced marinade and extra Sriracha to taste.

Yields 12-15 tacos

LINNELL’S NOTES:
1. This is not a difficult recipe to make, but it does take some time to prepare all of the components. To make it easier, next time I will marinate the meat in store-bought Korean B.B.Q. Sauce. Not only will this be easier, it might also make it less salty.

2. For several years now I’ve tried to watch my sodium intake. When I dine out,  most food tastes salty to me. This recipe falls in that category. Other than the soy sauce there is no additional sodium added in the recipe. It would be difficult to cut the amount of soy sauce down, because the ratio of marinade to meat would not be correct. Perhaps the remedy would be to use a low-sodium soy sauce.

3. According to Food Network, “If you can’t find short ribs, you can substitute with tri-tip.”

4. I added shredded carrots to the slaw for color and more daikon sticks for added crunch.

5. The recipe says to add the dressing while assembling the tacos. Dressing it as a salad before hand will cause the cabbage to become limp.

6. My husband grilled the meat outdoors on his barbecue.

Enjoy!

Read Full Post »

Spiced Grilled Sweet Potatoes One sweet potato contains more potassium than a banana. Why is potassium so important? An article in Women’s Health states, “Potassium is a crucial nutrient, playing key roles in muscle strength, nerve function and heart health. And if you don’t get enough—4,700 mg a day—it could lead to a deficiency, complete with fatigue, muscle cramps, heart palpitations and dizzy spells.” These grilled sweet potatoes with their smokey and spicy flavors make the perfect accompaniment to other grilled vegetables and grilled meats. This recipe is a trifecta: easy to prepare, delicious to eat, and good for your body.

Spiced Grilled Sweet Potatoes
Recipe from Whole Foods

INGREDIENTS
4 medium sweet potatoes (about 3 pounds), scrubbed well
1 teaspoon coarse sea salt
1 teaspoon ground cumin
1 teaspoon paprika
1/2 teaspoon ground cinnamon
1/2 teaspoon chipotle powder
2 tablespoons cider vinegar
1/4 cup extra-virgin olive oil

DIRECTIONS
1. Cover potatoes with cold salted water in a large pot, then bring to a boil. Simmer until slightly resistant when pierced with a sharp small knife, 5 to 7 minutes. Drain well. When cool, slice potatoes lengthwise.

2. Mix together salt, spices and apple cider vinegar; add oil in a slow stream. Brush this mixture on sweet potatoes.

3. Grill potatoes on a lightly oiled grill rack over medium heat, until grill marks appear and potatoes are cooked through, about 15 minutes.

4. Serve potatoes warm.

Serves 8

LINNELL’S NOTES
1. I usually slice the sweet potatoes lengthwise, but this time I sliced them crosswise to make smaller servings.

2. One of my favorite ways to serve these potatoes is to cut the slices into cubes and then toss them in a green salad.

Enjoy!

Read Full Post »

Chunky Lola Cookies The lyrics from the Broadway song, “Whatever Lola Wants, Lola Gets,” plays in my head while I make these cookies. In the musical Damn Yankees, Lola is a seductress hired by the devil. I don’t have a clue who the Chunky Lola of this famous recipe is, but she must be a seductress in her own right to have a devilishly delicious cookie named after her. With its dark chocolate chunks, sweet coconut, crunchy toasted pecans, and chewy oats, this cookie is so exceptional that you’ll say “the devil made me do it” as you reach for another one!

Chunky Lola Cookies
Recipe by Joanne Chang, owner and pastry chef at
Flour Bakery + Cafe

INGREDIENTS
1/2 cup plus 3 tablespoons (1-3/8 sticks/156 grams) unsalted butter, at room temperature
2/3 cup (140 grams) granulated sugar
2/3 cup (150 grams) packed light brown sugar
2 eggs
1 teaspoon vanilla extract
1¼ cups (175 grams) unbleached all-purpose flour
2/3 cup (70 grams) old-fashioned rolled oats (not instant or quick cooking)
1 teaspoon baking soda
1/2 teaspoon kosher salt
9 ounces (255 grams) bittersweet chocolate (62 to 70 percent cacao), chopped into ½-inch pieces
1¼ cups (125 grams) pecan halves, toasted and chopped
1 cup (120 grams) sweetened shredded coconut

DIRECTIONS
1. Using a stand mixer fitted with the paddle attachment (or a handheld mixer or wooden spoon), cream together the butter, granulated sugar, and brown sugar on medium speed for about 5 minutes, or until the mixture is light and fluffy. (This step will take about 10 minutes if using a handheld mixer or spoon.) Stop the mixer a few times and use a rubber spatula to scrape down the sides and bottom of the bowl and the paddle as necessary.

2. Beat in the eggs and vanilla on medium speed for 2 to 3 minutes, or until thoroughly combined. Scrape the bowl and paddle again to make sure the eggs are completely incorporated.

3. In a medium bowl, stir together the flour, oats, baking soda, and salt. Add the chocolate, pecans, and coconut and toss to combine.

4. On low speed (or with wooden spoon), slowly add the flour mixture to the butter-sugar mixture and then mix just until the flour mixture is totally incorporated and the dough is evenly mixed.

5. For the best results, scrape the dough into an airtight container and let rest in the refrigerator overnight (or for at least 3 to 4 hours) before baking.

6. When ready to bake, position a rack in the center of the oven and heat the oven to 350℉.

7. Drop the dough in ¼-cup balls onto parchment paper or Silpat lined baking sheets, spacing them about 2 inches apart. Flatten each ball slightly with the palm of your hand.

8. Bake for 20 to 22 minutes, or until the cookies are golden brown on the edges and slightly soft in the center. Let the cookies cool on the baking sheet on a wire rack for 15 to 20 minutes, or until they are cool enough to remove with a spatula. Then transfer them directly to the wire rack to cool completely, or enjoy them warm.

9. The cookies can be stored in an airtight container at room temperature for up to 2 days. The unbaked dough can be stored in an airtight container in the refrigerator for up to one week.

Makes approximately 18 large cookies

LINNELL’S NOTES
1. As Joanne Chang recommends, I weighed the ingredients that had weight equivalents listed.

2. I used Plugra unsalted butter and Lindt 70% Cocoa Smooth Dark chocolate with superior results.

3. I appreciate the notes that the author includes in her cookbook. Most of us home bakers do not cream butter and sugar together long enough. Of that Chang says, It’s best to beat together the butter and sugar for longer than you might think: as long as 6 to 8 minutes on medium speed with a stand mixer in some cases. Watch for the transformation from a yellow, sandy mixture to an ivory, fluffy mixture—the sign that you have properly creamed them together. When you are creaming butter with brown sugar, you’ll see the mixture go from muddy looking to pale brown, and creamy.

4. Even though I refrigerated the dough overnight, the cookies still spread quite a bit. To prevent the cookies from touching as they bake, next time I will space them farther apart than specified or make the dough balls smaller.

5. This cookie recipe is a 10 in my mind. However, because it requires a minimum of 3 to 4 hours of chilling time, it is not a cookie you can make in the spur of the moment.

Enjoy!

Read Full Post »

Cannellini Beans with Wilted Spinach and Bacon “Just what the doctor ordered,” I said as I dished out a savory salad onto my plate. With white beans, spinach, and a few chopped dates thrown in for good measure, I easily fulfilled one of the four daily servings of potassium-rich food that my cardiologist recommends. Why take supplements when you can eat delicious food?

Cannellini Beans with Wilted Spinach and Bacon
Recipe adapted from Bon Appétit: 12 Easy Ways to Cook a Can of Cannellini Beans

INGREDIENTS
Cannellini beans (canned), rinsed and drained
Onion, thinly sliced
Bacon slices, chopped and cooked
Garlic, minced
Red pepper flakes
Baby spinach leaves
Olive oil
Fresh lemon juice and zest
Chopped dates

DIRECTIONS
1. Cook chopped bacon in a skillet until bacon is brown and crisp. Transfer to paper towel-lined plate to drain.

2. Add sliced onion to fat in skillet and cook, stirring occasionally, until soft and golden.

3. Add minced garlic and a pinch of crushed red pepper flakes and cook, stirring occasionally, until fragrant.

4. Add cannellini beans and cook until heated through.

5. Put spinach leaves in a large bowl and using a slotted spoon to drain off the bacon fat, spoon the cannellini bean mixture into the spinach and toss. The spinach will begin to wilt from the heat of the beans.

6. Drizzle with some olive oil and fresh lemon juice, and toss to combine.

7. Add chopped dates and lemon zest, and toss again.

8. Add salt and pepper to taste.

9. Top with bacon.

LINNELL’S NOTES
1. To reduce sodium levels, I used cans of reduced-sodium cannellini beans.

2. I “doubled” the recipe: I used 2 cans of cannellini beans, 1 medium onion, 10 slices of bacon, 2 small garlic cloves, and about 8 ounces of baby spinach leaves. This quantity should yield six servings.

3. The next time I make this salad, I will add more crushed red pepper flakes to give it a little more kick.

4. I chopped about 5-6 pitted dates and added them to the salad. This was not part of the original recipe, but dates are high in potassium and offer a nice sweet counterbalance to the tart freshness of the lemon juice.

5. The lemon zest was not part of the original recipe either, but why waste this most fragrant part of a lemon?

6. To reduce the fat content and make this salad healthier, omit the bacon. Instead, sauté everything in olive oil.

Enjoy!

Read Full Post »

Salsa Negra Although the dark complex flavor of this salsa defies description, I would say, “deliciously sweet with a deep smokey flavor and a fiery punch that makes you take notice.” Using canned chipotle chiles in adobo sauce, this salsa comes together quickly and is versatile enough to be used as a seasoning base for other dishes, like the dip shown above.

Sweet-Sour Chipotle Seasoning (Salsa Negra)
Recipe by Rick Bayless as seen on Parade.com

INGREDIENTS
2 (7½-oz) cans chipotle chiles en adobo
2 Tbsp molasses
¼ cup (packed) dark brown sugar
¼ cup balsamic vinegar or sweet sherry vinegar
½ cup water
¼ cup soy sauce

DIRECTIONS
1. Place the chiles (with canning liquid), molasses, sugar, vinegar and ½ cup water in a blender and process until completely smooth. Scrape into a small saucepan over medium heat.

2. Let the mixture come to a brisk simmer, then turn the heat to medium-low and continue simmering, stirring regularly, until the mixture is the consistency of tomato paste, about 30 minutes.

3. Remove from the heat and stir in the soy sauce. If necessary, add water, a splash at a time, until the salsa is the consistency of runny ketchup. Cool, taste, and season with salt if needed.

Chef’s Note: Refrigerate salsa in a tightly covered pint-sized jar, where it will keep for a month or two.

LINNELL’S NOTES
1. I was a bad girl. By not reading the directions thoroughly, I screwed up. I added the soy sauce with the other ingredients in my blender. I cooked down the salsa negra in step 2, but because I added more liquid by adding the soy sauce prematurely, I did not let it cook it down to a tomato paste consistency.

2. I used light soy sauce with good results and added no more additional salt.

3. In Food and Wine, Chef Bayless says of this salsa, “Balsamic vinegar might seem like an unusual ingredient in Mexican food, but it is common in Baja. This recipe makes more salsa than you’ll need to make Shrimp with Spicy Chipotle Tomato Sauce, but it keeps in the refrigerator for weeks and can add an intense, smoky heat to grilled meats, stews and tacos.”

4. Taking Chef Bayless’s recommendation, I made a dip using the salsa negra. Using 16 ounces of room temperature cream cheese, I added some salsa negra (to taste) and some crumbled bacon. The dip packs enough flavor alone, if you just want to spread it on a bagel. I like it spread on a blue corn tortilla chip, drizzled with Mexican crema, and topped with a cilantro leaf.

Enjoy!

Read Full Post »

Roasted Artichoke Salad Mounds of colorful roasted artichoke salad, drizzled with basil vinaigrette, sat on a bed of fresh mixed greens. With roasted red peppers and artichokes hearts, capers, red onion, and parsley leaves, this salad made a perfect side dish for my mom’s Italian-themed birthday celebration. Don’t limit this spectacular salad to Italian dinners, though. You’ll want to serve this versatile dish at al fresco dinner parties, family barbecues, holiday brunches, and more!

Roasted Artichoke Salad
Recipe courtesy of Ina Garten

INGREDIENTS
4 boxes (9 ounces each) frozen artichoke hearts, defrosted
Good olive oil
Kosher salt and freshly ground black pepper
1 shallot, minced
3 tablespoons freshly squeezed lemon juice
1 teaspoon Dijon mustard
5 tablespoons white wine vinegar or champagne vinegar, divided
1/2 cup chopped fresh basil leaves
6 tablespoons capers, drained
2 roasted red peppers, sliced thin
1/2 cup minced red onion
1/2 cup chopped fresh parsley leaves
2 pinches hot red pepper flakes, optional

DIRECTIONS
1. Preheat the oven to 350 degrees F.

2. Place the artichoke hearts in a bowl with 1/4 cup olive oil, 1 teaspoon salt and 1/2 teaspoon pepper and toss until the artichoke hearts are coated. Dump the artichoke hearts onto a sheet pan and spread out into 1 layer; roast in the oven for 20 minutes.

3. Meanwhile, make the vinaigrette. Place the minced shallot, lemon juice, mustard, 1 tablespoon vinegar, 1 teaspoon salt, and 1/2 teaspoon pepper in the bowl of a food processor fitted with the steel blade. Process for 5 seconds. Add the basil leaves and process into a green puree. With the processor running, slowly pour 1/2 cup olive oil into the bowl through the feed tube until the ingredients are finely pureed. Set aside.

4. Place the roasted artichoke hearts in a bowl and toss with enough vinaigrette to moisten. Add the capers, red peppers, red onion, parsley, 4 tablespoons vinegar and red pepper flakes, if using, and toss gently. Sprinkle generously with salt and pepper and let stand for 30 minutes for the flavors to blend. Serve at room temperature.

Serves 6

LINNELL’S NOTES
1. I couldn’t find frozen artichoke hearts, so I substituted canned. I let the artichokes drain in a colander. Before using, I gently squeezed any excess liquid from them.

2. I doubled the recipe, but probably should not have doubled the salt. I normally eat a low-sodium diet, so this recipe seemed a bit salty to me, especially with the addition of the capers, which I rinsed and drained first. I used one 4-ounce jar of capers, which amounted to 7 tablespoons of capers. The doubled amount would have been 12 tablespoons worth of capers.

3. If you double this recipe, make sure you roast it in a single layer in two separate baking sheets.

4. To get a good roast on the artichokes, I needed to roast them 30 minutes longer than specified.

5. In step 4, I cut the amount of vinegar by half and did not add any additional salt.

6. Although the photo doesn’t show it, one of my favorite ways to serve this salad is on a rectangular serving platter. Place a mound of greens lengthwise on the platter and then mound the artichoke salad on top of the greens. Additional basil vinaigrette may be drizzled on top.

7. I made this salad the day before the party. Because it can be made ahead of time, it is a great salad for entertaining.

Enjoy!

Read Full Post »

« Newer Posts - Older Posts »