Feeds:
Posts
Comments

Posts Tagged ‘appetizers’

Chips, Dips and Strips: Healthy Appetizers 
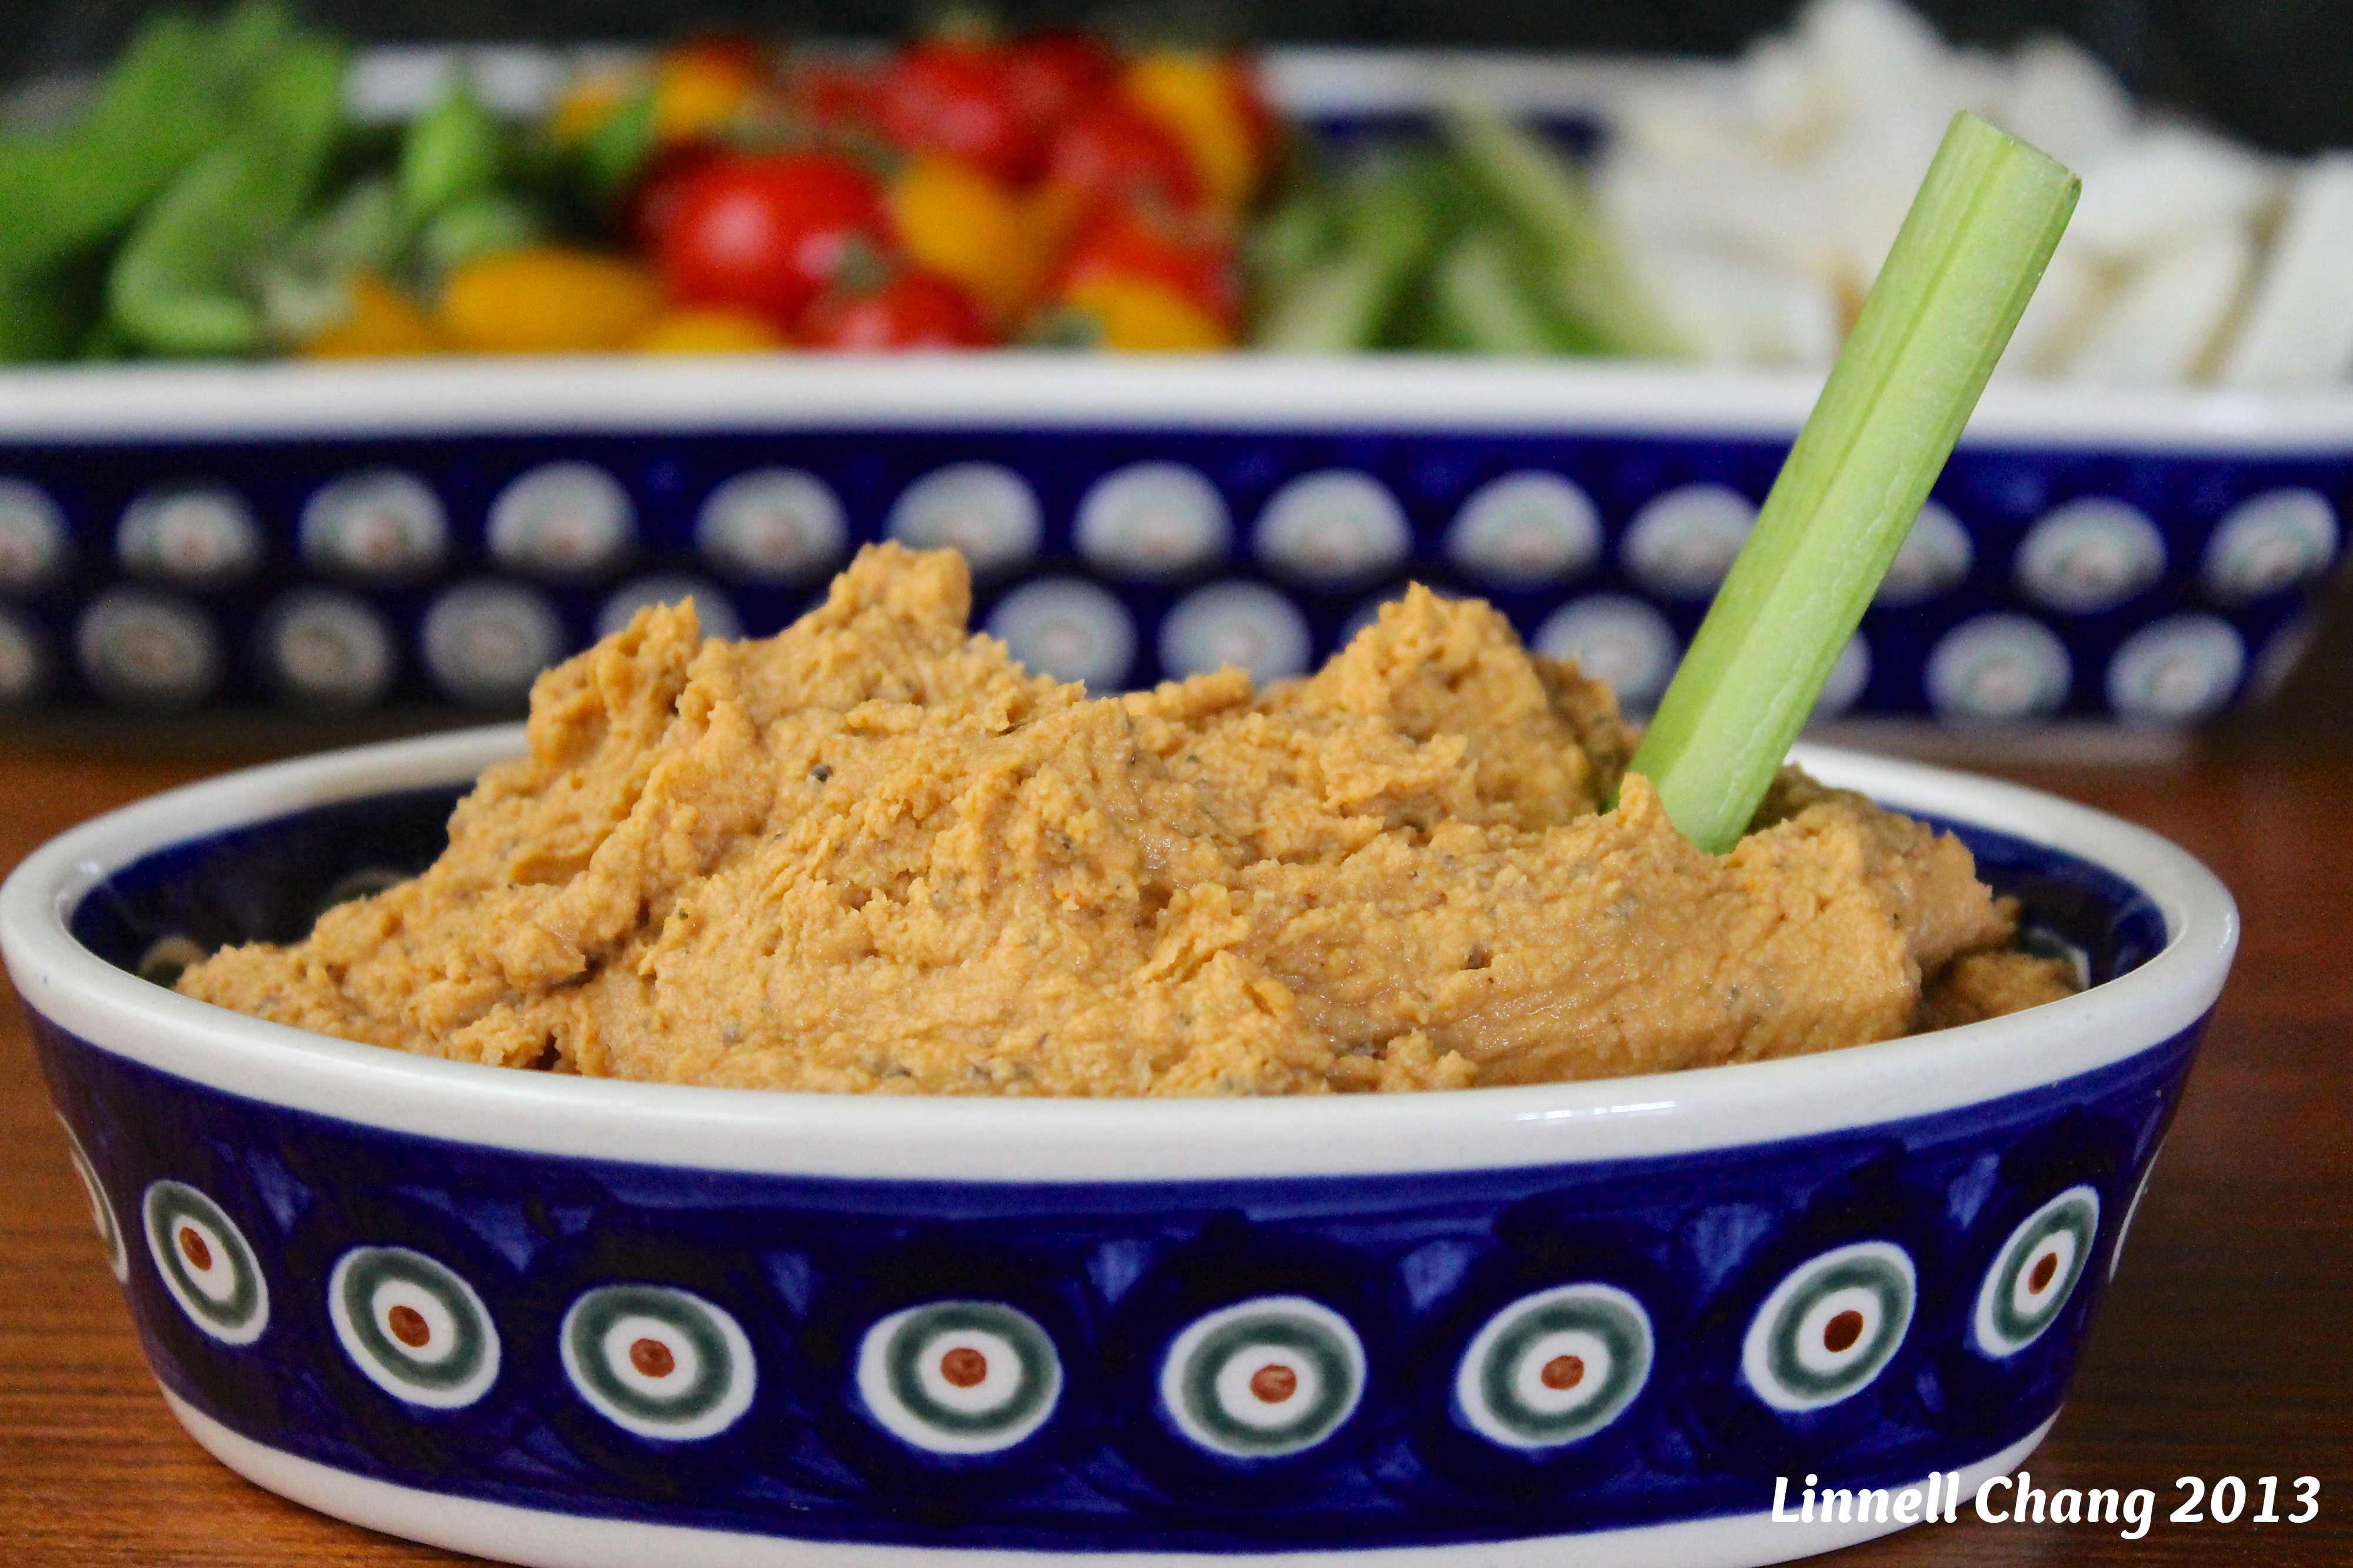
So what if your favorite football team failed in its attempt to reach the Super Bowl? Plenty of other reasons exist in life for you to throw a get-together with friends! Start the festivities out with mix and match homemade dips, chips, and strips. The exotic flavors of the Cajun Tortilla Chips and the Indian Egg-Roll Strips play nicely with the flavors of the Thai Shrimp Dip and the Hot Bean-and-Cheese Dip—so nicely, in fact, that you won’t even miss the fat in these tasty low-fat appetizers!

Recipes by Jim Fobel for Cooking Light Magazine

Thai Shrimp Dip
INGREDIENTS
1 pound medium shrimp, cooked and peeled
1/4 cup (2 ounces) 1/3-less-fat cream cheese
2 tablespoons light mayonnaise
2 tablespoons fresh lime juice
2 teaspoons Thai fish sauce or low-sodium soy sauce
1 (12.3-ounce) package reduced-fat firm tofu, drained
1 teaspoon dark sesame oil
1 tablespoon minced peeled fresh ginger
1 garlic clove, minced
3 tablespoons minced green onions
3 tablespoons chopped fresh cilantro
Cooked and peeled shrimp (optional garnish)
Cilantro sprig (optional garnish)

DIRECTIONS
1. Place the first 3 ingredients in a food processor, and process until minced.
2. Add lime juice, fish sauce, and tofu; pulse until blended.
3. Heat oil in a small skillet over medium heat; sauté ginger and garlic 2 minutes.
4. Add to shrimp mixture, and pulse until combined.
5. Add onions and chopped cilantro, and pulse 3 to 4 times.
6. Spoon into a bowl; cover and chill 1 hour.
7. Garnish dip with additional shrimp and cilantro sprig, if desired.

Yields: 3 cups

LINNELL’S NOTES
1. In this recipe, fish sauce is a more flavorful ingredient choice over low-sodium soy sauce. Fish sauce adds more depth of flavor. I would substitute soy sauce only if you absolutely can’t find/buy fish sauce in your region.

Hot Bean-And-Cheese Dip
INGREDIENTS
1 (14.5-ounce) can diced tomatoes, drained and divided
1/2 teaspoon hot pepper sauce
1/4 teaspoon salt
1/4 teaspoon ground cumin
1/4 teaspoon dried oregano
1 (16-ounce) can pinto beans, rinsed and drained
1 (16-ounce) can fat-free refried beans
1 (4.5-ounce) can green chiles, drained
Cooking Spray
3/4 cup (3 ounces) shredded sharp cheddar cheese

DIRECTIONS
1. Preheat oven to 350° F.
2. Combine 1 cup tomatoes and the next 7 ingredients (1 cup tomatoes through chiles).
3. Spoon tomato mixture into a 1½-quart casserole dish coated with cooking spray.
4. Top with cheese.
5. Bake at 350° for 20 minutes or until cheese is melted. Top with remaining tomatoes.

Yield: 4½ cups

LINNELL’S NOTES
1. The next time I make this I will add a little more hot pepper sauce for additional kick.
2. The combination of the melted cheese and the vegetable spray created a slight ring of oil around the edge of the dip after it was baked. I blotted this excess oil off with a paper towel before serving. Next time I will spray the cooking oil more sparingly or just lightly wipe a little oil with a paper towel on the inside of the dish.

Cajun Tortilla Chips
INGREDIENTS
Cajun Seasoning:
1½ teaspoons paprika
1 teaspoon dried thyme
1/2 teaspoon garlic powder
1/2 teaspoon onion powder
1/2 teaspoon black pepper
1/4 teaspoon salt
1/4 teaspoon sugar
1/4 teaspoon ground red pepper

Chips:
10 (7-inch) flour tortillas, cut into 8 wedges
Cooking spray

DIRECTIONS
1. Preheat oven to 375° .
2. To prepare Cajun seasoning, combine first 8 ingredients in a small bowl.
3. To prepare chips arrange the tortilla wedges on 2 baking sheets coated with cooking spray.
4. Coat wedges with cooking spray. Sprinkle 2 teaspoons Cajun seasoning over wedges.
5. Bake chips at 375° for 6 minutes or until crisp.
6. Note: Store remaining Cajun seasoning in an airtight container.

Yield: 80 chips

LINNELL’S NOTES
1. I find it easiest to use a pizza cutter to cut the tortillas into wedges.
2. Since the recipe makes a fair amount of seasoning, I sprinkled it on the tortilla wedges a little more generously than the recipe specified.
3. Instead of spraying cooking oil on the baking sheets, I covered them with parchment paper.
4. My chips took more than double the amount of time to become crisp.

Indian Egg-Roll Strips
INGREDIENTS
Curry seasoning:
1 tablespoon curry powder
1 teaspoon paprika
1/2 teaspoon salt
1/2 teaspoon ground cumin
1/4 teaspoon garlic powder
1/4 teaspoon black pepper

Strips:
10 egg-roll wrappers, each cut lengthwise into 8 strips
Cooking spray

DIRECTIONS
1. Preheat over 375°.
2. To prepare curry seasoning, combine first 6 ingredients in a small bowl.
3. To prepare strips, arrange the egg-roll strips on 2 baking sheets coated with cooking spray.
4. Coat strips with cooking spray, and sprinkle 2 teaspoons curry seasoning over strips.
5. Bake strips at 375° for 8 minutes or until crisp.
6. Note: Store remaining curry seasoning in an airtight container.

Yield: 80 strips

LINNELL’S NOTES
1. Again, I lined the baking sheets with parchment paper instead of spraying them with cooking spray.
2. Unlike the Cajun Tortilla Chips, these egg-roll strips brown faster, so monitor them while they bake.
3. I felt my first batch of these were underseasoned, so the next batch I applied the curry seasoning more liberally.

ENJOY!

Read Full Post »

Appetizer Roundup: 6 Party Appetizers Revisted “Ugh, I have to bring appetizers again! Any ideas on what I should make for the party next week?” grumbled my daughter. “Why don’t you check out the appetizer recipes on my blog?” I replied, trying not to smile. “You could make “Bloomin’ Onion Bread, Pepperoni Pizza Puffs, or Kate’s Cheese Squares. They’re always crowd-pleasers. You could make something healthy like a Trio of Dips served with crudités. Or, if you’d rather bring something more exotic, make Sushi Casserole or Banh Mi Bruschetta,” I suggested to her. “Oh, I don’t know . . . . I’ve got to think about this,” sighed my daughter.

That conversation reminded me of some of the great appetizers that I’ve prepared in the past, so I thought I would revisit them – just in time for holiday and New Year’s entertaining!

Banh Mi Brushetta (Top left)
Bruschetta with a twist or Banh Mi simplified? Either way, this appetizer brings together some incredible flavor combinations.

Bloomin’ Onion Bread (Left center)
Sourdough bread, Monterey Jack cheese, butter, green onions, garlic powder, and Parmesan cheese . . . need I say more?

Sushi Casserole (Bottom left)
This recipe serves a crowd and can be easily adapted. What ingredients you layer and the order you layer them is part of the fun in making this appetizer. Sushi rice will always be the base layer, but be creative with everything else!

Kate’s Cheese Squares (Top right)
A tried and true recipe that’s been around for decades is the best way to describe these cheese delights. They are light in texture, yet sinfully rich.

Pepperoni Pizza Puffs With Homemade Pizza Sauce (Middle right)
The smell of these small puffs of pizza will drive you crazy while they are baking, but they will be even more irresistible fresh out of the oven. They are best eaten hot, but they’re never around long enough to cool down!

Trio of Dips for Crudités (Bottom right)
Healthy does not mean blah. These three dips paired with fresh vegetables creates an explosion of flavors and colors!

ENJOY!

Read Full Post »

Pizza Hummus Pizza-flavored hummus? As a lover of hummus, this recipe caught my eye. I thought of all the wives and mothers out there who constantly battle to get their loved-ones to eat a more healthy diet. Why not be clever and sneak this healthy dip onto the table under the guise of a tasty “PIZZA” dip? It’s worth a try!

Pizza Hummus
Food Network Magazine

INGREDIENTS
1 tablespoon extra-virgin olive oil
1/4 cup tomato paste
2 teaspoons dried oregano
1 teaspoon dried basil
2 to 3 cloves garlic
3 cups canned chickpeas, drained and rinsed, 1/2 cup liquid reserved
1/4 cup tahini
1/4 cup fresh lemon juice
Kosher salt

DIRECTIONS
1. Heat the olive oil in a small skillet over medium-high heat.
2. Add the tomato paste, oregano and basil and cook until slightly toasted, about 2 minutes.
3. Transfer the tomato paste mixture to a food processor. Add the garlic, chickpeas, chickpeas liquid, tahini, lemon juice and 1 teaspoon salt.
4. Purée until smooth and creamy.

LINNELL’S NOTES
1. Tahini is a paste made from ground sesame seeds. To learn about the “Nutritional Facts for Roasted Sesame Tahini,” read this article from SFGate.

2. Two 15.5 oz. cans of chickpeas equaled 3 cups of drained and rinsed beans for me.

3. I used 2 cloves of garlic, but the next time I make this, I will try adding 3 cloves of garlic for a little bit more flavor.

4. Next time I will also add a little bit more basil and oregano. I may even try adding fresh basil and fresh oregano. The conversion for dried to fresh herbs is about 1 teaspoon of dried to 1 tablespoon of fresh.

5. I also will try sprinkling a little bit of diced sun-dried tomatoes (packed in olive oil) on top of the hummus before serving.

6. Obviously it is more nutritious to serve this dip with vegetables, but pita chips would be great with it, too.

ENJOY!

Read Full Post »

Sushi Casserole Creating extraordinary sushi requires great skill and passion. After watching Jiro Dreams of Sushi, a documentary about Jiro Ono, an 87-year-old sushi master, I’m almost embarrassed to share the following recipe. This recipe is far removed from the precise art of sushi-making, but the rumblings of my imagination wouldn’t let go of the idea of creating a sushi casserole. I searched online, sorted through my notes and newspaper clippings, and reread my sushi cookbooks to figure out what layers I wanted for the casserole. My experiment began and, after a fair amount of improvising, I ended up with a tasty casserole that yielded bite-sized squares of “sushi” that were served with roasted Nori. There are endless possibilities to a layered recipe such as this. And, yes, it is possible to stick a square peg into a round hole!

Sushi Casserole
Sushi Rice
The ratio of vinegar solution added to sushi rice varies with the type of sushi being made. In this case, I’m using a vinegar solution used for making maki-sushi. Normally, the vinegar solution is added to the rice after the rice is cooked. The rice is usually fanned while cooling to give the grains a lustrous or shiny appearance. I cheated by adding the vinegar solution into the rice cooker at the beginning and didn’t fan the rice at all.

Ingredients:
4 cups of uncooked sushi rice (rice must be short or medium grain only)
1/2 cup (8 tablespoons) of plain rice vinegar
5 tablespoons sugar
1 teaspoon salt
Water (approximately 4 cups plus 4 tablespoons)

Directions:
1. Wash and drain rice.
2. Put the rice in the rice cooker.
3. Combine vinegar, sugar, and salt in a small bowl.
4. Add vinegar solution to rice in rice cooker.
5. Add water up to the specified cup level.
6. Start the rice cooker.
7. After the rice is cooked, let it cool to body temperature.

Crab Layer
Ingredients:
1 pound imitation crab
3/4 cup mayonnaise
1 cup sour cream

Directions:
1. Chop the imitation crab or place it in a food processor and pulse. Small chunks are desired, not large chunks nor a smooth paste.
2. Combine mayonnaise and sour cream in a medium-sized bowl.
3. Add crab to mayo-sour cream mixture and stir until thoroughly combined.

Spicy Sauce
Ingredients:
1/2 cup mayonnaise
2 tablespoons Sriracha sauce

Directions:
1. Blend both ingredients together.
2. Pour into a squeeze bottle with a small nozzle tip.

Additional Toppings
Smoked salmon slices
Shrimp tempura
Cucumber sticks
Avocado slices
Aji Nori Furikake (a seasoned mix in a jar)

Assembling Casserole
1. In a small bowl, mix 1 cup of water with 2-3 tablespoons of vinegar. Rub this solution on your hands and on any utensils you use to prevent the rice from sticking.
2. Take handfuls of rice and gently and evenly press it into the bottom of a 9-inch by 13-inch pan. This layer should be at least 1/2-inch thick, but no more than 3/4-inch thick. There may be leftover rice.
3. Spread the crab layer over the rice.
4. At this point I put a thin layer of smoked salmon slices over the crab mixture.
5. The next layer, I alternated between the shrimp tempura, avocado slices, and cucumber strips.
6. Finally, I sprinkled some Aji Nori Furikake over the top of the casserole and then drizzled the spicy sauce up and down the rows of toppings.

To Serve
Ingredients:
Nori/sheets of seaweed
Wasabi
Pickled ginger

Directions:
1. Cut the casserole into small squares. You can either serve the sushi squares directly from the pan or you can plate them on a serving platter.
2. Accompany sushi casserole with squares of roasted Nori, wasabi, and pickled ginger.

Linnell’s Notes:
1. Sushi should not be put in the refrigerator, because the rice will become hard. It’s most delicious when served just after making it.

2. I made my rice base too thick, so I recommend using enough rice to form a solid base, but not so much that each bite is all rice.

3. I used frozen shrimp tempura from Costco and baked it in the oven while the rice was cooling.

4. For easier cutting and serving, the shrimp tempura could be cut into bite-sized pieces and placed intermittently in rows across the casserole. Another consideration might be to place the shrimp tempura under the crab layer. The same goes for the cucumber sticks. The cucumber sticks could be diced and sprinkled over the casserole.

5. Instead of toasting sheets of Nori/seaweed and cutting them into squares, I cheated and opened several roasted-seasoned seaweed snack packs. See packages in photo along with Furikake and rice vinegar: Partial Ingredients for Sushi Casserole

Enjoy!

Read Full Post »

crudities  with dip Instead of serving a tray of high-calorie appetizers at your next party, how about presenting a beautiful platter of fresh crudités? Boring, you say? Not if you serve the crudités with a variety of interesting dips! Don’t be fooled by the simple list of ingredients in the Herb Dip; the fresh herbs really shine in this easy and delicious recipe. Tempt your guests with the cooling flavor of lime juxtaposed against the heat of chilies in the Chili-Lime Sour Cream Dip. Last, but certainly not least, the Peanut Sauce is sure to be a crowd favorite – what’s not to like about peanut butter with a little attitude?

Herb Dip
Recipe by Ina Garten

Ingredients:
8 ounces cream cheese, at room temperature
1/2 cup sour cream
1/2 cup mayonnaise
4 scallions, white and green parts, minced
2 tablespoons fresh parsley leaves, minced
1 tablespoon fresh dill, minced
1 teaspoon kosher salt
3/4 teaspoon freshly ground black pepper

Directions:
Place the cream cheese, sour cream, mayonnaise, scallions, parsley, dill, salt, and pepper in the bowl of an electric mixer fitted with the paddle attachment and blend. Serve at room temperature.

Makes 2 cups

Linnell’s Notes:
Due to the cream cheese, this recipe produces a thick dip. To further cut calories, you could experiment with low-fat versions of the cream cheese, sour cream and mayonnaise. For best flavor, though, you’re going to have to leave some fat in the recipe!

Chili-Lime Sour Cream Dip
Recipe from Better Homes and Garden

Ingredients:
One 16-ounce carton of sour cream
Two 7-ounce cans of diced green chilies, drained
1/4 cup snipped fresh cilantro
1/4 cup jarred salsa
2 cloves garlic, minced
1 teaspoon mild or hot chili powder
2 teaspoons finely shredded lime peel
1/2 teaspoon salt
Bottled hot pepper sauce to taste

Directions:
In a large bowl combine sour cream, chilies, cilantro, salsa, garlic, chili powder, lime peel, salt and bottled hot pepper sauce. Cover and chill overnight.

Makes 3¾ cups

Linnell’s Notes:
The level of preferred heat can be adjusted by increasing or decreasing the amounts of chili powder and hot pepper sauce. Also, the type of salsa you use, will affect the heat of the dip. Chilling the dip overnight allows the flavors to meld.

Peanut Sauce
Recipe originally from Sunset Hors D’oeuvres Cookbook

Ingredients:
1/3 cup crunchy peanut butter
3 tablespoons firmly packed brown sugar
1/2 teaspoon crushed red pepper
1/4 cup lemon juice
2 tablespoons chili sauce or ketchup
1/2 – 1 teaspoon soy sauce, to taste

Directions:
Mix ingredients until well-blended. Serve with raw vegetables (cucumber, jicama, bell pepper, carrot and celery)

Makes 3/4 cup

Linnell’s Notes:
After tasting this at one of her parties, I begged my friend Tina for this recipe. Because it’s a crowd-pleaser, I double or quadruple this recipe when I make it!

Enjoy!

Read Full Post »

Buffalo Chicken Dip

Watching the great Willie Mays, Willie McCovey, Juan Marichal, Orlando Cepeda, Gaylord Perry, and the Alou brothers play baseball at the infamous Candlestick Park, ranks among my favorite childhood memories. Back in the day when it was deemed safe for children to be out and about the city all by themselves, my cousins and I would catch San Francisco Muni buses to go watch Giants games. Because of the unpredictable weather at Candlestick, we either froze in the damp overcast or toasted in the bright sunlight. But bags of peanuts, tasty hotdogs, boxes of Cracker Jack, and chunks of Bazooka Bubble Gum more than made up for any discomfort we experienced.

To honor the great Giants players of the past and the current National League Champions, I present a dip that’s worthy of a Giants World Series party. It’s even the right color – orange! So . . . LET’S GO GIANTS, LET’S GO!

Buffalo Chicken Dip
As featured in How Sweet It Is

Ingredients:
2 – 8 oz. blocks of cream cheese, softened
1/2 cup blue cheese dressing
1/2 cup ranch dressing
1 cup Frank’s Red Hot Buffalo Wing Sauce
3 cups shredded chicken
2 cups shredded cheddar cheese*

Directions:
1. Preheat oven to 375 degrees F.

2. In a large bowl, combine softened cream cheese, ranch dressing, blue cheese dressing, and buffalo wing sauce. Using a hand mixer, mix until smooth and creamy, about 3 minutes.

3. Fold in shredded chicken and 1 cup of shredded cheese.

4. Pour into a baking dish. Top with 1 cup of shredded cheese.*

5. Bake for 20 minutes or until dip is warmed through.

6. Serve with tortilla chips, bread, sturdy crackers, and celery sticks.

Linnell’s Notes:
1. Instead of buying chicken breasts and cooking them, I was lazy and purchased a rotisserie chicken and shredded the meat. Other versions of this recipe call for using canned chicken.

2. When this came out of the oven, small pools of oil sat on the surface and I blotted them off.

3. Next time, I will try adding blue cheese crumbles instead of blue cheese dressing. I think this would intensify the blue cheese flavor and cut back on the oiliness of the finished product.

4. *Also, the problem with baking shredded cheddar cheese on top of the dip is that as the dip cools the cheese hardens and creates a cheese crust that gets in the way of the dip. Next time I will omit the cheese topping and will mix in less fatty shredded mozzarella cheese instead of cheddar.

5. The heat in this recipe can be adjusted by adding a little more or a little less of Frank’s Red Hot Buffalo Wing Sauce.

6. Makes enough for a small gathering of snack-craving people.

Enjoy!

Read Full Post »

Whatever the occasion – raucous football parties, kids just hanging out, fancy dinner parties, brunches and lunches  – you can’t go wrong with these tasty puffs! Flaky crescent rolls wrapped around bits of warm, creamy, garlicky chicken make easy and sophisticated appetizers or filling snacks. These were good, but after tasting just one, I immediately went into my “what about this?” mode. Just about anything can be wrapped in crescent roll dough. Ideas for fillings flooded my head. What about using crab meat or shrimp? And what about curry chicken, barbecued beef, Chinese barbecued pork, taco meat, sautéed mushrooms . . . you see what I mean? With this recipe you are only limited by your imagination!

Garlic Chicken Puffs
Recipe found on Tidy Mom

Ingredients:
4 ounces cream cheese
1 teaspoon garlic powder
1/2 cup cooked chicken, shredded
2 cans refrigerated crescent rolls

Instructions:
1. Mix cream cheese, garlic and chicken until well-blended.
2. Unroll crescent rolls and cut each triangle into two triangles (when you unroll the crescent rolls, 2 triangles are attached making a big square. I just cut from there following the perforation for one cut and made another cut from the other corners – giving you 4 little triangles).
3. Place 1 teaspoon of chicken mixture on the center of each triangle and fold the corners in over the mixture.
4. Place on cookie sheet, lined with aluminum foil and sprayed with no stick spray. Bake at 375 degrees for 12 to 14 minutes.

Linnell’s Notes:
1. For more evenly-sized triangles, I made a minor adjustment in the way I cut the dough. After unrolling the crescent rolls, notice that two triangles make up a rectangle. You will have four rectangles. I cut each rectangle apart from the other rectangles. I gently patted the diagonal perforations together before cutting each rectangle in half width-wise to create 2 squares. Each square was then cut diagonally – from corner to corner. You should end up with 16 triangles.


2. Using kitchen shears, I snipped about ten chive stems from my garden and stirred them into the chicken mixture. I also added 1/4 teaspoon of Worcestershire sauce.
3. To prevent any of the filling from leaking out, I sealed each puff by pressing the edges of the dough together.
4. I covered a cookie sheet with parchment paper instead of using foil and cooking spray. Mine were done in about 12 minutes, but all ovens vary in temperature accuracy. You’ll want to check them at least 10 minutes into the baking process.
5. I transferred the puffs to a wire rack to cool – just so the bottoms wouldn’t have a chance to get soggy.
6. This recipe could be made even easier by using a rotisserie chicken or canned chicken instead of cooking chicken yourself.

Enjoy!

Read Full Post »

My husband will wonder if I’m throwing an impromptu party when he finds a container of freshly stuffed mushrooms and cherry tomatoes in our refrigerator. Yes, I’m having a party, but just a party for one! With only two months left before my son’s wedding, I would still like to lose some weight. Since my son became engaged, my husband has managed to lose over twenty pounds. What about me? Well, despite the fact, that I eat a small-portioned, healthy diet and work in a mix of cardio and strength training on a regular basis, I’ve not lost a single pound! My trainer tells me not to fret, since I have lost inches and body fat. So what about the appetizers in my refrigerator? Other than at the gym, I hate repetition. Bored with the usual snacks of apples, celery, and carrots, I decided to reward my progress with some healthy gourmet snacks!

Stuffed Cherry Tomatoes Italiano
Recipe as found in Deborah Anderson’s cookbook Easy Gourmet-Style Cooking With 5 Ingredients

Ingredients:
36 cherry tomatoes
1 – 15 oz. can of cannellini beans, drained
1 bunch of fresh basil, plus 24 leaves
2 tablespoons garlic-flavored olive oil
2 tablespoons freshly squeezed lemon juice

Directions:
1. Rinse the tomatoes and set aside.
2. Also wash and set aside 24 small basil leaves and chop remaining basil.
3. Cut 12 tomatoes in half, squeeze out all the seeds and juice, dice and set aside.
4. In a food processor or blender, puree the beans, basil, garlic oil and lemon juice until it reaches a finely chopped consistency.
5. Place pureed bean mixture in a medium bowl. Stir in the chopped tomatoes and chopped basil.
6. Remove top 1/4 portion from remaining 24 tomatoes and discard.
7. Slightly squeeze out the seeds, liquid and pulp using a small spoon, so you can create a cavity within the tomatoes.

8. Fill tomatoes with the bean mixture.
9. Garnish each tomato at the top with 1 basil leaf.

Makes 2 dozen.

Linnell’s Notes:
1. Having large ripe tomatoes sitting on my kitchen counter, I decided to dice those instead of the cherry tomatoes.
2. I used a little bit more lemon juice than called for, just to give it a fresher flavor.
3. I added half a shallot, a little salt and freshly ground pepper to the food processor before adding the beans.
4. You don’t want to over process this bean filling. It should still have small chunks of bean in it.
5. The recipe confusingly adds the basil twice – once to the food processor and then again to the pureed bean mixture. I ended up adding some to the food processor, and added in a bit more with the tomatoes. Although I love basil, I would probably not add as much the next time I make this recipe.
6. I did not discard the tomato tops as instructed in step 6. Instead, I diced them and added them to the bean mixture. I hate to waste food!
7. I used the small side of the melon baller to scoop out the tomatoes and then inverted the tomatoes on a paper towel to drain. A small demitasse spoon was used to fill the tomatoes and the mushrooms with bean filling.
8. Garnishing the tomatoes and the mushrooms in the photo are tiny Globe Basil branches from my garden.
9. The bean mixture is also delicious in baby bella mushrooms.

Enjoy!

Read Full Post »

My husband seemed very pleased with himself as he carried the groceries into the house. “What’s up?” I queried while poking my nose into one of the bags. “I bought you something,” he proudly replied. Pondering what he could have bought for me at the grocery store, I said, “Oh, really?” While waiting in line at the check stand, my darling husband succumbed to the store’s clever merchandising ploy of surrounding the area with tempting, impulsive, and last-minute-purchase items. As he described the food magazine he purchased for me and why he thought it was a good one, I thought to myself, “How lucky am I? I have a husband who doesn’t mind running out to the grocery store and who thinks of me while he’s there!”

From my new magazine comes this appetizer version of a classic banh mi, a Vietnamese sandwich. Banh mi sandwiches usually require a light crispy baguette, some type of meat, cucumber strips, jalapeño slices, cilantro sprigs, and pickled daikon and carrots. This simplified version is an easy and delicious way to use up some of your leftover Easter ham!

Banh Mi Bruschetta
Better Homes and Gardens, Best-Loved Reader Recipes, submitted by Amanda Humann

Ingredients:
24 ½-inch slices baguette-style French bread
1/3 cup mayonnaise
2 tablespoons soy sauce
6 ounces thinly sliced cooked ham
1 English cucumber, sliced or shredded
1 cup shredded carrots (2 medium)
1/2 cup coarsely snipped fresh cilantro
Thin fresh jalapeño chile pepper slices, optional
Lime wedges, optional

Directions:
1. Preheat broiler. Spread one side of each bread slice with mayonnaise. Place bread slices, spread sides up, on a baking sheet. Broil 4 to 5 inches from the heat about 1 minute or just until starting to brown. Brush lightly with soy sauce. Broil for 1 minute more.

2. Top bread slices with ham, cucumber, carrots, and cilantro. If desired, garnish with jalapeño slices and serve with lime wedges.

Linnell’s Notes:
1. To make this appetizer more like an authentic banh mi, make up a batch of pickled daikon and carrots and use it to top the mini banh mi stacks.

2. There’s no need to measure out the mayonnaise. Using a spatula, just spread it directly from the jar onto the bread. You’ll find that you’ll use less than the 1/3 cup called for.

3. Carrots should be coarsely grated or julienned.

4. If whole slices of jalapeño seem too spicy for you, cut the peppers into strips or coarse chop them. I wear rubber gloves (designated for food prep only) when I cut peppers. Hot chile peppers have oils that can burn your skin and eyes, so make sure you wash your hands with soap and water after working with them!

Enjoy!

Read Full Post »

The invitation read, “Last names: A-M hearty appetizer, N-Z dessert.” I sighed, put the invitation on my desk and thought, “Appetizers, again.” With a last name that begins with a letter in the first part of the alphabet, I’m pretty much destined to bring appetizers to every group party I’m ever invited to attend. Although, just once, I’d like to bring a dessert, I’m thankful that my situation has caused me to test and build up a pretty nice collection of appetizer recipes!

This recipe for Cheese Squares comes from my friend Kate, who got the recipe from her mother. Kate recently made these for a pre-wedding bash she hosted for her daughter. Helping Kate in the kitchen that evening was my strategy to be closer to the food – someone had to keep an eye on and sample all of the hot appetizers coming out of the oven! Kate outdid herself, as usual, and all her appetizers were delicious, but this one was a standout. If you like cheddar cheese, butter, and cream cheese, you will like these delicate puffs of bread dipped in a frothy mixture of those sinfully rich ingredients and then baked to a delicious, light golden brown.

Cheese Squares

Ingredients:
1/4 pound Tillamook cheddar cheese, grated
1 cube butter
13 ounces cream cheese
2 eggs
Unsliced loaf of bread, such as Challah or 1-inch thick slices of Texas Toast bread

Directions:
1. Cut crust off bread and cut into 1-inch cubes.

2. Melt the first three ingredients in a double boiler. Let cool for a bit.

3. Separate egg whites from the yolks. Beat egg whites until stiff and add to slightly cooled cheese-butter mixture.

4. Dip cubes of bread into the egg white-butter-cheese mixture and place on a greased or parchment-covered baking sheet.

5. Refrigerate cubes overnight. Kate has had the best luck when she quick-freezes the squares on a cookie sheet – both if she wants to cook them right away or if she wants to freeze them for future use. If she’s going to freeze them for future use, she makes sure they are completely frozen on the cookie sheet before placing them in a zip-type plastic bag or else they will stick to the inside of the bag.

6. Bake at 400 degrees F for 10-12 minutes.

Linnell’s Notes:
1. Obviously, the better the ingredients, the better the flavor. Buy flavorful bread and good cheese.

2. I made some Cheese Squares several months ago and froze the extra. Surprisingly, when my freezer went out recently and I was forced to bake these, they still tasted good!

Enjoy!

Read Full Post »

Older Posts »

%d bloggers like this: