Feeds:
Posts
Comments

Posts Tagged ‘Recipes’

Entering the Creepy Room A white door at the top of the stairs rests slightly ajar and tempts a young woman to enter. The floor groans as she takes her first steps into the dusty room. As her eyes adjust to the dim light, she spies dark shapes lined up under the shuttered windows. Closer inspection reveals large bags leaning against one another for support. At the tops of the bags, scrawled in cursive handwriting, are the words: Torsos, Necks, Bottoms, and Arms. Red specks cover the carpet and a cutting blade lies nearby. It’s quite a messy scene. “Mom’s at it again,” the young woman sighs. Acknowledging her mother’s late night activities forces the woman to shiver and contemplate the approaching cold weather. As she slowly closes the door behind her, she says thoughtfully, “How nice. Mom’s making more t-shirt scarves for the homeless.”

#1 – Igniting a Strand of Firecrackers
T-shirts 
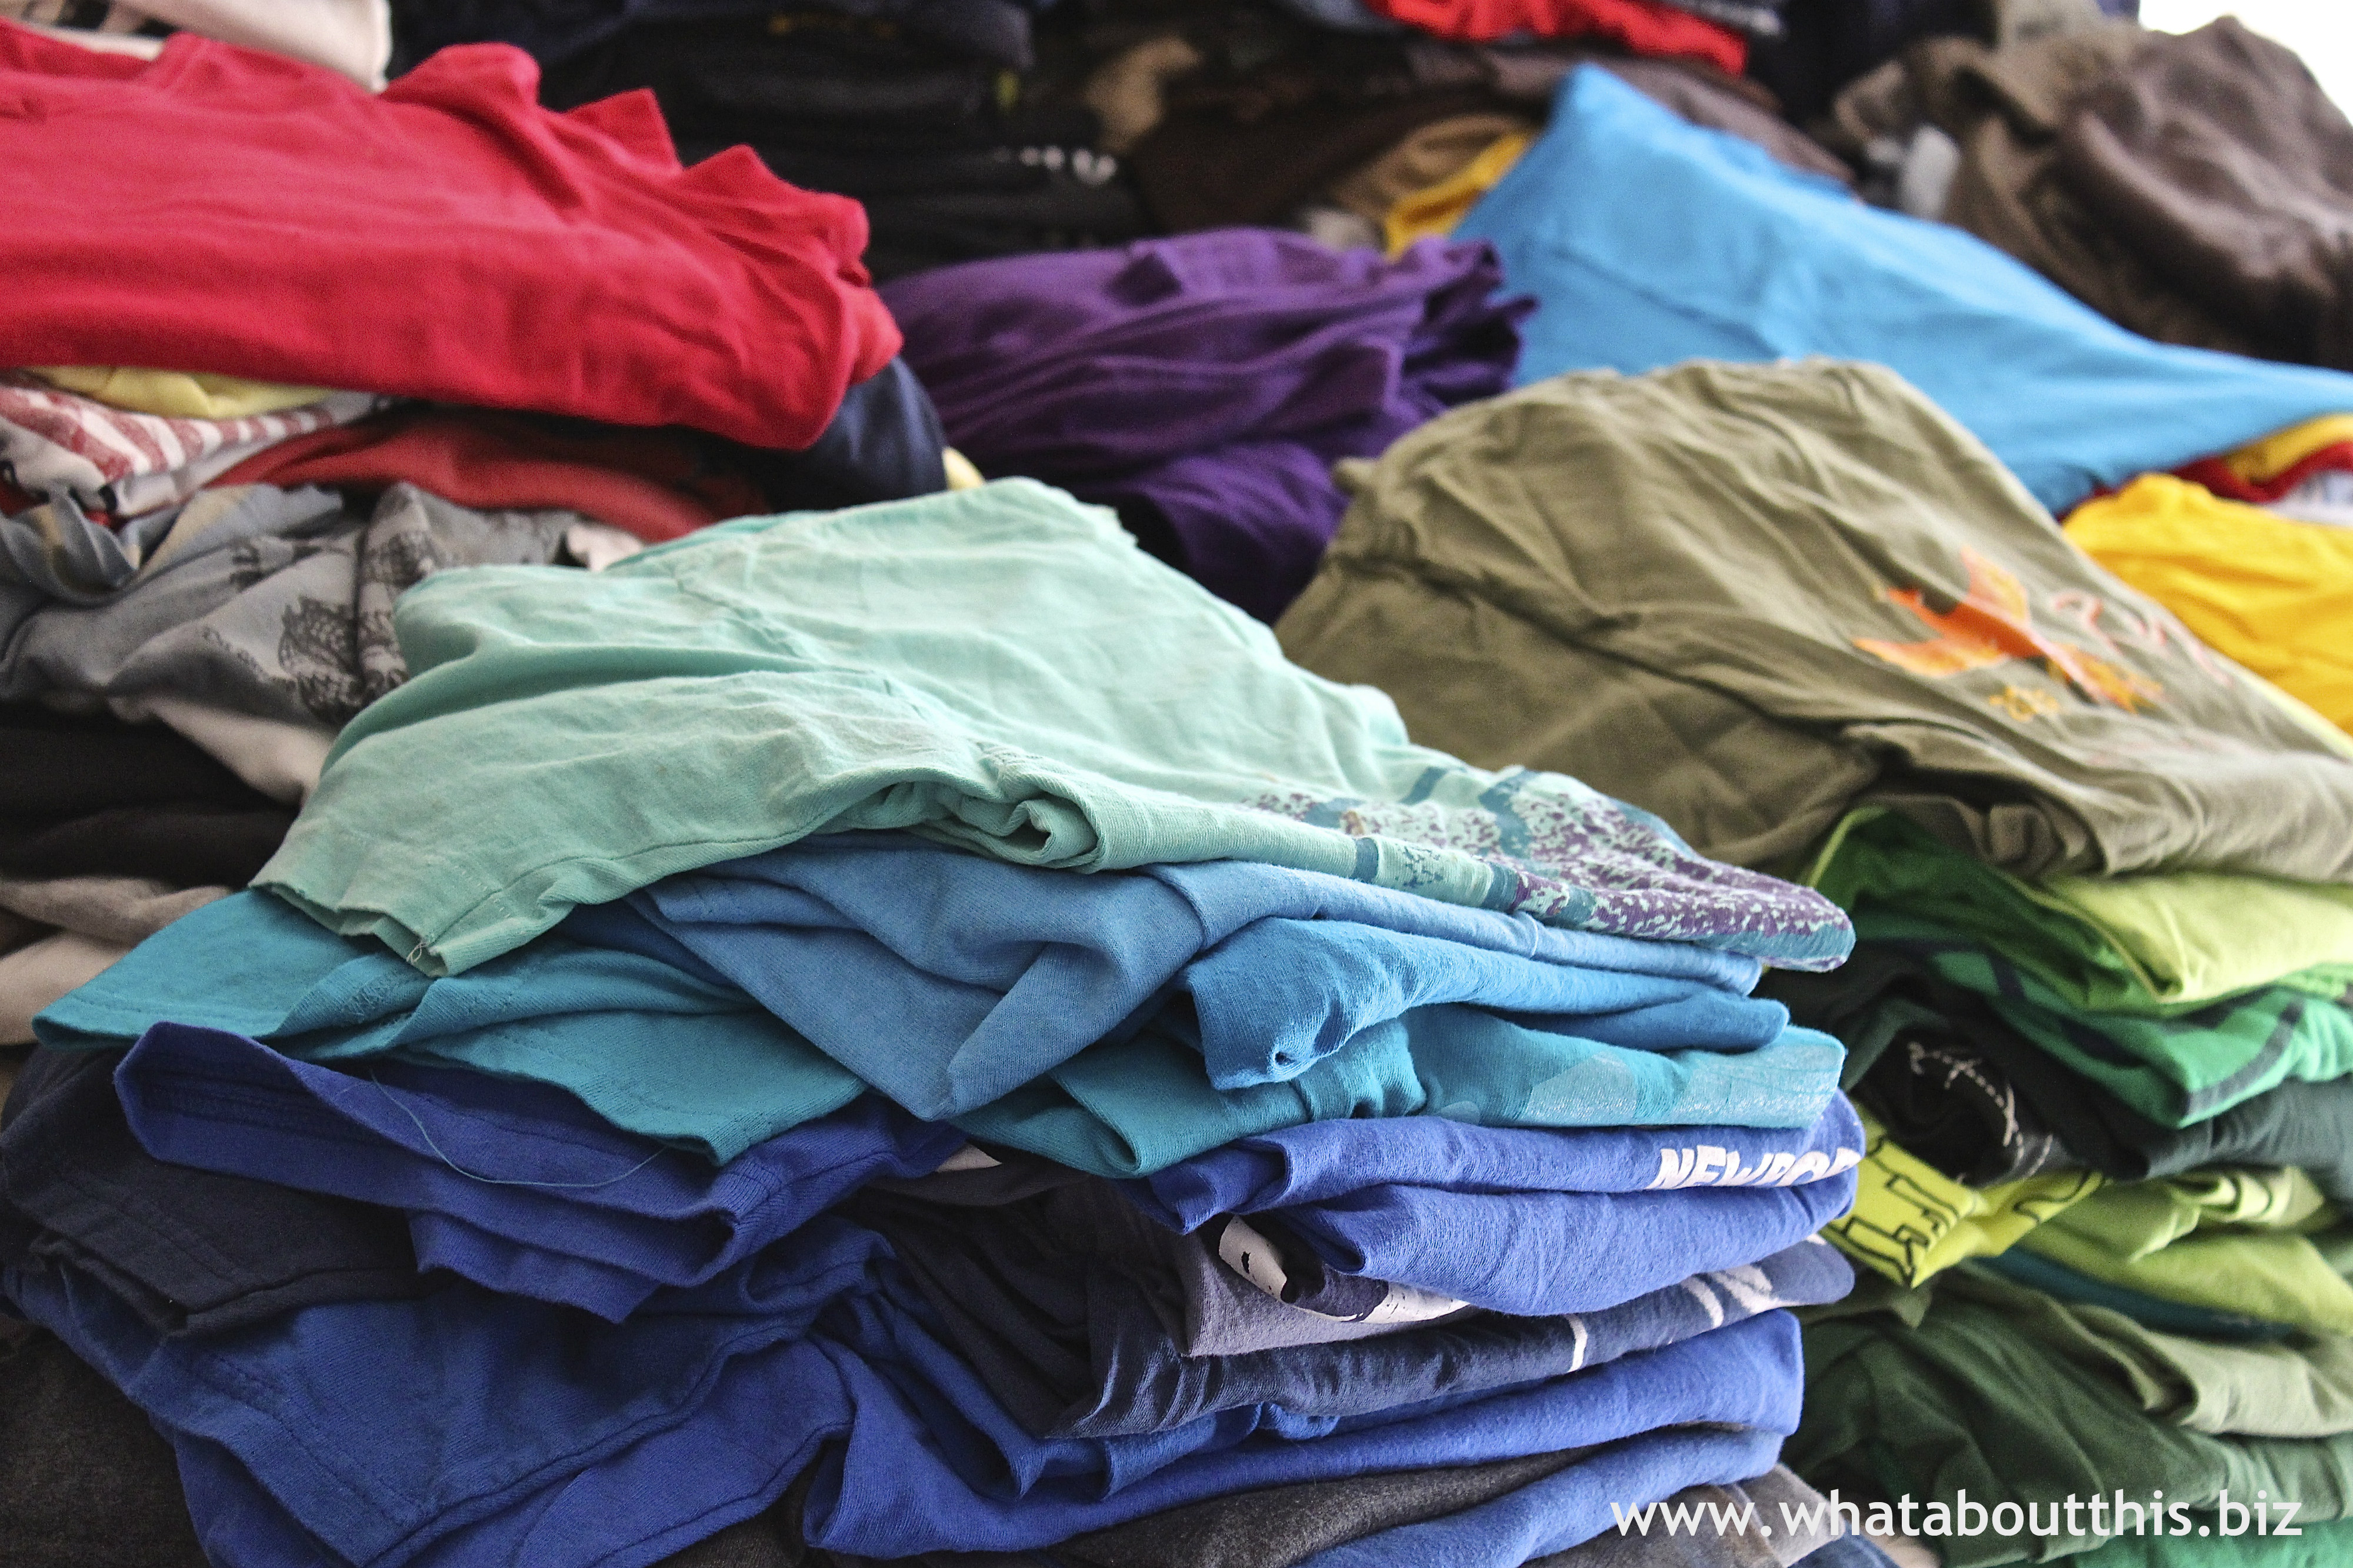
The power of one is like lighting the fuse on a strand of firecrackers. In September, I conceived an idea that would help both the homeless and planet Earth. In 100 Scarves: Making T-Shirt Scarves for the Homeless, I wrote about making scarves and tote bags from clean and gently used t-shirts. To help me reach my goal, I solicited t-shirt donations from friends and acquaintances. To date, I’ve made over 50 t-shirt scarves and 10 t-shirt tote bags and taken them to a local homeless shelter. When a dear friend of mine saw the scarves and bags she was inspired to help. Not only did she clean out her drawers and closets, she asked her friends to do the same. Very quickly word spread and soon friends of friends were donating t-shirts. Sitting in my dining room are close to 500 t-shirts and other pieces of clothing. Items such as jackets, vests, sweaters, and long-sleeved t-shirts will be donated to the shelter as is. People I don’t even know purchased brand new t-shirts to donate to my cause. Another friend gave me scarves she had knitted which reminded me of my own bag of knitted goods. All the scarves I’d knitted, but never given away as gifts were added to the pile. Once a strand of firecrackers ignites, each individual explosion affects the next one and the spark continues.

#2 – Monster Face Pizzas
Monster Face Pizzas Monsters are everywhere this time of the year. They can even be found hiding in our food! From Rhodes Bake-N-Serv Blog comes this monstrously easy idea. Think of how much fun kids would have creating their own Monster Face Pizzas at a Halloween party!

#3 – Art That Makes The Cut
Yulia-Brodskaya10-640x808 Using a technique called quilling, Moscow-born artist Yulia Brodskaya painstakingly cuts, curls, rolls, and glues paper to create her incredible three dimensional artwork, as seen on fubiz and on her website.

#4 – Creative Ideas
Chair and Bookshelf All In One
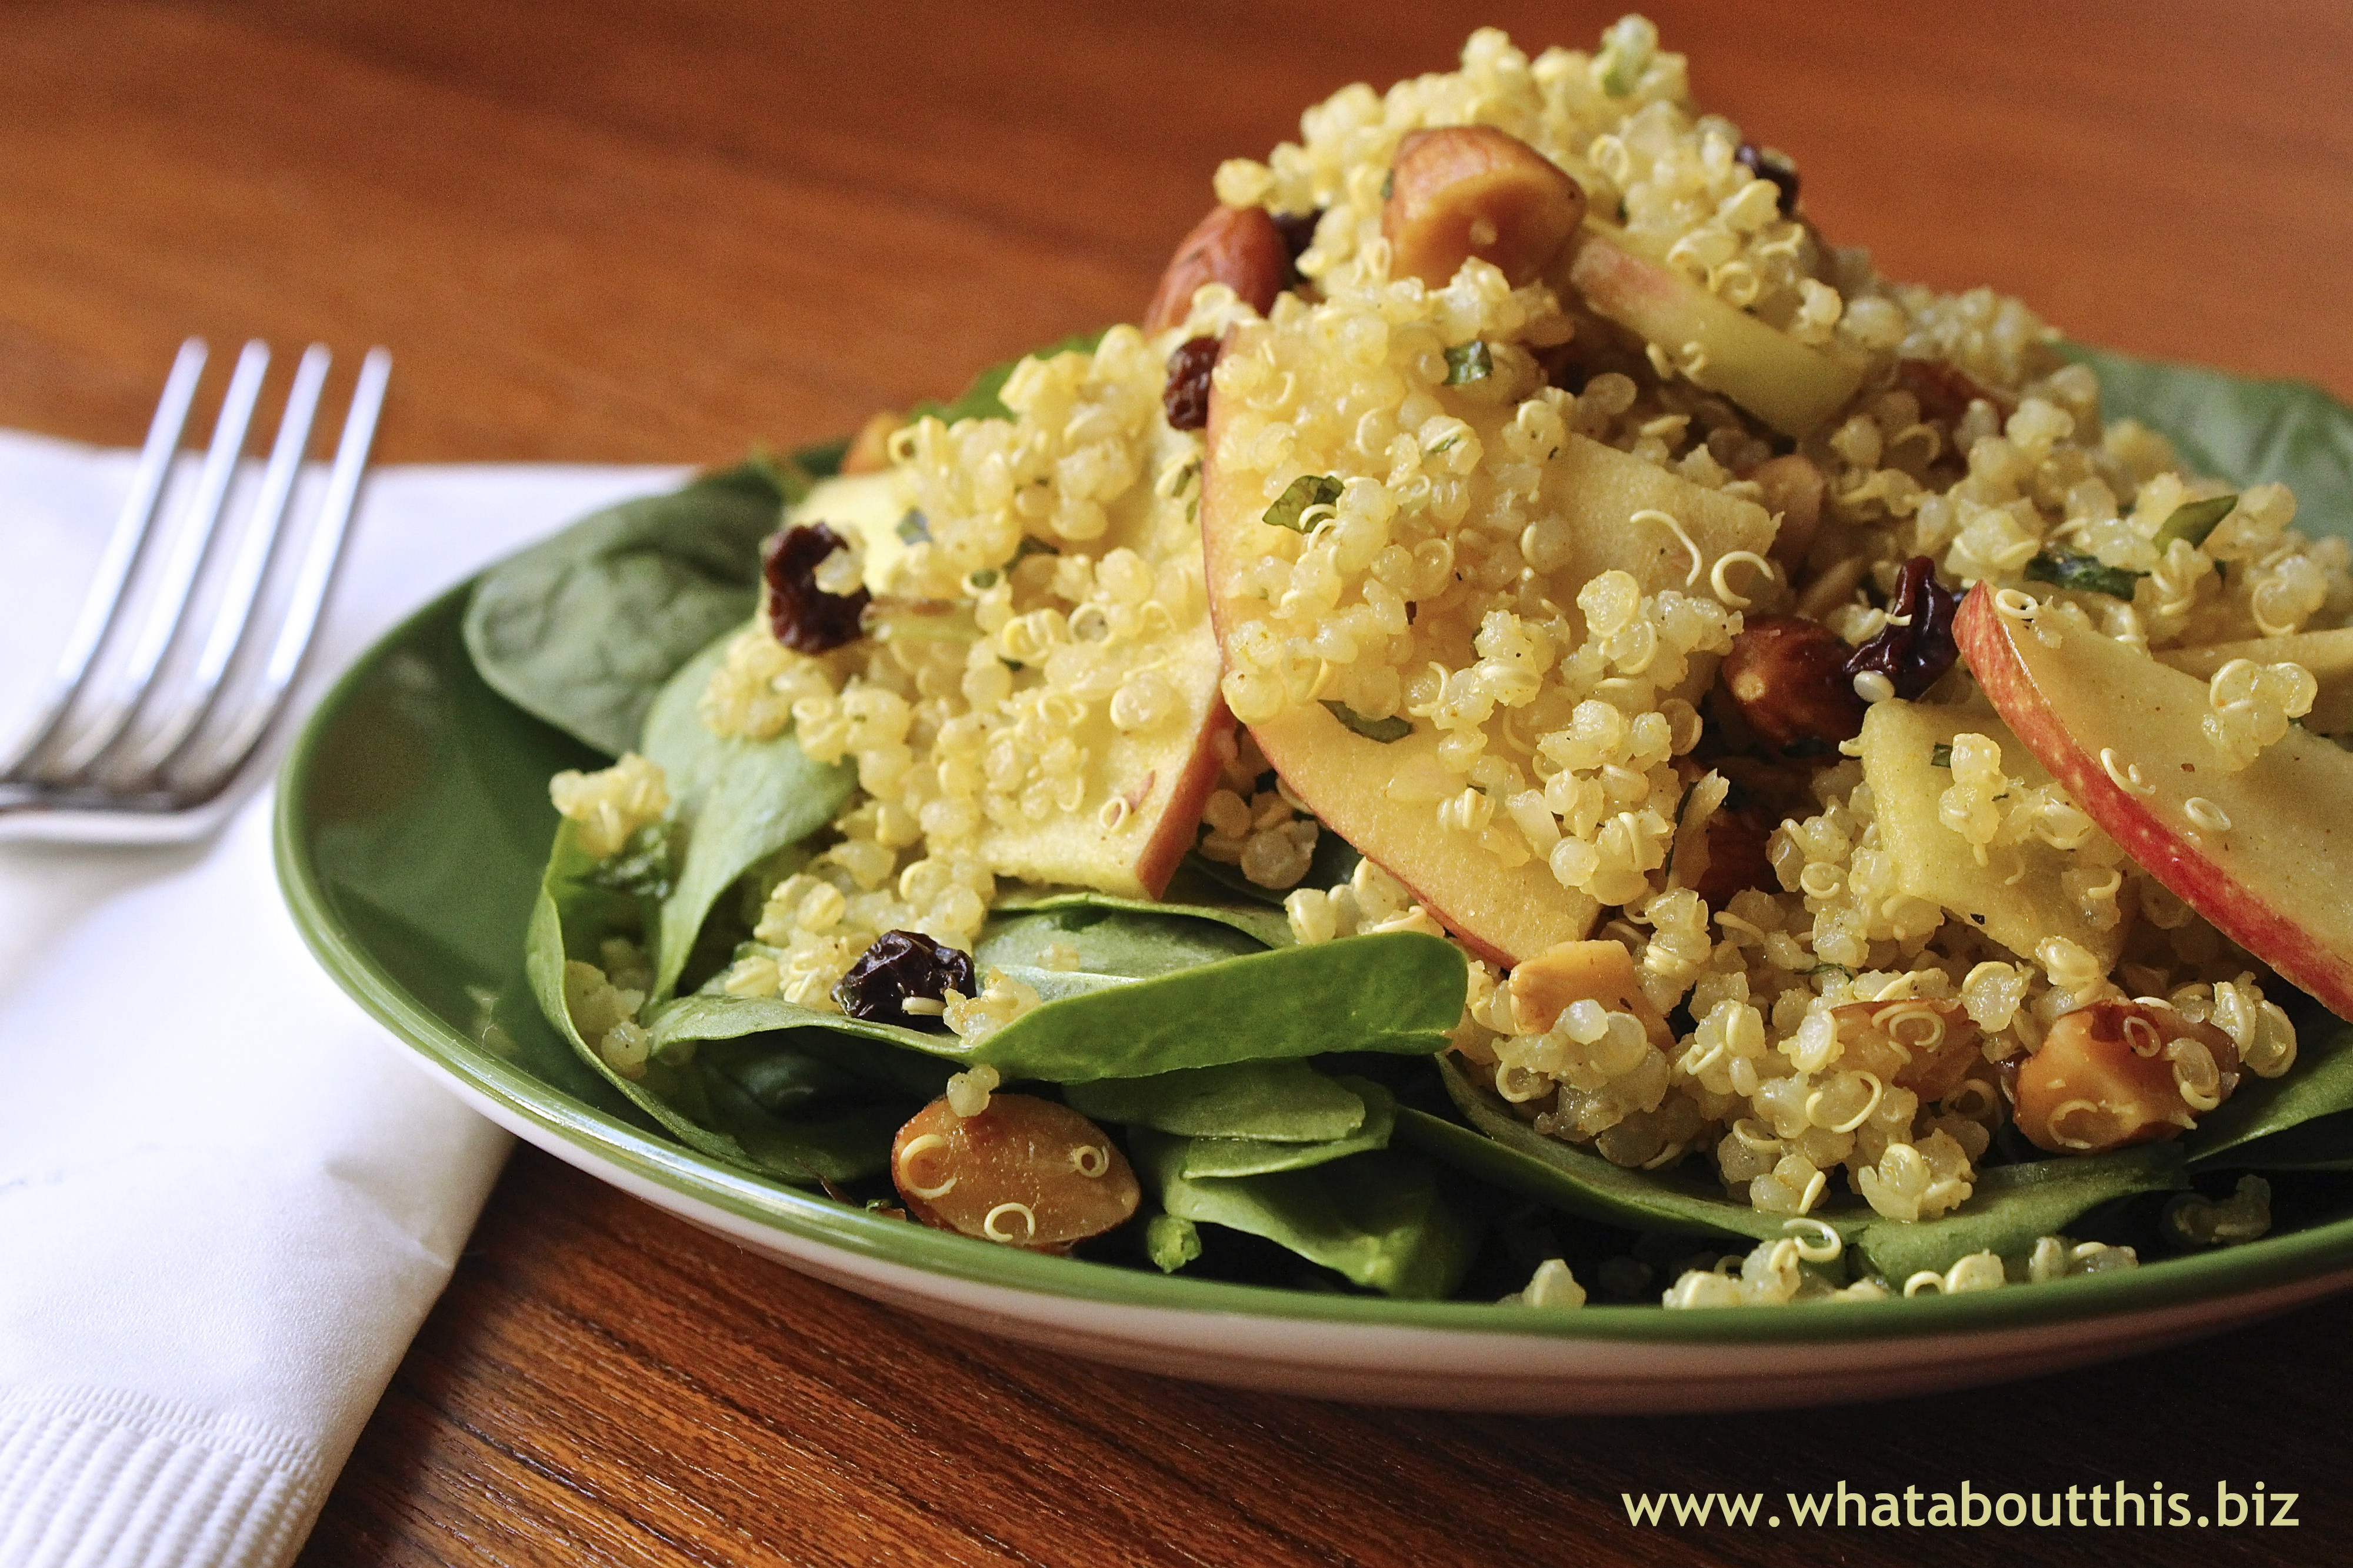
Recipes, design concepts, storage solutions, and re-purposing ideas can all be found in Simple Ideas That Are Borderline Genius. Some of them I’ve posted about in the past, but others are new to me. Who doesn’t appreciate a good idea?

#5 – The Power of One
“First with the head, then with the heart, you’ll be ahead from the start.”
Bryce Courtenay, The Power of One

NOW GO AND SPREAD JOY!

Read Full Post »

Bread Pudding Muffins My husband has two sweet loves that drive him crazy. Both possess endearing qualities that he cannot resist. If ever they appeared together, he would be beside himself with indecision. Recognizing that his birthday highlights this conflict, I decided to alleviate his stress this year. I figured out a way he could have his cake and eat it too—a way he could enjoy one love in the morning and one love after dinner. For breakfast I made him custard-rich bread pudding muffins and in the evening he blew out birthday candles on a moist and spicy carrot cake. Problem solved.

Bread Pudding Muffins
The Grand Central Baking Cookbook

INGREDIENTS
1 pound crusty artisan white bread
1/2 teaspoon ground cinnamon
6 eggs
3/4 cup granulated sugar
1½ cups heavy cream
1½ cups milk
2 teaspoons vanilla extract
Confectioners’ sugar, for dusting

DIRECTIONS
1. Slice the bread and cut it into 1-inch cubes. Put it in a large bowl and toss it with the cinnamon.

2. Whisk the eggs, sugar, cream, milk, and vanilla together until well combined, then pour the custard over the bread. Cover and refrigerate for at least 4 hours and up to 24 hours.

3. Preheat the oven to 325 degrees F.

4. Line a standard-size 12-cup muffin tin with paper liners, or generously grease with butter.

5. Scoop a heaping 1/2 cup of the pudding mixture into each of the 12 muffin cups; each one should be nicely mounded. Top off each pudding with the remaining custard.

6. Bake for 45 minutes, rotating the tin halfway through the baking time. The puddings should be lightly golden brown on top. Dust them with confectioners’ sugar while they’re still warm.

Makes 12 Pudding Muffins

LINNELL’S NOTES
1. Because of the amount of soaking time involved, if you plan on serving these muffins in the morning, it is best to begin soaking the bread the evening before.

2. I was able to get 18 muffins out of the recipe.

3. Although these are categorized as muffins, these little bread puddings would make nice individual desserts.

ENJOY!

Read Full Post »

Cinnamon Beef Noodles Ribbons of fat noodles soak up a spicy and aromatic broth while tender chunks of beef and green spinach leaves float by. How’s that for comfort food on a cold night? The use of cinnamon in a beef and noodle recipe may leave some people wondering. Wonder no more. For without a doubt, the cinnamon, together with the ginger, aniseed, and hot chile paste, undeniably adds a lovely complexity to the flavors in this simple and appealing dish.

Cinnamon Beef Noodles
Nina Simonds Asian Noodles Cookbook

INGREDIENTS

1 teaspoon safflower or corn oil

Chile-Cinnamon Seasonings:
6 scallions, trimmed, cut into 1½-inch sections, and smashed lightly with the flat side of a knife

6 cloves garlic, peeled, smashed lightly with flat side of a cleaver, and thinly sliced

4 slices fresh ginger (about the size of a quarter), smashed lightly with the flat side of a knife

1½ teaspoons hot chile paste

2 cinnamon sticks

1 teaspoon aniseed

Remaining Ingredients:
8½ cups water

1/2 cup soy sauce

2 pounds chuck or beef stew meat, trimmed of fat and gristle, and cut into 1½-inch cubes

10-ounces spinach, trimmed, rinsed, and drained

1/2 pound flat Chinese wheat-flour noodles, udon, or other flat noodles, such as fettuccine, cooked until just tender, rinsed under warm water, and drained

3 tablespoons minced scallions

DIRECTIONS
1. Heat a large pot or casserole over medium-high heat. Add the oil and heat until hot, about 30 seconds. Add the chile-cinnamon seasonings and stir-fry until fragrant, about 15 seconds.

2. Add the water and the soy sauce and bring to a boil.

3. Add the beef and bring back to a boil.

4. Reduce the heat to low, cover, and simmer for 1½ hours, or until the beef is very tender. Skim the surface to remove any impurities or fat.

5. Remove the ginger slices and cinnamon sticks and discard.

6. Add the spinach and bring to a boil.

7. Divide the noodles among six soup bowls. Ladle the meat, spinach, and broth over the noodles and sprinkle with scallions. Serve.

6 Servings

LINNELL’S NOTES
1. I used half low-sodium soy and half regular soy, because I was concerned about the broth being too salty. It was just right. No additional salt was needed.

2. Because I had 3 pounds of meat, I added an additional stick of cinnamon to the pot.

3. Adding chunks of red pepper will contrast the spinach nicely and give the dish a little bit more color.

4. In her recipe Ms. Simonds states, “The flavor gets better and better every time you reheat it.” Don’t you love food that gets better with time!

ENJOY!

Read Full Post »

Jammers: Biscuits Topped with JamImagine the smell of homemade biscuits wafting throughout your home in the early hours of the morning. You wake up early, before everyone else, because you enjoy the peace and calm of your empty kitchen. The timer rings and you take a tray of jammers, large buttery biscuits topped with jam, out of the oven. You restrain yourself from taking a bite into one, because you know that they will reach perfection in about five minutes. That gives you just enough time to brew a mug of coffee or steep a cup of tea. You eye the clock as five minutes turns into an eternity. Finally, you sit down with your hot brew and stare at the plate of jammers. You carefully select the largest one that has the biggest glob of jam on top. And after only one bite, pure delight spreads across your face as the crunchy exterior yields to the soft flaky interior. Ah, there’s no better way to start the day than with a hot jammer!

Grand Central Bakery Jammers
The Grand Central Baking Cookbook

INGREDIENTS
4 cups (1 pound, 4 ounces) all-purpose flour
3 tablespoons granulated sugar
2 teaspoons baking powder
1½ teaspoons salt
1 teaspoon baking soda
1 cup (8 ounces, or 2 sticks) cold unsalted butter
1¼ to 1½ cups (10 to 12 fluid ounces) buttermilk
About 3/4 cup good quality preserves or jam

DIRECTIONS
1. Preheat the oven to 350 degrees F. Lightly grease a baking sheet or line it with parchment paper.

2. Measure the flour, sugar, baking powder, salt, and baking soda into a bowl with high sides or the bowl of a stand mixer and whisk to combine.

3. Dice the butter into 1/2-inch cubes. Use your hands or the paddle attachment of the stand mixer on low speed to blend the butter into the dry ingredients until the texture of the flour changes from silky to mealy. There should still be dime- to quarter-size pieces of butter remaining. If you’re preparing the dough the night before, cover the bowl with plastic wrap and chill overnight; otherwise proceed with the recipe.

4. Make a well in the flour mixture and pour 1 cup of the buttermilk in one addition. Gently mix the dough just until it comes together; it will look rough. Scrape the dough from the sides and bottom of the bowl, then add another 1/4 cup buttermilk and mix again to incorporate any floury scraps. The majority of the dough will come together, on the paddle if you are using a stand mixer. Stop mixing while there are still visible chunks of butter and floury patches. The dough should come out of the bowl in 2 to 3 large, messy clumps, leaving only some small scraps and flour around the sides of the bowl. If the dough is visibly dry and crumbly, add up to 1/4 cup more buttermilk, 1 tablespoon at a time, mixing no more than one rotation after each addition.

5. Turn the dough out onto a lightly floured surface. Use the heels and sides of your palms to gather the dough and gently pat it into an oblong shape 1½ to 2 inches thick. It won’t look smooth or particularly cohesive; that’s okay. Use a biscuit cutter to cut jammers into circles at least 2½ inches in diameter. Layer the leftover scraps on top of one another and gently pat them out to a thickness of 1½ to 2 inches and again cut into circles.

6. Use you thumb to make an indentation the size of a fifty-cent piece in the middle of each biscuit. While gently supporting the outside edge of the biscuit with your fingers, use your thumb to create a bulb-shaped hole that’s a bit wider at the bottom and that goes almost to the bottom of the biscuit (think pinch pot). Try to apply as little pressure as possible to the outside of the biscuit, to avoid smashing the layers, which are the key to flaky jammers.

7. Fill each indentation with 1 tablespoon of jam and put jammers on the prepared baking sheet with 1½ inches between them.

8. Bake for 35 to 40 minutes, rotating pan halfway through the baking time. The jammers should be a deep golden brown.

Makes 10 to 12 jammers

LINNELL’S NOTES
1. These are very large biscuits! I was only able to make 8 biscuits from the recipe.

2. The key to achieving a flaky biscuit is to keep the butter cold and to avoid overworking the dough.

3. I baked my jammers for 35 minutes in a convection oven and they were done perfectly.

ENJOY!

Read Full Post »

Miniature Rose Several dozen rose bushes reside in my garden and, just like my children, I appreciate each one of them for their unique qualities and gifts. But, unlike my children, I have a favorite. With blossoms smaller than a penny, but just as pretty as their full-sized counterparts, this micro-miniature rose bush captures my fancy with its petite stature and amazing hardiness. In a world where everything is super-sized, don’t forget to appreciate the little things in in life.

#1 – The World of Miniatures

Video screenshot, Who Lives There, c Art+Practice.

Video screenshot, Who Lives There, © Art+Practice

After watching a four-minute documentary on Dawn Reese, a miniature artist and dollhouse builder from Ohio, I was reminded of my fascination with the world of miniatures and of my own small childhood collection. If you’ve ever been intrigued with teeny tiny things or played with dollhouses, you’ll enjoy watching Who Lives There. Both the video and additional information about Dawn Reese can be found in a well-written article on Yatzer.

#2 – October Food Fest
Apple and Browned Butter Tart It will be no small feat to keep yourself from salivating as you peruse through the photos of BuzzFeed’s 31 Delicious Things to Cook in October. What will be even more difficult to do, will be to decide which recipe to try first! Mash Potato Cheddar and Chive Waffles or Pumpkin Bread Pudding with Dulce de Leche?

#3 – Travel Tips
40 Travel Tips to Help You Travel Smarter, Cheaper, Safer . . . Little tips can make a big difference when traveling. Flashpacker Family shares this list of 40 Tips to Help You Travel Smarter, Cheaper, Safer, Lighter . . . and my guess is that there’s at least one tip in it that you haven’t thought of before.

#4 – Less Is More
In this short TED video, writer and designer Graham Hill suggests that less can mean more in life. Watch it and see if you agree.

#5 – It’s the Little Things
“Everyone is trying to accomplish something big, not realizing that life is made up of little things.” Frank A. Clark

Enjoy life and spread joy!

Read Full Post »

Quinoa and Apple Salad with Curry Dressing If you are looking for a salad that is a little bit sweet, a little bit spicy, a little bit crunchy, and quite a bit healthy, look no more. Serve this easy-to-make salad year-round. But with the abundance of freshly-harvested apples here in North America, the best time to serve this salad will be in the fall. With flavor powerhouses such as curry, honey, lemon, and mint you wouldn’t expect this salad to be so mild and delicately balanced. On the nutritional side, this salad’s no slouch either. Per serving, as provided on the recipe’s original site, it contains: 304 calories, 14 gr fat, 0 mg cholesterol, 38 g carbs, 154 mg sodium, 8 g protein, and 5 g fiber. Good for you and great tasting – that’s what I call a win-win recipe!

Quinoa and Apple Salad with Curry Dressing
Martha Stewart Living Cookbook, Volume 2

INGREDIENTS
1/4 cup raw whole almonds
1 cup white quinoa
1 teaspoon honey
1 tablespoon finely chopped shallot
1 teaspoon curry powder
1/4 teaspoon coarse salt
2 tablespoons fresh lemon juice
Freshly ground pepper
2 tablespoons extra-virgin olive oil
2 tablespoons dried currants
1 small McIntosh apple, cut into 1/8-inch-thick wedges.
1/4 cup loosely packed fresh mint leaves, coarsely chopped, plus more for garnish

DIRECTIONS
1. Preheat oven to 375 degrees F. Spread almonds on a rimmed baking sheet; toast in oven until lightly toasted and fragrant, about 7 minutes. Let cool; coarsely chop nuts.

2. Rinse quinoa thoroughly in a fine sieve; drain. Bring 2 cups of water to a boil in a medium saucepan. Add quinoa; return to a boil. Stir quinoa; cover, and reduce heat. Simmer until quinoa is tender but still chewy, about 15 minutes. Fluff quinoa with a fork; let cool.

3. Whisk together honey, shallot, curry powder, salt and lemon juice in a large bowl. Season with pepper. Whisking constantly, pour in oil in a slow, steady stream; whisk until dressing is emulsified. Add quinoa, currants, apple, mint, and nuts; toss well.

4. Garnish with mint.

Serves 4

LINNELL’S NOTES
1. Here’s a time-saving tip: I roast different varieties of nuts (almonds, walnuts, and pecans) in bulk and after they’ve cooled, I put them in separate airtight bags and store them in the freezer. When needed, I just reach into the freezer and remove the required amount. Except for chopping the nuts, I was all but done with step 1.

2. The amount of curry specified results in a very mild curry flavor. For those of you who prefer a more distinct curry flavor, more curry powder can be added in step 3.

3. I couldn’t find a McIntosh apple, so I used a Honey Crisp. I cut the apple into 1/8-inch thick slices and cut those slices in half crosswise. I felt the whole slices would be too large in proportion to the rest of the ingredients. Thanks to the lemon juice in the dressing, the apples do not turn brown in this salad, even when refrigerated overnight.

4. The recipe just doesn’t taste as good without the mint leaves. It makes a difference – the cool mint flavor balances the slight spiciness of the curry very well.

5. I served the quinoa salad on a bed of baby spinach and arugula leaves. Next time I think I will make a double batch of the dressing and toss a little bit of it with the greens just prior to plating. The dressing will help the other salad ingredients cling to the leaves better.

Enjoy!

Read Full Post »

Grilled Fish Tacos If you raise children to have adventurous taste buds and you give them an appreciation for well-prepared food, most likely they will grow up to be good cooks. This little bit of parental advice may not hold true for everyone, but I’ve been rewarded in spades. All my children enjoy cooking good food as much as they enjoy eating good food. Not only do my children enjoy good food, they also share it. I’ve been the lucky recipient of some really wonderful meals prepared by them. A couple of weeks ago, my middle child and his wife treated me to delicious homemade fish tacos. Because they were so good, I had big-time cravings for them and had to make them for myself. These fish tacos are easy to prepare, moist, flavorful, and healthy. No batter or deep-frying involved. Fish Taco Fridays may become a regular occurrence in this household!

Grilled Fish Tacos
Adapted from a Bobby Flay recipe

INGREDIENTS
Tacos:
1 pound white fish, such as mahi mahi, orata, tilapia, basa, etc.
1/4 cup canola oil
1 lime, juiced
1 tablespoon ancho chili powder
1 jalapeño, coarsely chopped
1/4 cup chopped fresh cilantro leaves
8 flour tortillas*

Garnish:
Shredded white cabbage
Hot sauce, tomato salsa, or pico de gallo
Crema or sour cream
Thinly sliced red onion
Thinly sliced green onion
Chopped cilantro leaves
Queso Fresco, crumbled

DIRECTIONS
1. Preheat grill to medium-high heat.

2. Place fish in a medium size dish. Whisk together the oil, lime juice, ancho, jalapeño, and cilantro and pour over the fish. Let marinade for 15 to 20 minutes.

3. Remove the fish from the marinade and place onto a hot grill. Grill the fish for 4 minutes on the first side and then flip for 30 seconds and remove. Let rest for 5 minutes.

4. Place the tortillas on the grill for 20 seconds.

Serves 4

LINNELL’S NOTES
1. *I use corn tortillas instead of flour tortillas. I think they are a better choice for tacos and they are slightly healthier to eat.

2. If you don’t want to grill the tortillas, you can warm them up in a frying pan on your cooktop.

3. The Kachumbari Salad I prepared last week goes wonderfully with these fish tacos.

Enjoy!

Read Full Post »

Kachumbari Salad: A Kenyan Tomato Salad Sweet vine-ripened tomatoes, the gems of summer, make the perfect base for salads. From Kenya comes this recipe that pairs tomatoes with red onions, cilantro, chile, and lime juice. Visually attractive and packed with flavor, this salad is the perfect side dish for summer entertaining. Tonight, those incredible flavors will marry beautifully with the fish tacos I’m serving!

Kachumbari Salad
Share: The Cookbook that Celebrates Our Common Humanity

INGREDIENTS
1 lb firm and ripe tomatoes, sliced or diced
1-1½ red onions, very thinly sliced
4 tablespoons fresh cilantro, chopped
1/4 cup extra virgin olive oil
1 chile, sliced (optional)
1-2 tablespoons lemon or lime juice
Salt and freshly ground black pepper

DIRECTIONS
1. Place the tomatoes into a medium salad bowl with the onions. Stir in the chopped cilantro.

2. Drizzle with the olive oil and stir in the chile, if using. Season and gradually add the lemon or lime juice to taste.

Serves 4

LINNELL’S NOTES
1. One pound of tomatoes is approximately 2.5 large tomatoes. For this recipe I used about two pounds of assorted tomatoes (cherry, heirloom, and beefsteak).

2. I cut the cherry tomatoes in half from top to bottom, but the larger tomatoes, I sliced crosswise into rounds.

3. Because I sliced them into rounds, I gently mixed the salad in a large pan instead of a bowl. This salad is attractive when arranged on a platter.

4. I used half of a red onion instead of a whole one and I’m glad I did. Even with this reduced amount, there were a lot of onions in this salad.

5. Here are some tips from Craig Kielburger, the contributor of this recipe to the cookbook: If you prefer a milder onion flavor, rinse the onion slices in hot salty water before putting them in the salad. This will ensure the onion is less harsh on the palate. Squeeze the lemon or lime juice into the salad just before serving to avoid sogginess. If the tomato and onion are chopped more finely, this recipe also works well as a homemade salsa.

6. The chile is optional, but its heat adds a nice flavor dimension to the salad.

ENJOY!

Read Full Post »

Garden Spider Image Helen, named after the main character in a children’s book, makes picking cherry tomatoes and cucumbers in my garden a challenging experience. People with arachnophobia would avoid this task, since Helen, a large garden spider, has woven a three-foot by six-foot web around the plants. As I look at her work, I recall reading Be Nice To Spiders to my children several decades ago. The storyline revolves around Helen, a spider, who provides many useful services to a zoo. My quandary is what I should do with my new pest-guest and her giant web? Should I destroy it and relocate her or should I just leave her alone and let her do her job?

#1 – Time to Move On
Left undisturbed, Helen, the spider, moved on within two days of my discovering her. Perhaps it was the constant clicking of my camera shutter that annoyed her? How do most of us know when it’s time to move on in our lives? Marc and Angel Hack Life wrote an article titled 9 Reasons It’s Time to Move On that’s filled with insightful and motivating thoughts.

#2 – Chalk It Up!
DIY Chalkboard Projects Chalkboard paint projects are popping up everywhere, from walls to furniture to wine glasses. There’s no reason not to have fun with this product. Here are a few articles to rev up your creativity:

8 Easy Chalkboard Paint DIYs to Try
20 Ways to Use Chalkboard Paint
22 DIY Chalkboard Projects

#3 -Something to Smile About
Mona Lisa image Here’s a short and fun art history lesson by art historian Kathy Galitz. Watch this 3-minute video from the Metropolitan Museum of Art, where she examines the meaning of smiles during different time periods. We can never learn enough about the world of art, can we?

#4 – Mom’s Recipes
Hand-Written Dutch Apple Cake Recipe I felt like I had discovered lost treasure, when I stumbled upon this flickr site. Someone named Phil scanned and shared all the recipes in his mother’s extensive recipe collection. When I look at the images of handwritten recipes on worn index cards and yellowed newspaper clippings, I appreciate the slice (pun intended) of history and nostalgia that they represent. Plus, I’ve found a few more recipes to try!

#5 – Catching Love
“The means to gain happiness is to throw out from oneself like a spider in all directions an adhesive web of love, and to catch in it all that comes.”
Leo Nikolaevich Tolstoy

Enjoy your weekend!

Read Full Post »

Homemade Ice Cream: Almond Butter Crunch Ice Cream The subject line of an email to my husband read, “Make this for me.” The body of the email was blank, except for a link to an online recipe. Possessing a sweet tooth and being the thoughtful man that he is, my husband came home from work with a shopping bag filled with necessary ingredients. In our family, not only does he bring home the bacon, he makes the ice cream, too!

Almond Butter Crunch Ice Cream
The Noble Pig

INGREDIENTS
1 cup almond butter
3/4 cup sugar
1/2 teaspoon table salt
2 cups heavy cream
2 cups whole milk
2 teaspoons vanilla bean paste or regular vanilla
1 cup vanilla almond crunch granola (large almonds removed) or your favorite granola

DIRECTIONS
1. Add almond butter, sugar and salt to the bowl of a stand mixer. Blend on medium speed for at least 5 minutes.

2. Add cream, milk and vanilla and mix another 2 minutes until fully incorporated.

3. Add cream mixture to the freezer bowl of your ice cream maker and freeze according to manufacturer’s directions. Right before removing, add your favorite granola and let mix in. (If your granola has large chunks, just stir it in rather than pour into the ice cream maker while it’s running.)

4. Place into a container when it’s done and freeze for 3 hours in the freezer.

Makes 1¼ quarts

LINNELL’S NOTES
1. To me this had the saltiness of salted-caramel. Next time, I’ll ask my husband to cut back on the salt and we’ll see which version we like better.

2. I chopped up some toasted almonds that I had on hand and added it to the leftover granola. The additional nuts and granola made a great topping for this ice cream.

3. For those of you wondering if the granola remained crunchy, I can positively say it did–down to the very last spoonful!

Enjoy!

Read Full Post »

« Newer Posts - Older Posts »