Feeds:
Posts
Comments

Posts Tagged ‘Recipes’

five spice pork belly Before you say, “Eww, gross!” at the mere mention of pork belly, consider this: other countries in the world make their bacon from side and back cuts of pork, but here in the United States, we choose to make our bacon from the pig’s belly. In other words, bacon is none other than cured PORK BELLY, so if you’re loving your crispy bacon in the morning, you are eating pork belly!

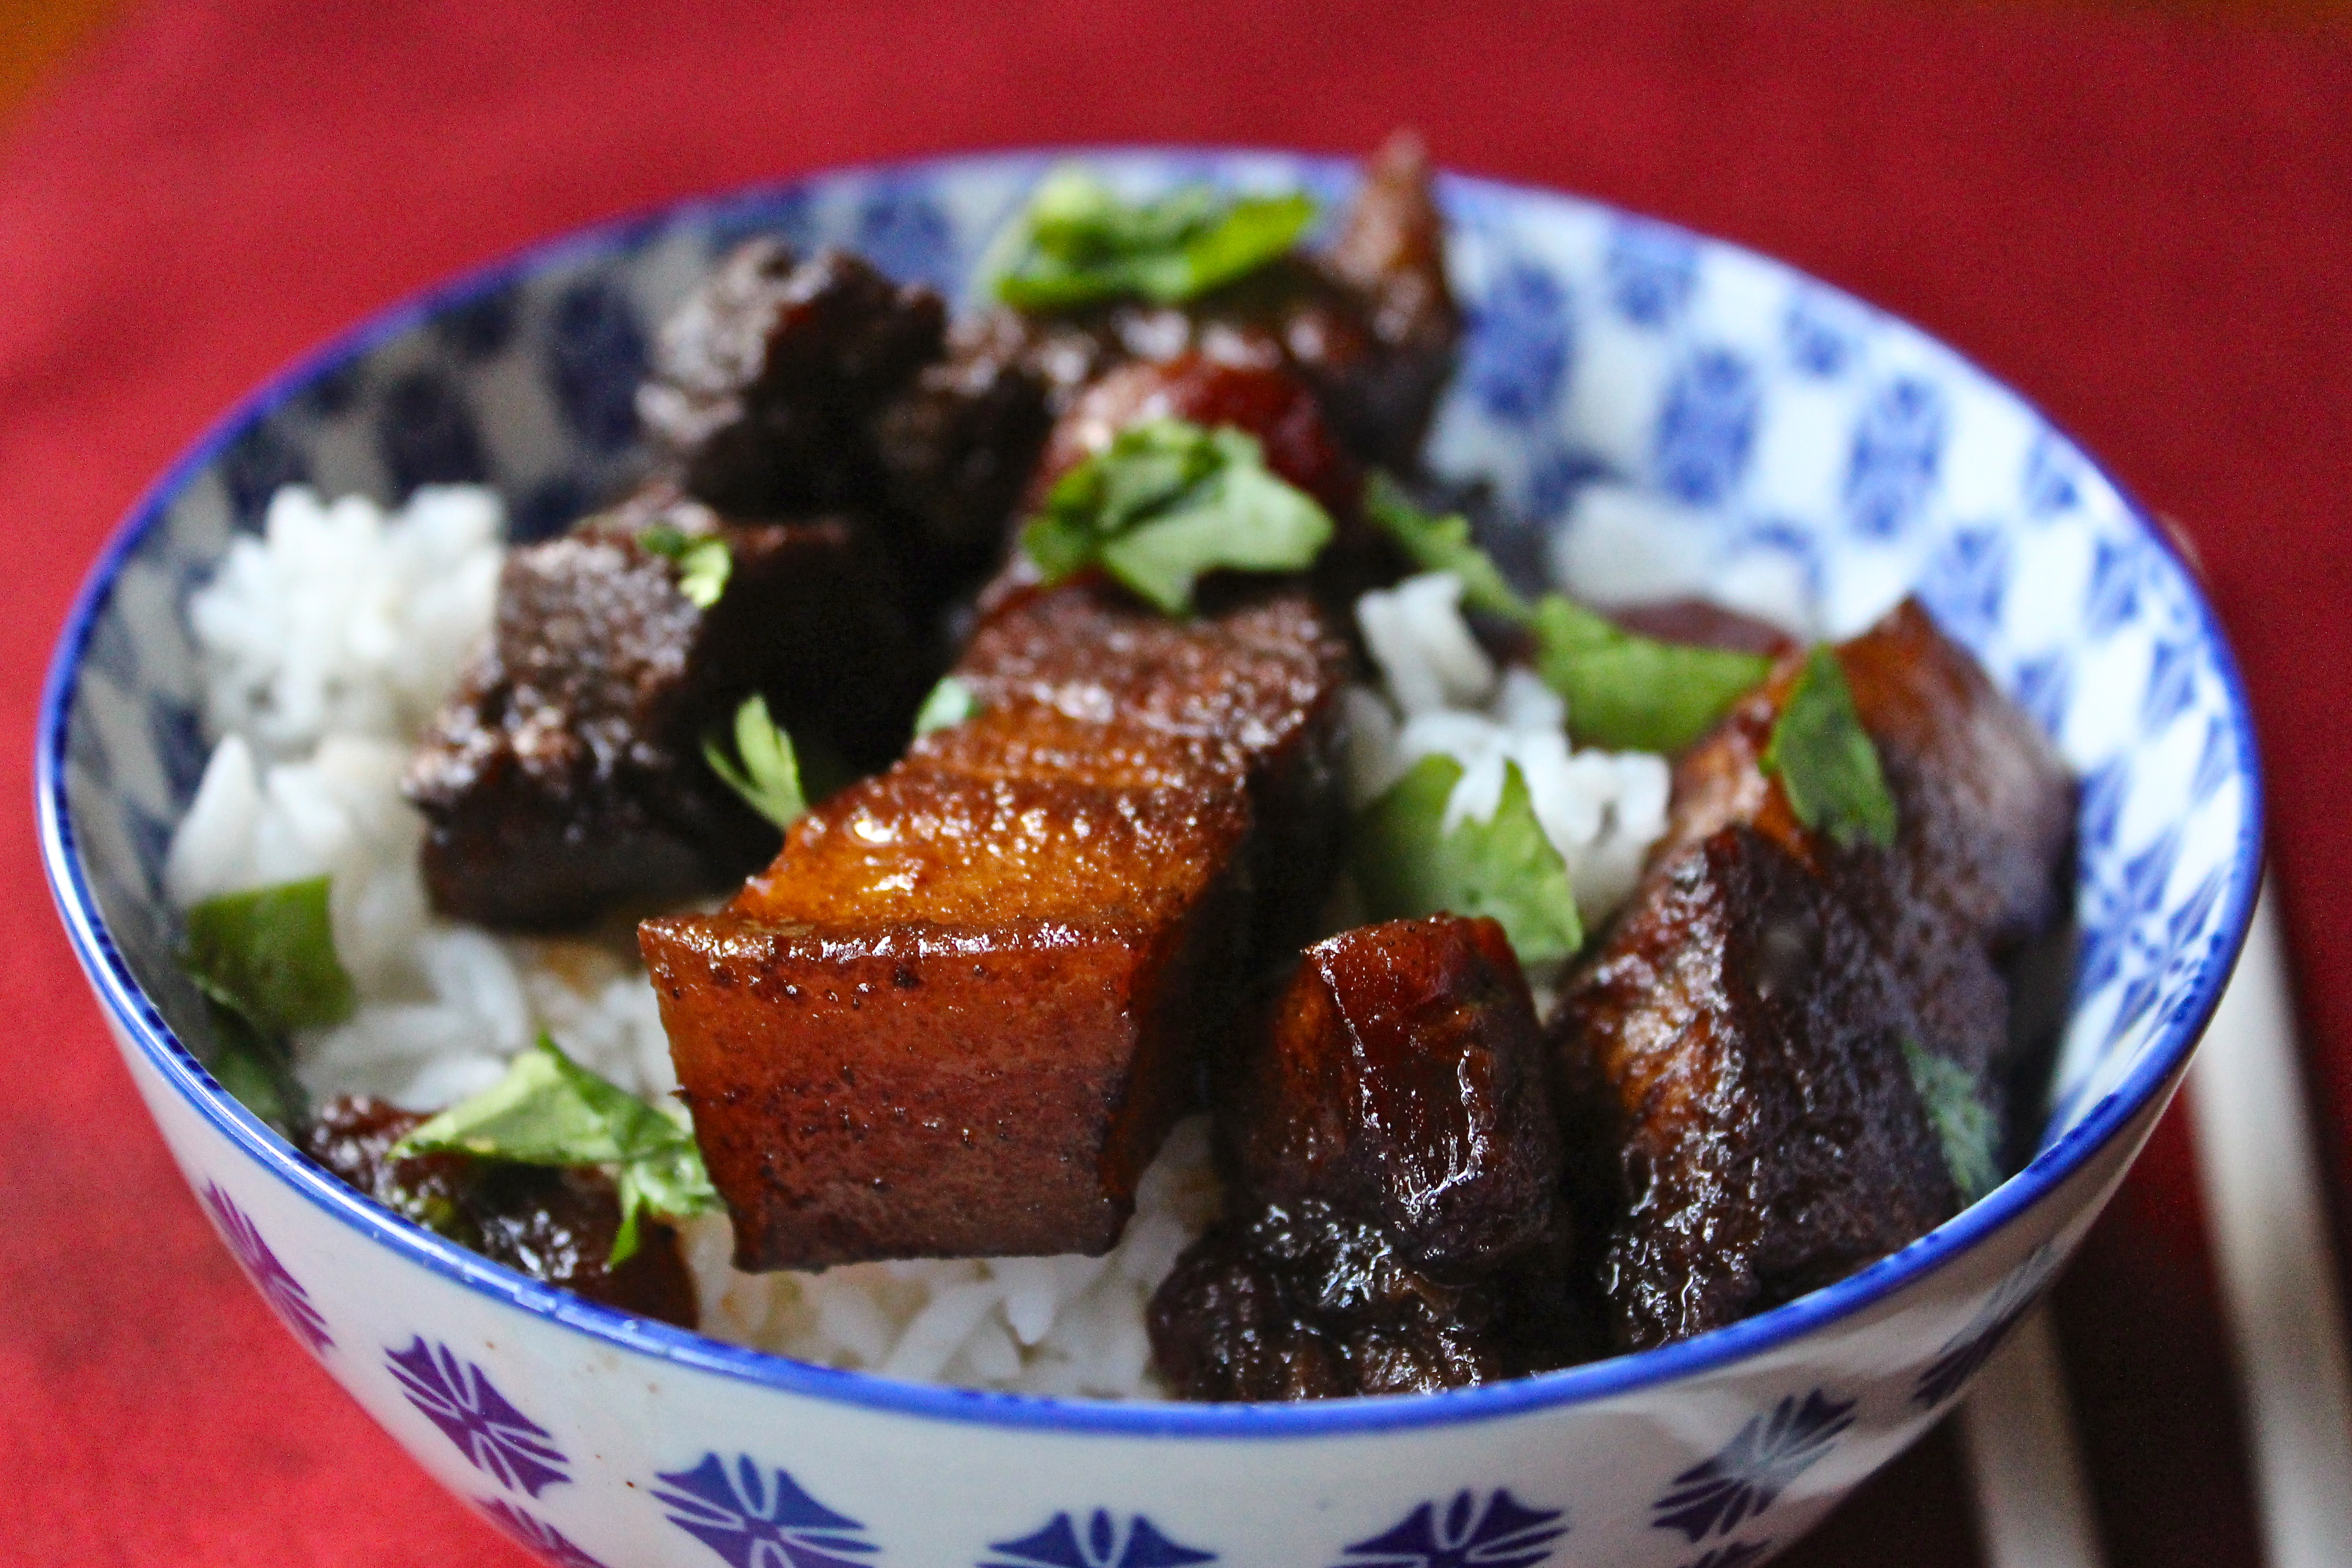
Dining on pork belly has become a food trend from coast to coast. Chefs at some of the most popular and fashionable restaurants have put their own unique spin on preparing it. For example, Chef Zak Pelaccio of New York, makes a signature Coriander Bacon. His chefs “cure their heritage-pork belly in a mix of palm sugar, coriander, Thai chiles, and salt, smoke it over hardwood, then braise it to melting, candied softness.” That sounds delicious, but the procedure is more complicated than the average home cook wants to undertake. Here’s an easy and interesting pork belly recipe. It’s similar in taste to the Chinese red-cooked pork belly, but with a Thai twist. The addition of chopped tomatoes, fish sauce, and lime juice provides a sublime depth of flavors. This dish will be part of my Chinese New Year’s feast this weekend!

Pork Belly with Five Spices
From The Cook’s Encyclopedia of Thai Cooking by Judy Bastyra

Ingredients:
1 large bunch fresh coriander (cilantro) with roots*
2 tbsp/30ml vegetable oil
1 garlic clove, crushed
2 tbsp/30ml five-spice powder
1¼ lb/500g pork belly, cut into 1-in/2.5cm pieces
14oz/400g can chopped tomatoes
2/3 cup/150ml hot water
2 tbsp/30ml dark soy sauce
3 tbsp/45ml Thai fish sauce
2 tbsp/30ml granulated sugar
1 lime halved

Directions:
1. Cut off the coriander roots. Chop five of them finely and freeze the remainder for another occasion. Chop the coriander stalks and leaves and set them aside. Keep the roots separate.

2. Heat the oil in a large pan and cook the garlic until golden brown. Stirring constantly, add the chopped coriander roots and then the five-spice powder.

3. Add the pork and stir-fry until the meat is thoroughly coated in spices and has browned. Stir in the tomatoes and hot water. Bring to a boil, then stir in the soy sauce, fish sauce and sugar.

4. Reduce the heat, cover the pan and simmer for 30 minutes. Stir in the chopped coriander stalks and leaves. Squeeze in the lime juice and serve.

Serves 4

Linnell’s Notes:
1. This dish is not intended to be served as a solo main entrée, but as one among several entrée-type dishes served at dinner (Chinese style).

2. Five-spice powder is said to encompass the five elements of flavor: sour, bitter, sweet, pungent, and salty. Use Chinese five-spice powder, which is normally made from cloves, cinnamon, fennel seeds, star anise, and Szechuan pepper, and not the Indian five spice known as Panch phoran, which is made from fenugreek seed, nigella seed, cumin seed, black mustard seed and fennel seed.

3. *I did not have coriander with roots and I understand it can be hard to find, so I cut in a few more stems to make up the difference. Coriander/cilantro stems have a slightly more intense flavor than the leaves.

ENJOY!

Read Full Post »

gyro meatloaf

Whether from a vendor on the streets of New York City or from a takeout counter in Monastiraki Square in Athens, Greece, my family loves to eat gyros. Delicious memories of warm circles of pita bread wrapped around flavorful slices of meat, tomatoes, onions and french fries, drizzled with a wonderfully refreshing Tzatziki sauce, prompted me to search for a homemade version. Normally gyro meat is slow-roasted on a vertical spit, but this recipe simplifies that by baking the meat in a loaf pan. Then, after some time in the refrigerator, the meat is thinly sliced and pan fried or grilled to give it a crispy texture – as if it’d been on a rotisserie for hours. A platter of gyro fixings would make for a fun family dinner or make great Super Bowl party fare.

Favorite Meat Loaf Gyros
Recipe from Taste of Home

Ingredients:
1 egg, lightly beaten
6 garlic cloves, minced
3 tablespoons dried oregano
1½ teaspoons kosher salt
1 teaspoon pepper
1 pound ground lamb
1 pound ground beef

TZATZIKI SAUCE:
1 cup (8 ounces) plain yogurt
1 medium cucumber, peeled, seeded and chopped
2 tablespoons lemon juice
2 garlic cloves, minced
1/2 teaspoon salt
1/4 teaspoon pepper

GYROS:
8 whole pita breads
3 tablespoons olive oil, divided
16 slices tomato
8 slices sweet onion, halved

Directions:
1. In a large bowl, combine the egg, garlic, oregano, kosher salt and pepper. Crumble lamb and beef over mixture; mix well.

2. Pat into an ungreased 9 x 5-inch loaf pan.

3. Bake, uncovered, at 350° for 60-70 minutes or until no pink remains and a meat thermometer reads 160°.

4. Cool completely on a wire rack. Refrigerate for 1-2 hours.

5. For sauce, in a small bowl, combine the yogurt, cucumber, lemon juice, garlic, salt and pepper. Cover and refrigerate until serving.

6. Brush pita breads with 1 tablespoon oil; heat on a lightly greased griddle for 1 minute on each side. Keep warm.

7. Cut meat loaf into very thin slices. In a large skillet, fry meat loaf in remaining oil in batches until crisp.

8. On each pita bread, layer the tomato, onion and meat loaf slices; top with some Tzatziki sauce. Carefully fold pitas in half. Serve with remaining sauce.

Yield: 8 servings.

Linnell’s Notes:
1. This was an easy recipe, but it does require some planning ahead. The meat loaf needs to be refrigerated for a couple of hours to allow it to be firm enough to slice into thin slices.

2. Although the meat was flavorful, it seemed a tad dry to me. The next time I try this recipe, I will chop my own beef and lamb, so that the mixture is more coarse – resulting in better flavor and texture. I’d also like to try making other meat versions of gyros. Here are links to other versions to try:

Pork Gyros
Chicken Gyros

3. The next time I’ll also experiment by adding chopped onions, ground rosemary, and ground thyme to the meat mixture.

4. I fried the meat slices in a nonstick frying pan, so no additional oil was needed.

5. I doubled the recipe and gave some to my son and daughter-in-law, so they’d have one less dinner to cook during the week!

ENJOY!

Read Full Post »

sparerib recipe

Feeling the love for some tasty barbecued spare ribs, but not loving the idea of barbecuing outside in the cold? Assuage those rib cravings of yours by making “barbecued” ribs indoors. First, the ribs are baked in a low-temperature oven and then they’re basted and “grilled” under the broiler. Your reward will be smokey-tasting juicy ribs with a little bit of a kick that’s amplified by a sticky, sweet, and tangy finish. Get those napkins out, because the Super Bowl’s around the corner and you’ll want to serve these ribs at your party!

Beth’s Melt in Your Mouth Barbecue Ribs
Recipe from Food.com

Ingredients:
4 lbs pork ribs
3/4 cup light brown sugar
1 teaspoon hickory smoke salt
1 tablespoon paprika
1 tablespoon garlic powder
1/2 teaspoon ground red pepper (optional)
2 cups of your favorite barbecue sauce

Directions:
1. Preheat oven to 300 degrees F.
2. Peel off tough membrane that covers the bony side of the ribs.
3. Mix together the sugar and spices to make the rub.
4. Apply rub to ribs on all sides.
5. Lay ribs on two layers of foil, shiny side out and meaty side down.
6. Lay two layers of foil on top of ribs and roll and crimp edges tightly, edges facing up to seal.
7. Place on baking sheet and bake for 2 – 2½ hours or until meat starts to shrink away from the ends of the bone.
8. Remove from oven.
9. Heat broiler.
10. Cut ribs into serving sized portions of 2 or 3 ribs.
11. Arrange on broiler pan, bony side up.
12. Brush on sauce.
13. Broil for 1 or 2 minutes until sauce is cooked on and bubbly.
14. Turn ribs over.
15. Repeat on other side.
16. Alternately, you can grill the ribs on your grill to cook on the sauce.

Serves 6

Linnell’s Notes:
1. I could not find hickory smoke salt, so I brushed a tiny amount of Liquid Smoke (Hickory) on the ribs before applying the dry rub. A little bit of Liquid Smoke goes a long way, so don’t over do it.

2. I used Kinder’s Mild BBQ Sauce, but any flavorful good quality sauce will do.

3. I did not add any salt to the dry rub mix, partially because I couldn’t find the hickory smoke salt and because I felt that there would be plenty of sodium in the barbecue sauce. My husband and I thought the ribs tasted great without any additional salt, but it’s up to you.

4. Come spring and summer, you’ll want to finish these ribs off outside on the grill instead of under the broiler!

ENJOY!!

Read Full Post »

peanut butter oatmeal cookies

Two peanut butter oatmeal cookies lay temptingly before you. Each contains 13 ingredients. Which one will you reach for – the light-colored cookie that is deliciously thick, chewy, and on the healthier side or the divinely dark and crunchy one that not only has butter in it, but is loaded with chocolate as well? Tough decision. After making the two different recipes and tasting the cookies, I concluded that I liked them both, but for health’s sake and for ease of preparation, I’ll be making the light ones more frequently.

Chewy Peanut Butter Oatmeal Cookies
Recipe from passtheplate.blog

Ingredients:
3/4 cup all purpose flour
1 teaspoon baking powder
1/2 teaspoon baking soda
1/2 teaspoon salt
1/2 cup peanut butter (smooth or chunky)
1/4 cup cinnamon applesauce (regular works too)
1 egg
1 teaspoon vanilla extract
Couple dashes cinnamon
1/2 cup white sugar
1/2 cup light brown sugar
1½ cups quick-cooking oats
1/4 cup ground flaxseed

Directions:
1. Preheat oven to 375 degrees F. Line a baking sheet with parchment paper.

2. In a medium bowl, whisk together flour, ground flaxseed, baking powder, baking soda, salt, and cinnamon.

3. In a large bowl, beat together peanut butter, sugars, applesauce, egg and vanilla. Working by hand, stir in the flour mixture and the oats until just combined and no streaks of flour remain.

4. Drop tablespoonfuls onto the prepared baking sheet. Bake for about 10-12 minutes.

5. Let cool on sheet for 3 or 4 minutes, then transfer to a wire rack to cool completely.

6. Store in an airtight container.

Makes approximately 30 cookies.

Linnell’s Notes:
1. I did not use quick-cooking oats. I could have pulsed my old-fashioned oats in a food processor to turn them into quick-cooking oats, but I decided to leave them whole.
2. These cookies supposedly only have 73 calories each!

Jose’s Oatmeal Peanut Butter Chocolate Chip Cookies
Recipe from Epicurious

Ingredients:
1½ cups old-fashioned rolled oats
2 cups all-purpose flour
1 teaspoon baking powder
1 teaspoon baking soda
1 teaspoon salt
2 sticks (1 cup) unsalted butter, softened
1 cup granulated sugar
1 cup firmly packed light brown sugar
1 tablespoon vanilla extract
3/4 cup peanut butter
2 large eggs
12-ounce bag semisweet chocolate chips
8 ounces semisweet chocolate, grated

Directions:
1. In a food processor pulse 1 cup oats until ground fine.

2. In a large bowl stir together ground oats, remaining 1/2 cup whole oats, flour, baking powder, baking soda, and salt.

3. In another large bowl with an electric mixer beat together butter and sugars until light and fluffy and beat in vanilla and peanut butter. Add eggs, 1 at a time, beating well after each addition, and gradually beat in flour mixture. Add chocolate chips and grated chocolate, beating just until combined. Chill cookie dough, covered, at least 2 hours and up to 1 week.

4. Preheat oven to 325°F.

5. Form rounded tablespoons of dough into balls and arrange about 2 inches apart on ungreased baking sheets. Flatten balls slightly.

6. Bake cookies in batches in middle of oven 15 minutes, or until just pale golden. Cool cookies on baking sheet 5 minutes and transfer to racks to cool completely.

Makes approximately 60 cookies.

Linnell’s Notes:
1. Grating the 8 ounces of chocolate was a lot of work. A large chunk of chocolate would have been easier to grate than the thin chocolate bars I used. If you have a grating disc on your food processor, that might also work. Chocolate should be at room temperature for hand-grating, but frozen for machine-grating.
2. I only baked half of the cookies. The remaining dough I froze for future use.

ENJOY!

Read Full Post »

IMG_0145

When is a recipe more than just a recipe? If the mere thought of a particular recipe opens a floodgate of memories, then it transcends its written words. For me, this recipe for Pizza Spread falls into that category. This recipe, with only a few ingredients and very brief instructions, has been in my family for quite some time. No one in the family can remember the original source, but all can remember coming home from school and munching on mini pizzas made from Pizza Spread and English muffins. During my happy-but-poor years of marriage, I presented almost everyone I knew with jars of homemade Pizza Spread for Christmas. Fast forwarding to another decade, I remember the excitement in my children’s faces, when I’d make Pizza Spread for them. Later, when they left home for college, they did not leave empty-handed. One hand held a jar of Pizza Spread and the other held a bag of English muffins. Now my children make Pizza Spread on their own and I see mini pizzas in their children’s futures. One thing all Pizza Spread lovers agree on is the number of mini pizzas that are eaten: tasting just one mini pizza is impossible; nibbling on two is highly unlikely; eating a mere three is more probable, and devouring four to six is most likely!

Pizza Spread
Recipe from Linnell’s mom
pizza spread

Ingredients:
1 two-pound block of Velveeta Cheese
2 cubes of butter, room temperature
2 – 6 ounce cans of tomato paste
2 teaspoons of dried oregano
8 stalks of green onions, sliced into thin rings
Salt
English muffins

Directions:
1. Cut Velveeta into small cubes and then put into a large mixing bowl, food processor bowl, or electric mixer bowl.
2. Cut butter into small cubes and add to mixing bowl.
3. Add the two cans of tomato paste and dried oregano.
4. Wash and slice the green onions and add to the cheese mixture.
5. Blend all ingredients thoroughly together.

To Serve:
1. Turn on oven broiler.
2. Cut English muffins in half.
3. Spread English muffin halves with Pizza Spread and place them on a cookie sheet.
4. Broil until spread is melted and bubbling slightly.

Linnell’s Notes
1. Although any type of bread can be used, English muffins work particularly well with this recipe. The melted Pizza Spread flows into all the nooks and crannies of the muffins!

2. I do not add any additional salt. The Velveeta is plenty salty for me. In addition, I use unsalted butter.

3. Keep a watchful eye on the muffins when they are under the broiler, because they can burn quickly!

4. Store in an airtight container in the refrigerator.

ENJOY!

Read Full Post »

crudities  with dip Instead of serving a tray of high-calorie appetizers at your next party, how about presenting a beautiful platter of fresh crudités? Boring, you say? Not if you serve the crudités with a variety of interesting dips! Don’t be fooled by the simple list of ingredients in the Herb Dip; the fresh herbs really shine in this easy and delicious recipe. Tempt your guests with the cooling flavor of lime juxtaposed against the heat of chilies in the Chili-Lime Sour Cream Dip. Last, but certainly not least, the Peanut Sauce is sure to be a crowd favorite – what’s not to like about peanut butter with a little attitude?

Herb Dip
Recipe by Ina Garten

Ingredients:
8 ounces cream cheese, at room temperature
1/2 cup sour cream
1/2 cup mayonnaise
4 scallions, white and green parts, minced
2 tablespoons fresh parsley leaves, minced
1 tablespoon fresh dill, minced
1 teaspoon kosher salt
3/4 teaspoon freshly ground black pepper

Directions:
Place the cream cheese, sour cream, mayonnaise, scallions, parsley, dill, salt, and pepper in the bowl of an electric mixer fitted with the paddle attachment and blend. Serve at room temperature.

Makes 2 cups

Linnell’s Notes:
Due to the cream cheese, this recipe produces a thick dip. To further cut calories, you could experiment with low-fat versions of the cream cheese, sour cream and mayonnaise. For best flavor, though, you’re going to have to leave some fat in the recipe!

Chili-Lime Sour Cream Dip
Recipe from Better Homes and Garden

Ingredients:
One 16-ounce carton of sour cream
Two 7-ounce cans of diced green chilies, drained
1/4 cup snipped fresh cilantro
1/4 cup jarred salsa
2 cloves garlic, minced
1 teaspoon mild or hot chili powder
2 teaspoons finely shredded lime peel
1/2 teaspoon salt
Bottled hot pepper sauce to taste

Directions:
In a large bowl combine sour cream, chilies, cilantro, salsa, garlic, chili powder, lime peel, salt and bottled hot pepper sauce. Cover and chill overnight.

Makes 3¾ cups

Linnell’s Notes:
The level of preferred heat can be adjusted by increasing or decreasing the amounts of chili powder and hot pepper sauce. Also, the type of salsa you use, will affect the heat of the dip. Chilling the dip overnight allows the flavors to meld.

Peanut Sauce
Recipe originally from Sunset Hors D’oeuvres Cookbook

Ingredients:
1/3 cup crunchy peanut butter
3 tablespoons firmly packed brown sugar
1/2 teaspoon crushed red pepper
1/4 cup lemon juice
2 tablespoons chili sauce or ketchup
1/2 – 1 teaspoon soy sauce, to taste

Directions:
Mix ingredients until well-blended. Serve with raw vegetables (cucumber, jicama, bell pepper, carrot and celery)

Makes 3/4 cup

Linnell’s Notes:
After tasting this at one of her parties, I begged my friend Tina for this recipe. Because it’s a crowd-pleaser, I double or quadruple this recipe when I make it!

Enjoy!

Read Full Post »

ravioli casserole

Looking for something tasty and hearty to take to a holiday potluck? Well, consider yourself “potlucky” that you found this recipe! Like a lasagne, this casserole has layers of meaty tomato sauce and shredded cheese, but magnificent rows of cooked raviolis replace the lasagne noodles. My two guest taste-testers gave this casserole a two-thumbs up and even took some home as party favors.

Lisa’s Ravioli Casserole
From Paul & Phil’s Potluck Cookbook

Ingredients:
9 oz. fresh or frozen raviolis
1 lb. extra-lean ground beef
Salt, garlic, ground black pepper, and Italian seasoning, to taste
1 – 26 oz. jar of spaghetti sauce
2 cups shredded cheese (mixture of mozzarella, Romano and Parmesan)

Directions:
1. Preheat oven to 350 degrees F.

2. Boil 8 quarts of water and cook raviolis according to package instructions. Drain them.

3. While raviolis are cooking, brown hamburger with the spices. Drain fat from meat. Stir in spaghetti sauce and set aside.

4. Spray a large casserole with nonstick spray. Layer meat sauce in the bottom of the dish. Place a few raviolis on top of the sauce. Put another layer of sauce on top of the raviolis. Sprinkle a layer of cheese on next. Continue to layer the ingredients with final layer being cheese.

5. Bake for 45 minutes or until the cheese is slightly browned and bubbly.

Serves 4-8

Linnell’s Notes:
1. This recipe creates a good casserole. Nothing exotic, though. The great thing about this recipe is its adaptability. The next time I prepare this casserole, I will use more interesting tasting ravioli (I used cheese ravioli the first go-round) and add some sweet Italian sausage to the ground beef mixture for more depth of flavor. Chopped spinach (defrosted and squeezed dry), chopped mushrooms, diced green peppers, chopped onions, and a can of diced tomatoes would also enhance the flavor of this recipe. Oh, and maybe a little wine, too . . . .

2. I doubled the recipe and it fit nicely in a 9 by 13-inch pan.

3. Instead of placing “a few raviolis on top of the sauce” as the recipe states, I layered the  raviolis in rows to cover the sauce (approximately 4 raviolis across and 6 raviolis long). This way every person is guaranteed to get his share of ravioli!

Enjoy!

Read Full Post »

Close up of frog

Photo by Linnell Chang

He: It’s late. Are you coming to bed?
She: In a minute.
He: What are you doing?
She: Taking pictures of a frog.
He: A frog? Where? It’s one o’clock in the morning!
She: Yeah, well, when I was checking the door to see if it was locked, I noticed a frog stuck to the glass. It’s not everyday you can see the belly of a frog up close!
He: I should have known better than to ask you what you were up to!

Opportunities to learn something new present themselves everyday, all day long. It’s easy to ignore or dismiss these moments because we live busy lives and because we take the world around us for granted. So the next time you see something you take for granted – a frog on a window, an autumn leaf on the ground, a candle burning, etc., ask yourself these classic questions: why, when, what, where, and how? For example, how is a frog able to cling to a smooth surface? Why do some autumn leaves turn yellow, some orange, and some red? When a candle burns, where does the wax go? Whether we take the time to observe, study, or investigate depends on our willingness or receptiveness to learn. Don’t forget . . . the more you know, the more you grow.

#1 – Sharpie Art
Sharpie decorated mugs Isn’t it time you learned that Sharpie pens are not just for writing? Take a look at these 20 Sharpie Projects Perfect for the holidays! You’ll be surprised with what you can create with a Sharpie pen!

#2 – Santa Hat Pretzels
Santa Hat Pretzels Looking for an easy-to-make holiday treat? Make these cute Santa Hat Pretzels. Simple, clever, and no baking required!

#3 – Ink and Water

Alberto Seveso

Part of the A Due Colori Series by Alberto Seveso

In the hands of an average person, mixing ink and water together spells out one big mess, but in the hands of Italian artist Alberto Seveso, these two elements create something beautiful. Click here to see more of his intriguing work.

#4 – Random Acts of Kindness
random acts of kindness When we truly open our eyes to the world around us, we take down our blinders and open our hearts, too. It’s been awhile since I’ve posted about random acts of kindness, so when I saw these 16 Unbelievable Acts of Kindness, I knew I had to share them with you. They’ll restore your faith in mankind and propel you to do something kind for someone else.

#5 – Just For Today

Just for today, I will not be angry.

Just for today, I will not worry.

Just for today, I will be grateful.

Just for today, I will do my work honestly.

Just for today, I will be kind to every living thing.

The Five Reiki Principles by Dr. Mikao Usui

Learn something new this weekend!

Read Full Post »

Fall Fruit Salad

“Healthy” and “holiday” are words rarely used together, especially when describing food. Trying to plan healthy meals during the holidays can be quite a struggle, right? Well, not necessarily. This past Thanksgiving, I served my family a visually appealing, texturally satisfying, and heart-healthy salad. Not only did this salad splendidly highlight fall fruit, such as persimmons, Asian pears, pomegranates, and ruby grapefruit, it was served with a delicate, FAT-FREE, slightly sweet and slightly tart salad dressing! This salad has it all: gorgeous to look at, easy to prepare, and a delight to eat!

Fall Fruit Salad
Recipe from November 1995 issue of Sunset Magazine

Ingredients:
1 to 2 tablespoons pine nuts
2 firm-ripe Fuyu persimmons (1/2 lb. each)
2 ruby grapefruit (1 lb. each)
1 Asian pear (about 3/4 lb.)
3 tablespoons lime juice
3 tablespoons rice vinegar
2 tablespoons honey
2 to 3 cups frisée, rinsed and drained
3/4 cup pomegranate seed
Salt

Directions:
1. In a 6- to 8-inch frying pan over medium heat, frequently stir pine nuts until pale gold, 2 to 3 minutes. Pour from pan.

2. Rinse persimmons, then trim off and discard leaf tops. Slice persimmons crosswise into thin rounds.

3. With a knife, cut peel and white membrane from grapefruit. Holding fruit over a bowl, cut between segments and inner membrane to release fruit into bowl. Also squeeze juice from membrane into bowl, then discard membrane.

4. Rinse pear and discard stem. Cut fruit crosswise into thin rounds, right through center seeds. Coat pear slices with grapefruit juice.

5. Mix 3 tablespoons grapefruit juice (reserve remainder for other uses) with lime juice, rice vinegar, and honey.

6. Line a salad bowl or individual plates with the frisée. Arrange pieces of persimmon, pear, grapefruit on the greens; sprinkle fruit with pomegranate seed and pine nuts, then moisten with the grapefruit-lime dressing. Add salt to taste.

Serves 6

Linnell’s Notes:
1. Fuyu persimmons are the round, squat persimmons that can be eaten while they are firm, unlike the elongated and pointed Hachiya persimmons, which must be eaten only after the fruit has ripened to a soft and somewhat squishy state.

2. Besides a light sprinkling of salt, I also sprinkled some fresh ground pepper on each plated salad.

3. Keep an eye on the pine nuts while toasting them. They contain a high level of oil, so they will burn quickly!

4. My family is not a big fan of frisée, so I substituted fresh green curly-leafed lettuce.

5. It is easier to peel the grapefruit, if you first cut off the top and the bottom peel. This will give you a flat surface when you stand the grapefruit on the cutting board.

ENJOY!

Read Full Post »

split pea and spinach soup

A sip of hearty soup and a bite of freshly baked cornbread takes the chill out of a chilly evening. But better than that, when this thick and flavorful soup is paired up with cornbread, which is a complimentary protein, a complete protein is formed. How comforting to know that the comfort food you’re eating is not only delicious, but good for you, too!

Split Pea and Spinach Soup
Recipe from Linnell’s old recipe box, original source unknown

Ingredients:
2 cups chopped onions (about 2 large ones)
2 tablespoons vegetable oil
1 lb. or 2 cups yellow or green split peas, picked over and rinsed
2 quarts water
2 bay leaves, crumbled
1 teaspoon dried basil
1 10 oz. package frozen chopped spinach
2 teaspoons salt
1/2 teaspoon pepper
1/8 teaspoon ground cloves
1/4 cup Parmesan cheese, grated

Directions:
1. Heat oil in a Dutch oven and add onions. Sauté the onions (and the pork, if using*) in oil until tender.
2. Add peas, water, bay leaves, and basil.
3. Cover and simmer for approximately one hour or until the peas are tender.
4. Add the spinach, cover, and simmer, while stirring occasionally, about 8 minutes longer.
5. Season with salt, pepper, and cloves.
6. Serve sprinkled with grated Parmesan cheese and a crusty loaf of pumpernickel bread.

Serves 4 or makes 10 cups.

Linnell’s Notes:
1. *I add either diced salt pork, ham, or 2 smoked ham hocks for additional flavor. Obviously if you’d like to make this a vegetarian soup, you will omit the meat.
2. Taste soup before adding the salt, especially if you’re adding a cured meat.
3. As the recipe suggests, pumpernickel bread is a good accompaniment, but my family would revolt if I did not serve this with cornbread.

ENJOY!

Read Full Post »

« Newer Posts - Older Posts »