Feeds:
Posts
Comments

Archive for the ‘Recipes’ Category

The Bee and the Blue Hydrangea Bees busily buzz from cluster to cluster of brilliant blue hydrangeas. How’s that for a bit of alliteration? I unexpectedly spent my morning chasing bees. My goal of taking photos of hydrangeas morphed into something else after I saw bees flying around the blossoms. “Wouldn’t it be great if I could capture an image of a bee?” I thought to myself. After a moment of wishing I’d read my camera manual, I took aim at the buzzing noise around me. About a half-hour of truly living in the moment and a hundred photos later, I accomplished my goal. But, wait! What about getting even closer . . .

#1 – Earth Album
Earth Album Get a closer look at the world by going to Earth Album. This site lets you explore the world without packing any bags or leaving home. All you have to do is click on a spot anywhere on the site’s world map and, thanks to Google and Flicker, photos of the area appear. Because the photos come from Flickr, the images will change from time to time – a great reason to revisit the site!

#2 – Eat Your Oatmeal
Steel Cut Oatmeal "Cupcakes" I received an email from a reader the other day, thanking me for sharing my story about having genetically high cholesterol. Six months ago she received a bad lab report. Her total cholesterol was 251 with her HDL at 70 and her LDL at 163. Remember LDL is the “lousy” one. She read my post My Most Requested Recipe and faithfully followed my steel cut oatmeal “cupcake” regime, exercised more frequently, and watched what she ate. It all paid off. Her most recent lab work reflected a 34 point drop in her overall cholesterol and a 29 point drop in her LDL. Her testimony confirms the role soluble fiber plays in the battle against high cholesterol. Eating soluble fiber and making other lifestyle changes can make a difference in your health. Another reader wrote to tell me a similar story after she advised her husband to follow my recipe and months later he “waved his lab report around like it was a medal!”

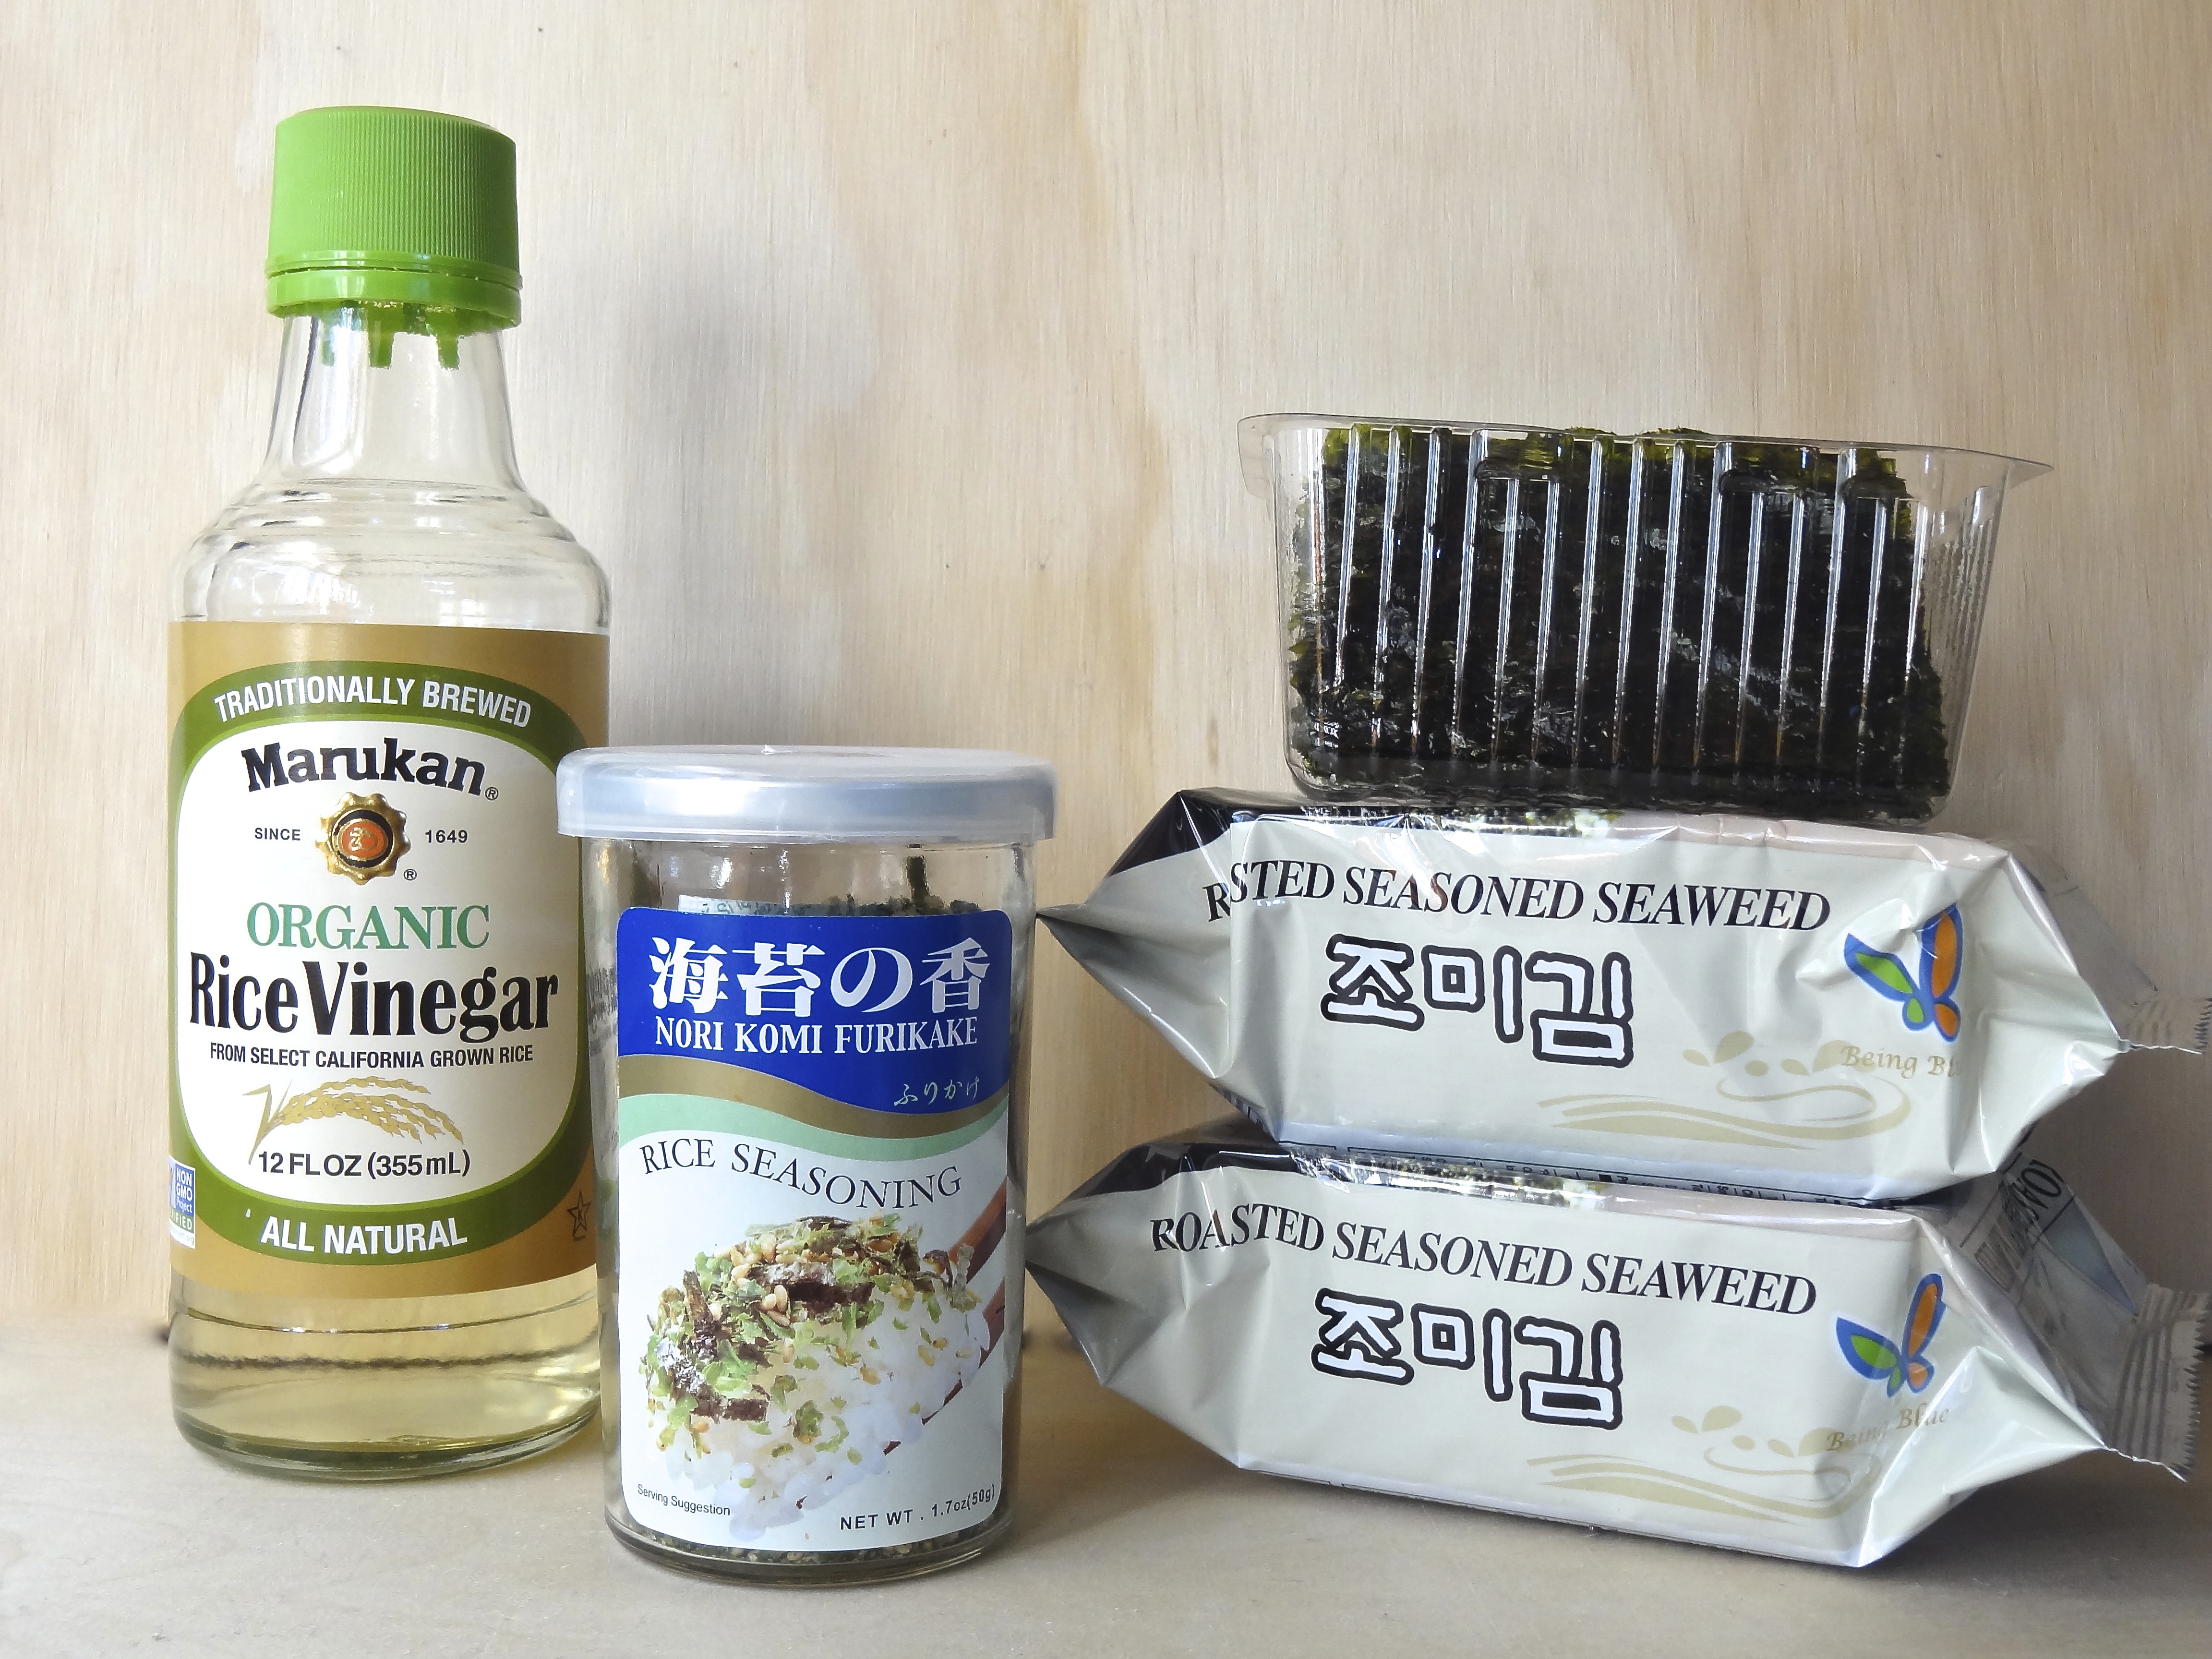
#3 – Removing Rust Stains
The first sign of lovely spring-like weather leads to one thing: it’s time to spruce up the yard. Last weekend after moving some large potted plants off my concrete patio, I noticed that the metal pots had left ugly rust stains on the pavement. After quickly researching ways to remove rust stains from concrete, I selected a method using natural ingredients that I already had at home. I squeezed some lemons and asked my husband to pour the juice over the spots. About 10 to 20 minutes later, he scrubbed the areas with a stiff brush, and then hosed them off. Most of the rust stains were gone, but a few stubborn areas remained. Since I had run out of lemons, I told my husband to try using distilled white vinegar. He repeated the process using vinegar and it worked like a charm. Two words of caution: Scrubbing can abrade and remove some of the concrete and be aware of the fact that acid can be detrimental to nearby vegetation, so be careful of any undiluted acid running into bedding or lawn areas.

#4 – Happiness Is . . .
What can one learn about himself while living isolated in Siberia for six months? French travel writer Sylvain Tesson lived as a hermit in a hut on the edge of a lake in Siberia for that amount of time. During that time he “discovered space, silence and solitude.” Watch “Happiness is . . . escaping to a cabin in Siberia” and listen to him describe how his life changed.

#5 – You Already Have It
“We all possess exactly what we need to be our greatest selves and it is (about) listening to our instincts.”
Usher

Enjoy your weekend!

Read Full Post »

Sushi Casserole Creating extraordinary sushi requires great skill and passion. After watching Jiro Dreams of Sushi, a documentary about Jiro Ono, an 87-year-old sushi master, I’m almost embarrassed to share the following recipe. This recipe is far removed from the precise art of sushi-making, but the rumblings of my imagination wouldn’t let go of the idea of creating a sushi casserole. I searched online, sorted through my notes and newspaper clippings, and reread my sushi cookbooks to figure out what layers I wanted for the casserole. My experiment began and, after a fair amount of improvising, I ended up with a tasty casserole that yielded bite-sized squares of “sushi” that were served with roasted Nori. There are endless possibilities to a layered recipe such as this. And, yes, it is possible to stick a square peg into a round hole!

Sushi Casserole
Sushi Rice
The ratio of vinegar solution added to sushi rice varies with the type of sushi being made. In this case, I’m using a vinegar solution used for making maki-sushi. Normally, the vinegar solution is added to the rice after the rice is cooked. The rice is usually fanned while cooling to give the grains a lustrous or shiny appearance. I cheated by adding the vinegar solution into the rice cooker at the beginning and didn’t fan the rice at all.

Ingredients:
4 cups of uncooked sushi rice (rice must be short or medium grain only)
1/2 cup (8 tablespoons) of plain rice vinegar
5 tablespoons sugar
1 teaspoon salt
Water (approximately 4 cups plus 4 tablespoons)

Directions:
1. Wash and drain rice.
2. Put the rice in the rice cooker.
3. Combine vinegar, sugar, and salt in a small bowl.
4. Add vinegar solution to rice in rice cooker.
5. Add water up to the specified cup level.
6. Start the rice cooker.
7. After the rice is cooked, let it cool to body temperature.

Crab Layer
Ingredients:
1 pound imitation crab
3/4 cup mayonnaise
1 cup sour cream

Directions:
1. Chop the imitation crab or place it in a food processor and pulse. Small chunks are desired, not large chunks nor a smooth paste.
2. Combine mayonnaise and sour cream in a medium-sized bowl.
3. Add crab to mayo-sour cream mixture and stir until thoroughly combined.

Spicy Sauce
Ingredients:
1/2 cup mayonnaise
2 tablespoons Sriracha sauce

Directions:
1. Blend both ingredients together.
2. Pour into a squeeze bottle with a small nozzle tip.

Additional Toppings
Smoked salmon slices
Shrimp tempura
Cucumber sticks
Avocado slices
Aji Nori Furikake (a seasoned mix in a jar)

Assembling Casserole
1. In a small bowl, mix 1 cup of water with 2-3 tablespoons of vinegar. Rub this solution on your hands and on any utensils you use to prevent the rice from sticking.
2. Take handfuls of rice and gently and evenly press it into the bottom of a 9-inch by 13-inch pan. This layer should be at least 1/2-inch thick, but no more than 3/4-inch thick. There may be leftover rice.
3. Spread the crab layer over the rice.
4. At this point I put a thin layer of smoked salmon slices over the crab mixture.
5. The next layer, I alternated between the shrimp tempura, avocado slices, and cucumber strips.
6. Finally, I sprinkled some Aji Nori Furikake over the top of the casserole and then drizzled the spicy sauce up and down the rows of toppings.

To Serve
Ingredients:
Nori/sheets of seaweed
Wasabi
Pickled ginger

Directions:
1. Cut the casserole into small squares. You can either serve the sushi squares directly from the pan or you can plate them on a serving platter.
2. Accompany sushi casserole with squares of roasted Nori, wasabi, and pickled ginger.

Linnell’s Notes:
1. Sushi should not be put in the refrigerator, because the rice will become hard. It’s most delicious when served just after making it.

2. I made my rice base too thick, so I recommend using enough rice to form a solid base, but not so much that each bite is all rice.

3. I used frozen shrimp tempura from Costco and baked it in the oven while the rice was cooling.

4. For easier cutting and serving, the shrimp tempura could be cut into bite-sized pieces and placed intermittently in rows across the casserole. Another consideration might be to place the shrimp tempura under the crab layer. The same goes for the cucumber sticks. The cucumber sticks could be diced and sprinkled over the casserole.

5. Instead of toasting sheets of Nori/seaweed and cutting them into squares, I cheated and opened several roasted-seasoned seaweed snack packs. See packages in photo along with Furikake and rice vinegar: Partial Ingredients for Sushi Casserole

Enjoy!

Read Full Post »

Strawberry Agua Fresca

Luscious in color and bright in flavor, this refreshing strawberry agua fresca makes the perfect summer drink. Agua fresca is Spanish for “fresh water” and this beverage is just that — light and fresh! With its ease of preparation and its ability to be made ahead, this beverage invokes effortless summer entertaining. Try adding a splash of tequila to make an easy strawberry margarita or try experimenting with other flavors, such as watermelon, cantaloupe, honeydew, or cucumber. This agua fresca will make you long for the hot days of summer!

Strawberry Agua Fresca
Cooking Light, May 2005

Ingredients:
4 cups water
1/3 cup sugar
6 cups hulled fresh strawberries
1/4 cup fresh lime juice (about 2 limes)

Directions:
1. Combine water and sugar, stirring until sugar dissolves.
2. Place strawberries in a blender, and process until smooth.
3. Combine the sugar mixture, strawberry puree, and juice; stir well.

Yield: 8 cups (serving size 1-1/3 cups)

Linnell’s Notes:
1. I used Splenda in place of sugar with great results. Because the strawberries I had were farm-ripe sweet, I used less sweetener than the recipe called for. The original recipe states that there are 71 calories per serving, so by substituting Splenda, there will be even fewer calories!

2. Because the two limes I had yielded only 1/8 cup juice, I added 1/8 cup fresh lemon juice to the mix.

3. This beverage should be served well-chilled.

Enjoy!

Read Full Post »

White Mum by Linnell Chang One thing always leads to another: While putting a colorful Mother’s Day bouquet in a vase of water, I decided I should snap some photos of the flowers before they passed their prime. The following morning, I got out my camera and looked at the flowers from different angles. As my camera lens zoomed closer and closer to the delicate chrysanthemum petals, I became intrigued with their spoon-shaped curves and concentric rows. Soon I found myself “Googling” chrysanthemums on my computer. I learned from Symbolic-Meanings that Dreaming of chrysanthemums indicates an unfolding of the inner self, during a tumultuous time of life. More specifically, it may represent a time of deep personal growth forged by hardship or conflict. The result leading to a stronger, more realized self. At another site, I found out that John Steinbeck wrote a short story in the 1930s titled The Chrysanthemums. After reading the story, I sought more information about Steinbeck’s use of symbolism and how they relate to the development of his characters. As the morning passed, and as one discovery lead to another, all I could think of was how the beautiful bouquet of flowers was a gift that kept on giving.

#1 – Humanity

Act of Kindness

A man giving his shoes to a homeless girl in Rio de Janeiro

Reading the newspaper or watching the news every day can be a depressing experience when story after story highlights crimes against humanity. View this series of 35 Photos That Will Restore Your Faith in Humanity and remember that acts of kindness can set a chain of positive events in motion.

#2 – A Two Minute Respite
Need to relax, unwind, take a break, de-stress, recharge, or refocus? If so, go to the Do Nothing For 2 Minutes site. Close your eyes or gaze at the photo of the sun peeking over the horizon. Relax and listen to the sound of ocean waves while the timer ticks down. Breathe in deeply and exhale slowly. The instructions state, “Just relax and listen to the waves. Don’t touch your mouse or keyboard.” If you dare ignore these instructions, a red “FAIL” appears on your screen. Give yourself a gift of 2 relaxing minutes.

#3 – One Sentence
After taking a 2 minute break and recharging your creative juices, how about trying your hand at writing a true story in only one sentence? That is the challenge of the site One Sentence. The site says, “One Sentence is an experiment in brevity.” The entertaining part of the site is to read what other people have submitted. If Ernest Hemingway could write a six word short story, you can write a story in one sentence!

#4 – One Recipe, Two Uses
The May issue of the Nutrition Action newsletter features a versatile recipe for a “Greek-inspired topping for grilled or roasted salmon or other fish — also doubles as a delightfully tangy salad dressing.” For more healthy recipes check out the “Healthy Recipes” section at Nutrition Action.

Yogurt-Dill Dressing:
Combine 6 oz. of fat-free Greek yogurt with 1 cup of fresh dill sprigs, 1 Tbs. of lemon juice, 1 Tbs. of Dijon mustard, 1 small shallot, and 1/4 tsp. of salt in a food processor. Process until smooth.

#5 – Happy to Be Grateful
In daily life we must see that it is not happiness that makes us grateful, but gratefulness that makes us happy.
Brother David Steindl-Rast

Wishing you a weekend of grateful happiness!

Read Full Post »

coco's Special Cheese Dressing Feeling very proud of the heads of lettuce growing in two small planters in my backyard, I announced to my husband that we were having a very fresh salad for dinner. With lettuce that fresh, I wanted to serve it with a good homemade salad dressing instead of a bottled dressing. Coincidentally, earlier in the day, while flipping through the pages of a book, I found a newspaper clipping containing a recipe for a requested salad dressing from the Coco’s restaurant chain. Finding the recipe and having all the ingredients on hand, I felt destined to make it. Sometimes the moon and the stars align and everything works out perfectly!

Coco’s Special Cheese Dressing
Recipe from Kathy Shepard

Ingredients:
1/4 to 3/4 cup milk
3/4 cup mayonnaise
1/2 cup sour cream
1/4 cup buttermilk
4½ teaspoons cider vinegar
1½ teaspoons garlic salt
1/2 teaspoon fresh ground pepper
2 tablespoons grated Parmesan cheese

Directions:
1. Combine milk, mayonnaise, sour cream, and buttermilk. Whisk until blended.
2. Place vinegar in cup and stir in garlic salt and pepper.
3. Add to mayonnaise mixture and blend in cheese.
4. Store in the refrigerator.

Makes about 2 cups

Linnell’s Notes:
To keep this salad dressing on the healthier side, I substituted Greek yogurt for the sour cream.

Enjoy!

Read Full Post »

Korean Barbecued Hamburgers

Instead of eating ordinary hamburgers on a bun, take your hamburger dining experience to a whole new gastronomical level. By creatively substituting and adding different elements, you can successfully fuse together the flavors of different cultures. Last weekend I created Korean Barbecued Hamburgers for a weekend backyard barbecue. Soy sauce, sesame seeds, brown sugar, and chopped green onions flavored the hamburger meat. After grilling the patties, the fun began! Spicy kimchi topped the burgers instead of traditional pickles and a small handful of fresh pea shoots, instead of alfalfa sprouts, added a nice crunchy texture. And, in lieu of ketchup, I substituted Korean Ssamjang sauce. Ssamjang sauce is a thick spicy condiment normally made from doenjang (Korean soybean paste), gochujang (Korean chili pepper paste), sesame oil, onion, garlic and green onions. With everyone asking for MORE, these tasty burgers were deemed a huge hit!

Korean Hamburger Elements
Ingredients:
Korean barbecued hamburger patties (recipe below)
Hamburger buns
Lettuce leaves
Tomato slices
Kimchi
Pea shoots (AKA pea sprouts)
Ssamjang-Mayo sauce (recipe below)

Korean Barbecued Hamburgers
Meat recipe revised from the Favorite Island Cookery: Book II

Ingredients:
1 lb. ground beef
2 stalks green onion, chopped
1-2 cloves of garlic, minced
1½ T. soy sauce
Dash pepper
1 egg
2 tsp. brown sugar
1/2-inch piece of ginger root, minced
1 tsp. sesame seed, toasted
1 tsp. sesame seed oil

Directions:
Combine ingredients and form into patties. Broil 3 to 5 minutes on each side, pan fry or grill them on the barbecue.

Yields 3 to 4 servings

My Ssamjang-Mayo Sauce:
2 T. mayonnaise
1-2 T. Ssamjang sauce, depending on desired level of spiciness

Mix both ingredients together in a small bowl.

Assembly:
1. Spread Ssamjang-Mayo sauce on buns.
2. Add lettuce leaf to bottom portion of bun.
3. Place hamburger patty on lettuce leaf.
4. Place tomato slice on top of hamburger patty.
5. Put a few slices of kimchi on top of tomato.
6. Place a small handful of pea shoots on top of the tomato.
7. Place top portion of bun on top of shoots.

Linnell’s Notes:
1. I always double the meat recipe when serving 5 people.
2. Kimchi, Ssamjang sauce, and pea shoots can be purchased at most Asian markets. Kimchi and pea shoots can often be found at Trader Joe’s and I’ve purchased pea shoots at farmers’ markets, although they’re more expensive there.
3. If you can’t find Ssanjamg sauce, any chile garlic sauce like Sriracha can be used.
4. Recipes for two great side dishes to accompany these Korean Barbecued Hamburgers can also be found on this blog:
Asian Coleslaw
Asian Cucumber Salad

Enjoy these flavorful burgers and make sure to have plenty of napkins on hand!

Read Full Post »

Lemon-Rosemary Crumb Cake

The strong flavors of rosemary and lemon can oftentimes dominate a recipe. Not so, in this case. From the crunchy lemon crumb on top to the tender cake speckled with bits of rosemary, this cake is delightful from top to bottom. With its perfect blend of flavors and its ease of preparation, it will quickly become one of your “go to” cakes. Serve it for breakfast, brunch, lunch, snack, or dessert!

Lemon-Rosemary Crumb Cake
Cooking Light Magazine, May 1998

Ingredients:
1¼ cups all-purpose flour
2/3 cup sugar
1/8 teaspoon salt
1/4 cup chilled stick margarine or butter, cut into small pieces
3/4 teaspoon minced fresh or 1/4 teaspoon dried rosemary
1/2 teaspoon baking powder
1/4 teaspoon baking soda
1/3 cup low-fat buttermilk
2 tablespoons fresh lemon juice
1 large egg
Cooking spray
2 teaspoons grated lemon rind
3/4 teaspoon water
Rosemary sprigs (optional)
Lemon slices (optional)

Directions:
1. Preheat oven to 350 degrees F.

2. Lightly spoon flour into dry measuring cups; level with a knife. Combine flour, sugar, and salt in a bowl; cut in butter with a pastry blender or 2 knives until mixture resembles coarse meal. Reserve 1/2 cup flour mixture for topping; set aside.

3. Combine remaining flour mixture, rosemary, baking powder, and baking soda; add buttermilk, lemon juice, and egg. Beat at medium speed of a mixer until blended. Spoon batter into and 8-inch round cake pan coated with cooking spray. Combine reserved 1/2 cup flour mixture, lemon rind, and water; stir with a fork. Sprinkle crumb mixture over batter. Bake at 350 degrees for 30 minutes. Cool on a wire rack. Garnish with rosemary sprigs and lemon slices, if desired.

Yield: 8 servings or 8 wedges

Linnell’s Notes:
1. I used butter instead of margarine. Why not splurge on flavor since the recipe only calls for a 1/4 cup of it?

2. I only have a 9-inch cake pan, so the cake would have been taller if I had used an 8-inch cake pan.

3. Using the larger pan, I was careful to check the cake after 20 minutes. It was baked by 25 minutes.

4. To test the cake to see if it is done, gently press on the top of it with your fingers. If it springs back completely when lightly touched in the center, the cake is done.

Enjoy!

Read Full Post »

Breakfast Pizza

Pizza for breakfast? Sure, what kid or hungry adult hasn’t eaten leftover pizza for breakfast? But here’s a recipe for a pizza that is covered with ingredients more appropriate for breakfast and is also just as delicious eaten the morning after! This is an easy and wonderful dish to serve at breakfast or brunch, but could be served anytime of the day. The only hard part about this recipe is remembering to defrost the frozen pizza dough in the refrigerator the night before!

Breakfast Pizza
Recipe adapted from DHC Fine Foods catalogue

Ingredients:
2 tablespoons extra virgin olive oil
1 pound purchased pizza dough, room temperature
Flour for rolling the dough
4 ounces ham, thinly sliced
6 asparagus spears, blanched and cut into 1/2-inch pieces
4 large eggs
1/2 cup Fontina cheese, grated
1/4 Parmesan cheese, grated
2 teaspoons parsley, chopped, optional

Directions:
1. Preheat oven to 450 degrees.
2. Coat the bottom of a rimmed baking pan with the olive oil.
3. Roll out the dough to a rectangle about 9 x 13 inches. Transfer to the baking pan.
4. Arrange the ham slices evenly over the dough, leaving about a 1-inch border.
5. Scatter the asparagus pieces over the ham.
6. Carefully break the eggs on top of the pizza. (The asparagus will “trap” the eggs and keep them from rolling.)
7. Sprinkle the fontina and parmesan cheeses over all.
8. Bake the pizza for 15 minutes or until browned and bubbling.
9. Sprinkle with the chopped parsley for garnish.

Serves 4

Linnell’s Notes:
1. The next time I make this, I will roll the dough out a little larger and bake it on a shallow rimmed baking sheet instead of a 9 x 13 inch pan. The crust was a little too thick for me when baked as specified.

2. To make it easier to cut the pizza, I cut the pieces of ham into 1/2-inch pieces instead of laying whole pieces of it.

3. An extra egg could have been cracked in the center and would have given more people more egg to eat.

4. Arugula or chopped cilantro would add more dimension to the flavors if sprinkled on top compared to the specified chopped parsley.

Enjoy!

Read Full Post »

Road Blur

Photo by Linnell Chang

The road goes on for miles. Bright jagged streaks of light float over it and define its path. On and on it goes, passing one fence post after another, until finally, in a fiery explosion of color, it converges with the setting sun and the heavy night sky. Taken with my cell phone from a moving car, this photo is certainly not an example of my finest work, yet there’s something about it that captivates me. Perhaps its painting-like qualities, the broad brushstrokes of color and the soft fog-like illumination, draw me in. Or perhaps, the metaphoric symbol of the road, with its encouraging guiding light, carries me forward, on and on.

#1 – The Colors of Spring
Spring 2013 Colors Pretty spring colors are not just outside in the garden. They could be in your closet, too. I haven’t included a style or fashion post in a long time, so I thought some of you might appreciate this feature from Stylelist: Pantone Fashion Color Report Spring 2013. How many of these colors do you have in your spring wardrobe?

#2 – Reusing Mascara Brushes
Don’t throw away your used mascara brushes. Possessing an easy-to-hold handle and a small brush, mascara wands make the perfect tool for small jobs inside and outside of the home. Throw away the portion carrying the mascara and wash and dry the brush-handle part thoroughly. Here are a few ideas on how to reuse them that I found circulating on the internet, plus a few of my own ideas. If you can think of more ways to reuse mascara wands, send them to me. I’m always looking for new ways to reuse things!

Ways to Reuse Mascara Wands:

Separate clumpy eyelashes
Brush eyebrows
Exfoliate lips

Clean hummingbird feeders (the brushes need to be really clean for this use)
Clean jewelry
Clean heating and cooling vents (home and car)
Clean fingernails
Clean lint from hairdryer
Clean your computer keyboard
Clean out drilled holes

Unclog sink drains
Unclog soap or lotion dispensers
Paint with them
Get the last drop of paint out of a bottle/tube

#3 – Ice Castles
Harbin Ice Sculptures The Harbin Snow and Ice Festival is the largest ice festival on earth. After looking at these photos of the incredible ice sculptures, you’ll want to visit them in person. Add this festival to your bucket list!

#4 – Recipe Maker
From Fine Cooking comes this fun tool called Recipe Maker. The top of the website page states, “Our interactive tool guides your kitchen improvisation: You choose the specific ingredients and flavors; we provide you with the amounts and instructions.” I clicked on “Versatile and Variable Fritatta,” dragged virtual ingredients into a bowl step-by-step, and ended up with a delicious recipe that utilizes ingredients that I have in my refrigerator.

#5 – Love
“Remember that people are the least lovable when they are most in need of love.”
Sharon Randall

Enjoy your weekend!

Read Full Post »

Fresh Banana Sorbet

“Can I throw these away?” my husband inquires. I look at the bunch of dark bananas in his hand and scream, “Noooooooooooo!” Guilt washes over me at the thought of wasting food. I come from a long line of “savers.” Nothing gets wasted, everything is saved. So when my husband sees a bunch of ugly and disgusting bananas, I see something with potential. Normally, if I’m on top of my game and I see brown bananas with freckles sitting on the kitchen counter, I’ll put them in the freezer for future baking projects. But occasionally, I’m too preoccupied to notice their demise and I end up sending them to the compost bin instead. When I came across this recipe for banana sorbet, I was thrilled. The only ingredient in this recipe are very ripe bananas! You’ll need a blender or a food processor – no ice cream maker is required. This frozen treat couldn’t be easier, healthier, and less wasteful!

Fresh Banana Sorbet
Recipe from Chocolate and Zucchini

Ingredients:
Very ripe bananas

Directions:
1. The day before, peel the bananas, slice them, and place them in a freezer-safe container in the freezer.

2. Remove the frozen banana slices from the freezer and process them in a sturdy food processor or blender. At first it will look like a mess, but if you press on, it will soon come together and become smooth.

3. At this point, you could choose to add mix-ins, such as candied nuts, chopped chocolate, dried coconut flakes, caramel sauce or melted chcolate to create swirls, etc.

4. Serve immediately or return to the freezer for later consumption.

Yields: A single medium banana will yield two small scoops or one large scoop.

Linnell’s Notes:
1. My husband likes to eat ice cream while watching television at night. I think this sorbet would be a healthier alternative for him. For the initial taste test, I presented him with a bowl of banana sorbet with chopped candied pecans sprinkled over the top. He gave it a thumbs up.

2. Because this sorbet does not contain anything artificial, it would make a great frozen treat for babies and young children. You could make a large batch and freeze it in small paper cups to make mini fruit pops for the kids.

ENJOY!

Read Full Post »

« Newer Posts - Older Posts »