Feeds:
Posts
Comments

Archive for the ‘Recipes’ Category

ravioli casserole

Looking for something tasty and hearty to take to a holiday potluck? Well, consider yourself “potlucky” that you found this recipe! Like a lasagne, this casserole has layers of meaty tomato sauce and shredded cheese, but magnificent rows of cooked raviolis replace the lasagne noodles. My two guest taste-testers gave this casserole a two-thumbs up and even took some home as party favors.

Lisa’s Ravioli Casserole
From Paul & Phil’s Potluck Cookbook

Ingredients:
9 oz. fresh or frozen raviolis
1 lb. extra-lean ground beef
Salt, garlic, ground black pepper, and Italian seasoning, to taste
1 – 26 oz. jar of spaghetti sauce
2 cups shredded cheese (mixture of mozzarella, Romano and Parmesan)

Directions:
1. Preheat oven to 350 degrees F.

2. Boil 8 quarts of water and cook raviolis according to package instructions. Drain them.

3. While raviolis are cooking, brown hamburger with the spices. Drain fat from meat. Stir in spaghetti sauce and set aside.

4. Spray a large casserole with nonstick spray. Layer meat sauce in the bottom of the dish. Place a few raviolis on top of the sauce. Put another layer of sauce on top of the raviolis. Sprinkle a layer of cheese on next. Continue to layer the ingredients with final layer being cheese.

5. Bake for 45 minutes or until the cheese is slightly browned and bubbly.

Serves 4-8

Linnell’s Notes:
1. This recipe creates a good casserole. Nothing exotic, though. The great thing about this recipe is its adaptability. The next time I prepare this casserole, I will use more interesting tasting ravioli (I used cheese ravioli the first go-round) and add some sweet Italian sausage to the ground beef mixture for more depth of flavor. Chopped spinach (defrosted and squeezed dry), chopped mushrooms, diced green peppers, chopped onions, and a can of diced tomatoes would also enhance the flavor of this recipe. Oh, and maybe a little wine, too . . . .

2. I doubled the recipe and it fit nicely in a 9 by 13-inch pan.

3. Instead of placing “a few raviolis on top of the sauce” as the recipe states, I layered the  raviolis in rows to cover the sauce (approximately 4 raviolis across and 6 raviolis long). This way every person is guaranteed to get his share of ravioli!

Enjoy!

Read Full Post »

Close up of frog

Photo by Linnell Chang

He: It’s late. Are you coming to bed?
She: In a minute.
He: What are you doing?
She: Taking pictures of a frog.
He: A frog? Where? It’s one o’clock in the morning!
She: Yeah, well, when I was checking the door to see if it was locked, I noticed a frog stuck to the glass. It’s not everyday you can see the belly of a frog up close!
He: I should have known better than to ask you what you were up to!

Opportunities to learn something new present themselves everyday, all day long. It’s easy to ignore or dismiss these moments because we live busy lives and because we take the world around us for granted. So the next time you see something you take for granted – a frog on a window, an autumn leaf on the ground, a candle burning, etc., ask yourself these classic questions: why, when, what, where, and how? For example, how is a frog able to cling to a smooth surface? Why do some autumn leaves turn yellow, some orange, and some red? When a candle burns, where does the wax go? Whether we take the time to observe, study, or investigate depends on our willingness or receptiveness to learn. Don’t forget . . . the more you know, the more you grow.

#1 – Sharpie Art
Sharpie decorated mugs Isn’t it time you learned that Sharpie pens are not just for writing? Take a look at these 20 Sharpie Projects Perfect for the holidays! You’ll be surprised with what you can create with a Sharpie pen!

#2 – Santa Hat Pretzels
Santa Hat Pretzels 
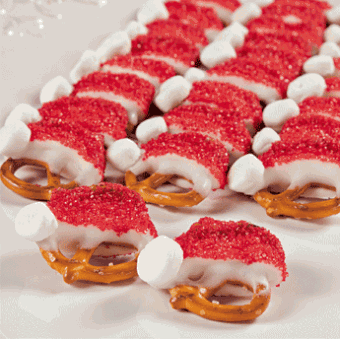
Looking for an easy-to-make holiday treat? Make these cute Santa Hat Pretzels. Simple, clever, and no baking required!

#3 – Ink and Water

Alberto Seveso

Part of the A Due Colori Series by Alberto Seveso

In the hands of an average person, mixing ink and water together spells out one big mess, but in the hands of Italian artist Alberto Seveso, these two elements create something beautiful. Click here to see more of his intriguing work.

#4 – Random Acts of Kindness
random acts of kindness When we truly open our eyes to the world around us, we take down our blinders and open our hearts, too. It’s been awhile since I’ve posted about random acts of kindness, so when I saw these 16 Unbelievable Acts of Kindness, I knew I had to share them with you. They’ll restore your faith in mankind and propel you to do something kind for someone else.

#5 – Just For Today

Just for today, I will not be angry.

Just for today, I will not worry.

Just for today, I will be grateful.

Just for today, I will do my work honestly.

Just for today, I will be kind to every living thing.

The Five Reiki Principles by Dr. Mikao Usui

Learn something new this weekend!

Read Full Post »

Fall Fruit Salad

“Healthy” and “holiday” are words rarely used together, especially when describing food. Trying to plan healthy meals during the holidays can be quite a struggle, right? Well, not necessarily. This past Thanksgiving, I served my family a visually appealing, texturally satisfying, and heart-healthy salad. Not only did this salad splendidly highlight fall fruit, such as persimmons, Asian pears, pomegranates, and ruby grapefruit, it was served with a delicate, FAT-FREE, slightly sweet and slightly tart salad dressing! This salad has it all: gorgeous to look at, easy to prepare, and a delight to eat!

Fall Fruit Salad
Recipe from November 1995 issue of Sunset Magazine

Ingredients:
1 to 2 tablespoons pine nuts
2 firm-ripe Fuyu persimmons (1/2 lb. each)
2 ruby grapefruit (1 lb. each)
1 Asian pear (about 3/4 lb.)
3 tablespoons lime juice
3 tablespoons rice vinegar
2 tablespoons honey
2 to 3 cups frisée, rinsed and drained
3/4 cup pomegranate seed
Salt

Directions:
1. In a 6- to 8-inch frying pan over medium heat, frequently stir pine nuts until pale gold, 2 to 3 minutes. Pour from pan.

2. Rinse persimmons, then trim off and discard leaf tops. Slice persimmons crosswise into thin rounds.

3. With a knife, cut peel and white membrane from grapefruit. Holding fruit over a bowl, cut between segments and inner membrane to release fruit into bowl. Also squeeze juice from membrane into bowl, then discard membrane.

4. Rinse pear and discard stem. Cut fruit crosswise into thin rounds, right through center seeds. Coat pear slices with grapefruit juice.

5. Mix 3 tablespoons grapefruit juice (reserve remainder for other uses) with lime juice, rice vinegar, and honey.

6. Line a salad bowl or individual plates with the frisée. Arrange pieces of persimmon, pear, grapefruit on the greens; sprinkle fruit with pomegranate seed and pine nuts, then moisten with the grapefruit-lime dressing. Add salt to taste.

Serves 6

Linnell’s Notes:
1. Fuyu persimmons are the round, squat persimmons that can be eaten while they are firm, unlike the elongated and pointed Hachiya persimmons, which must be eaten only after the fruit has ripened to a soft and somewhat squishy state.

2. Besides a light sprinkling of salt, I also sprinkled some fresh ground pepper on each plated salad.

3. Keep an eye on the pine nuts while toasting them. They contain a high level of oil, so they will burn quickly!

4. My family is not a big fan of frisée, so I substituted fresh green curly-leafed lettuce.

5. It is easier to peel the grapefruit, if you first cut off the top and the bottom peel. This will give you a flat surface when you stand the grapefruit on the cutting board.

ENJOY!

Read Full Post »

split pea and spinach soup

A sip of hearty soup and a bite of freshly baked cornbread takes the chill out of a chilly evening. But better than that, when this thick and flavorful soup is paired up with cornbread, which is a complimentary protein, a complete protein is formed. How comforting to know that the comfort food you’re eating is not only delicious, but good for you, too!

Split Pea and Spinach Soup
Recipe from Linnell’s old recipe box, original source unknown

Ingredients:
2 cups chopped onions (about 2 large ones)
2 tablespoons vegetable oil
1 lb. or 2 cups yellow or green split peas, picked over and rinsed
2 quarts water
2 bay leaves, crumbled
1 teaspoon dried basil
1 10 oz. package frozen chopped spinach
2 teaspoons salt
1/2 teaspoon pepper
1/8 teaspoon ground cloves
1/4 cup Parmesan cheese, grated

Directions:
1. Heat oil in a Dutch oven and add onions. Sauté the onions (and the pork, if using*) in oil until tender.
2. Add peas, water, bay leaves, and basil.
3. Cover and simmer for approximately one hour or until the peas are tender.
4. Add the spinach, cover, and simmer, while stirring occasionally, about 8 minutes longer.
5. Season with salt, pepper, and cloves.
6. Serve sprinkled with grated Parmesan cheese and a crusty loaf of pumpernickel bread.

Serves 4 or makes 10 cups.

Linnell’s Notes:
1. *I add either diced salt pork, ham, or 2 smoked ham hocks for additional flavor. Obviously if you’d like to make this a vegetarian soup, you will omit the meat.
2. Taste soup before adding the salt, especially if you’re adding a cured meat.
3. As the recipe suggests, pumpernickel bread is a good accompaniment, but my family would revolt if I did not serve this with cornbread.

ENJOY!

Read Full Post »

Chocolate-Pomegranate-Ginger Bark Candy

The intensity of bittersweet chocolate mixed with the spicy zip of candied ginger tantalizes my taste buds beyond delight, but the bursts of fresh, tart, pomegranate juice in my mouth sends them into pure ecstasy. This confection combines few ingredients to create a depth of flavors you’d not expect from such a simple recipe. Individually, each ingredient is potent enough to stand alone, but when combined, they deliver an incredible treat. Flavonoid-rich dark chocolate, zingibain-rich ginger, and antioxidant-rich pomegranate juice give impressive reasons to eat this candy. Too bad I had to force myself to sample so many pieces to write this review!

Chocolate-Pomegranate-Ginger Bark
Recipe from Oct/Nov issue of Fine Cooking Magazine

Ingredients:
10 oz. bittersweet chocolate (60% cacao), broken into 1-inch pieces
1 cup fresh pomegranate seeds (from 1 large pomegranate)
1½ Tbs. minced candied ginger
1/4 tsp. fine sea salt

Directions:
1. Line a baking sheet with a silicone baking mat or waxed paper.

2. Put the chocolate in a wide, shallow, microwave-safe bowl and microwave on high until it just starts to melt, about 1 minute. Stir with a spatula until the chocolate is completely melted and smooth, heating in additional 15-second increments if necessary.

3. Gently stir half of the pomegranate seeds, the ginger (break up any clumps with your fingers), and the salt into the chocolate.

4. Scrape the chocolate mixture onto the baking sheet and spread it into an 8×10-inch rectangle.

5. Sprinkle the remaining pomegranate seeds evenly over the top, pressing them into the chocolate.

6. Refrigerate until fully set, about 30 minutes.

7. Break the bark into chunks with your hands (be careful not to crush the seeds), and serve. The bark will keep, refrigerated, for up to 5 days.

Serves 6

Linnell’s Notes:
1. Obviously, the better quality chocolate you use, the better tasting bark you’ll have.
2. To open up a pomegranate see the instructions in my “Linnell’s Notes” section of my post Brussels Sprouts Roasted on the Stalk. The pomegranates I had were huge, so I used more pomegranate seeds than called for. The next time I make this recipe (and I will be making this again), I will cut back on the amount of pomegranate seeds.
3. I minced a little bit of extra candied ginger to sprinkle on top of the bark.
4. You might be considering omitting the salt from this recipe, but don’t! I think the salt adds a good counterbalance to the other flavors.

Enjoy! Enjoy! Enjoy!

Read Full Post »

Roasting Brussels Sprouts on a Stalk
Are you a hater or a lover . . . of Brussels sprouts, that is? Which category do you fall into? Scientists at Cornwall College have discovered a genetic reason why people fall into one category or the other. These scientists discovered that some people have a mutated gene which makes them immune to the bitterness of Brussels sprouts. Too bad for those who don’t eat these sprouts, though, because they are packed with nutrients – with high levels of fiber, vitamin A, vitamin B6, vitamin C, vitamin K, and iron, just to name a few. I purchased a whole stalk of Brussels sprouts at an Asian market for only $3.99 and roasted it, stalk and all, in maple syrup and olive oil. For an added nutritional punch, I sprinkled fresh pomegranate seeds over it. Treat your family to this visually interesting, nutritionally-charged vegetable this Thanksgiving and you’ll feel less guilty about serving them the other nutritionally-challenged Thanksgiving fare!

Brussels Sprouts Roasted On The Stalk
Recipe from Trader Joe’s and The Fresh Market

Ingredients:
1 Brussels sprout stalk
3/4 cup maple syrup
1/4 cup olive oil
Freshly ground pepper and sea salt, to taste
Fresh pomegranate seeds or dried cranberries, for garnish

Directions:
1. Preheat oven to 350 degrees F.
2. Trim the stalk down to the fullest, best looking part, if necessary. Trim sprouts off one side of stalk to make a flat bottom. Also trim off any discolored or blemished leaves. Brussels sprouts stalk 3. Rinse stalk and trimmed sprouts in fresh water.
4. Wrap damp stalk in plastic wrap and heat in the microwave for 4 to 5 minutes (or blanch in a large pot of boiling water). Place trimmed loose sprouts in a bowl, cover with plastic wrap and microwave for 3 minutes.

Blanched Brussels sprout stalk

Blanched Brussels sprout stalk

5. Whisk maple syrup and olive oil together. Place stalk flat-side down along with any loose sprouts in a roasting pan and pour the maple sugar mixture over it.
6. Use a pastry brush to mop the maple syrup mixture onto all sides of the sprouts and stalk.
7. Season, to taste, with salt and pepper.

Brussels sprout stalk

Ready for oven

8. Place in oven and roast for about 45 minutes or until sprouts on the stalk are fork tender and caramelize to a golden color.
9. To serve: Place stalk on a holiday platter, pour any syrup from the roasting pan over the stalk. Garnish with something bright and tart such as cranberries or fresh pomegranate seeds*. Roasted Brussels sprout stalk with pomegranate seeds

Serves 6 – 8

Linnell’s Notes:
1. The stalk I bought was covered evenly with sprouts, so I did not need to trim off any straggly stem.
2. Before trimming the sprouts off of one side, you need to decide first which side is the most attractive, then turn it upside down and trim off the sprouts that prevent it from laying down flat. Trim off as few as possible. I did not trim off any near the top back portion of the stalk, because when I flipped it over it was balanced and laid flat nicely.
3. If you are blanching the stalk in a large pot of boiling water, instead of microwaving it, you will have to turn the stalk over so that the both ends of the stalk gets some time in the hot water.
4. For easy clean-up, I covered my roasting pan with a sheet of parchment paper.
5. When selecting pomegranates, select the heaviest ones. They’ll contain more juice. It’s not important how red they are on the outside, unless you’re buying pomegranates to dry for decorations.
6. To serve, I just snipped the sprouts off with kitchen shears and served them on the same platter.

*How to cut open a pomegranate easily and without a mess:
1. Wash and dry the exterior of the pomegranate.
2. Fill a medium-large bowl with water and put it in the sink.
3. Cut off the top, just below the crown, and then cut the bottom off.
4. Notice that four to six sections of white membrane are now exposed. Cut the skin vertically along each section.
5. Put the pomegranate into the bowl of water and break apart along the cut lines.
6. Break the sections into smaller parts, loosening the arils and allowing them to sink to the bottom of the bowl.
7. Using a spoon or your hands, scoop up the pieces of white membrane that have floated to the surface of the water.
8. Pour the arils and liquid through a strainer and let drain.

ENJOY!

Read Full Post »

Pumpkin Cream Pie As leaves start taking their final bows and nights become longer, fall’s spectacular show appeals to our senses more than ever. Acorns make music as they fall from tall oak trees and drop to the ground. Autumn leaves paint fiery displays of color on bright blue backdrops of sky. Familiar smells of favorite spices set the stage for the holidays. With a little over three weeks until Thanksgiving, now is a great time to test out new fall recipes. Imagine a fluffy and lightly-spiced pumpkin cream pie – one that even non-pumpkin-eaters will like and one that can be prepared in advance. That’s my idea of a fall showstopper!

Pumpkin Cream Pie
Recipe from The Pioneer Woman

INGREDIENTS
For the Crust:
1-1/2 package graham crackers (about 15 Cookie Sheets)
1/2 cup powdered sugar
1 stick butter, melted

For the Filling*:
1 box (3 oz. box) Vanilla Pudding (Cook and Serve variety)
1 cup half-and-half
1/2 cup heavy cream
Pinch of cinnamon
Pinch of nutmeg
Pinch of ground cloves
2 tablespoons whiskey, optional
1/2 cup pumpkin purée
1/2 cup additional heavy cream
2 tablespoons brown sugar
Extra graham cracker crumbs, for garnish

Directions:
1. Heat oven to 300 degrees F.

2. Grind graham crackers in a food processor (if you don’t have a food processor, place them in a large Ziploc and pound them with a rolling pin). Add powdered sugar and melted butter and process until totally combined. Press into the bottom and sides of a pie pan until nice and firm. Bake for 8 to 10 minutes, or until warm and “set.” Remove from oven and allow crust to cool completely.

3. In a medium saucepan, mix dry pudding mix with half-and-half and cream. Add spices. Bring to a boil over medium heat, stirring constantly, until mixture is bubbly and thick.

4. Remove from heat and stir in whiskey, if using. Add pumpkin and stir to combine. Place lid on pot and set aside to cool. When cool enough, place pot in the fridge to cool completely.

5. When mixture is cool, remove from the fridge. In a mixing bowl, add 1/2 cup heavy cream and brown sugar. Beat until very light and fluffy. Fold in pumpkin cream mixture until combined. Pour into cooled crust.

6. Cover and refrigerate for a couple of hours or overnight. Serve with graham crackers crumbled on top.

Serves 8

Linnell’s Notes:
1. This recipe called for 15 graham cracker “cookie sheets” which I assumed meant 15 double sheets or the sheets as they come out of the bag. This was way too much, so the author’s definition of a sheet must be half of that. I used part of the leftover crumbs for the garnish.

2. *In the photo of the pie on The Pioneer Woman I noticed the pie looked a bit shallow, so I decided to double the filling ingredients. A 15-ounce can of pumpkin purée was a bit more than what a doubled amount would have been, but I went ahead and used the whole can. Didn’t make sense to let a small amount of pumpkin go to waste. Extra filling filled four individual ramekins and was called pumpkin mousse!

3. The next time I make this pie, I will try sprinkling a tiny bit of finely chopped candied ginger on top along with the graham cracker crumbs – just for a special interest.

Enjoy!

Read Full Post »

Buffalo Chicken Dip

Watching the great Willie Mays, Willie McCovey, Juan Marichal, Orlando Cepeda, Gaylord Perry, and the Alou brothers play baseball at the infamous Candlestick Park, ranks among my favorite childhood memories. Back in the day when it was deemed safe for children to be out and about the city all by themselves, my cousins and I would catch San Francisco Muni buses to go watch Giants games. Because of the unpredictable weather at Candlestick, we either froze in the damp overcast or toasted in the bright sunlight. But bags of peanuts, tasty hotdogs, boxes of Cracker Jack, and chunks of Bazooka Bubble Gum more than made up for any discomfort we experienced.

To honor the great Giants players of the past and the current National League Champions, I present a dip that’s worthy of a Giants World Series party. It’s even the right color – orange! So . . . LET’S GO GIANTS, LET’S GO!

Buffalo Chicken Dip
As featured in How Sweet It Is

Ingredients:
2 – 8 oz. blocks of cream cheese, softened
1/2 cup blue cheese dressing
1/2 cup ranch dressing
1 cup Frank’s Red Hot Buffalo Wing Sauce
3 cups shredded chicken
2 cups shredded cheddar cheese*

Directions:
1. Preheat oven to 375 degrees F.

2. In a large bowl, combine softened cream cheese, ranch dressing, blue cheese dressing, and buffalo wing sauce. Using a hand mixer, mix until smooth and creamy, about 3 minutes.

3. Fold in shredded chicken and 1 cup of shredded cheese.

4. Pour into a baking dish. Top with 1 cup of shredded cheese.*

5. Bake for 20 minutes or until dip is warmed through.

6. Serve with tortilla chips, bread, sturdy crackers, and celery sticks.

Linnell’s Notes:
1. Instead of buying chicken breasts and cooking them, I was lazy and purchased a rotisserie chicken and shredded the meat. Other versions of this recipe call for using canned chicken.

2. When this came out of the oven, small pools of oil sat on the surface and I blotted them off.

3. Next time, I will try adding blue cheese crumbles instead of blue cheese dressing. I think this would intensify the blue cheese flavor and cut back on the oiliness of the finished product.

4. *Also, the problem with baking shredded cheddar cheese on top of the dip is that as the dip cools the cheese hardens and creates a cheese crust that gets in the way of the dip. Next time I will omit the cheese topping and will mix in less fatty shredded mozzarella cheese instead of cheddar.

5. The heat in this recipe can be adjusted by adding a little more or a little less of Frank’s Red Hot Buffalo Wing Sauce.

6. Makes enough for a small gathering of snack-craving people.

Enjoy!

Read Full Post »

Severed Finger Cookies

Long dirty fingernails punctuate irregularly-shaped fingers. An extreme paleness gives them a ghostly appearance, while thick red puddles form around their severed ends. Strewn across an old chopping block, the fingers suspiciously point to a nearby meat cleaver and to a handwritten note that says, “For Dessert.”

Severed Finger Cookies
Recipe from Rachel Ray Magazine

Ingredients:
1 cup unsalted butter, at room temperature
1 cup confectioners’ sugar
1 egg
1 teaspoon pure vanilla extract
2¾ cups flour
1 teaspoon baking powder
1 teaspoon salt
1/2 cup sliced almonds
Raspberry jam

Directions:
1. In a large bowl, beat the butter until creamy. Mix in the sugar, egg and vanilla, then mix in the flour, baking powder and salt. Cover the dough with plastic wrap and refrigerate for 30 minutes.

2. Preheat the oven to 325 degrees F. Using your hands and working quickly, roll a heaping tablespoon of dough into a finger shape. Place the fingers about 3 inches apart on an ungreased cookie sheet. Stick a sliced almond on one end of each for the fingernail. Use a table knife to make three crosswise knuckle marks in the middle of each cookie.

3. Bake until lightly golden, 20 to 25 minutes. Transfer to a rack to cool.

4. Meanwhile, in a small saucepan, cook the jam over low heat until it reaches a saucy consistency. Once liquefied, remove from the heat and pour into a small bowl; dip the severed end of each cookie into the sauce.

Makes about 50 cookies

Linnell’s Notes:
1. I made the dough the night before, took it out the next morning, and let it sit on the counter for a little bit, until it was pliable enough to shape.

2. I covered my cookie sheet with parchment paper.

3. Sort through the sliced almonds before you begin and put “nail-worthy” ones in a small bowl. This will make the assembly of the “fingers” faster. Carefully press the sliced almonds onto the dough fingers. If you press too hard, you can break the almond slices. However, if you do not press them into the dough well enough, they fall off after the cookies are baked. A few almond slices fell off my cookies, but I just stuck them back on with a dab of jam. It created the look of “bloody cuticles.”

4. These are sturdy and not delicate cookies. They seemed a little dry to me, so the next time I make these, I will make the fingers a little smaller and adjust the baking time. Their texture makes them good cookies to dunk, though!

5. After 15 minutes in the oven, take a look at the cookies. The cookies won’t be golden at this point, but you do need to keep an eye on the thin almond slices. They can darken or burn quickly, so don’t set the timer for 25 minutes and walk away.

6. I used cherry jam instead of raspberry jam. I strained the jam for cherry chunks before heating it. I also microwaved the jam instead of putting it in a saucepan. It just seemed simpler to do that.

7. I put a wire rack over a piece of waxed paper. After dipping the severed ends of the cookies into the jam, I put them on the rack. Any sticky jam drops fell onto the waxed paper.

Enjoy these Halloween cookies!

Read Full Post »

Some people sing in the shower. I sing in the kitchen. So if you happened to walk past my house one morning last week, you might have heard a very off-tune version of this Baha Men’s song:

You put the lime in the coconut and drink it all up
Put the lime in the coconut and drink it all up
You put the lime in the coconut and drink it all up
Put the lime in the coconut; you’re such a silly one
You put the lime in the coconut and drink ’em both together

I couldn’t help but sing and bust a few “unique” moves as I whipped up a loaf of moist coconut banana bread. What a great combination of flavors: coconut, banana, rum, and lime. Don’t forget the rum, because, take it from me, it makes you sing and dance better!

Coconut Banana Bread With Lime Glaze
Recipe from Cooking Light, September 2003

Ingredients:
2 cups all-purpose flour
3/4 teaspoon baking soda
1/2 teaspoon salt
1 cup granulated sugar
1/4 cup butter, softened
2 large eggs
1½ cups mashed ripe banana (about 3 bananas)
1/4 cup plain low-fat yogurt
3 tablespoons dark rum
1/2 teaspoon vanilla extract
1/2 cup flaked sweetened coconut
Cooking spray
1 tablespoon flaked sweetened coconut
1/2 cup powdered sugar
1½ tablespoons fresh lime or lemon juice

Directions:
1. Preheat oven to 350 degrees F.

2. Lightly spoon the flour into dry measuring cups, and level with a knife. Combine the flour, baking soda, and salt, stirring with a whisk to combine.

3. Place granulated sugar and butter in a large bowl; beat with a mixer at medium speed until well blended (about 1 minute). Add the eggs, one at a time, beating well after each addition.

4. Add banana, yogurt, rum, and vanilla; beat until blended.

5. Add flour mixture; beat at low speed just until moist.

6. Stir in 1/2 cup coconut. Spoon batter into a 9 x 5-inch loaf pan coated with cooking spray; sprinkle with 1 tablespoon coconut.

7. Bake at 350 degrees for 1 hour or until a wooden pick inserted in center comes out clean.

8. Cool 10 minutes in pan on a wire rack; remove from pan.

9. Combine powdered sugar and juice, stirring with a whisk; drizzle over warm bread. Cool bread completely on a wire rack.

Yield: 1 loaf, 16 servings

Linnell’s Notes:
This bread was moist and flavorful, but the next time I make it I will be sure to have all the correct ingredients on hand to see how the bread should really taste. I used light rum instead of dark. The dark rum would have probably added a fuller flavor to the bread. I did not have plain yogurt on hand either, so I substituted vanilla-flavored yogurt and omitted the vanilla extract. I’m not sure that this substitution altered the taste very much. I also replaced the 1 cup of sugar with Splenda just to see if I could cut back on the amount of sugar. It turned out fine.

ENJOY!

Read Full Post »

« Newer Posts - Older Posts »