Feeds:
Posts
Comments

Posts Tagged ‘blog’

Egg Cups As Mini Vases

To justify collecting “stuff,” I try to think of as many ways as possible to use my collections. For example, every March and April, I use my eclectic collection of egg cups to bring spring joy to my home. I fill them with sweet treats, flowers, or candles and use them as decorations. If you don’t already have a collection of egg cups and you’d like to start one, now is the time to start looking! Egg cups are normally inexpensive, unless you buy rare antique ones. Most of mine were treasures found at peddlers’ fairs, flea markets, antique stores, import stores, department stores, and discount stores, such as Tuesday Morning, T.J. Maxx, and Marshall’s. If you have any ideas or suggestions on other creative ways to use egg cups, I’d love to hear about them!

Egg Cups as Individual Candy Dishes:
Egg Cup Candy Dish Whether you use egg cups that match your china or you use a variety of egg cups, they are the perfect size to fill with sweet treats for your guests. Don’t feel restricted to filling them with jelly beans – a single chocolate truffle would add elegance to your table!

Egg Cups as Candle Holders:
Egg Cup Candle Holders 
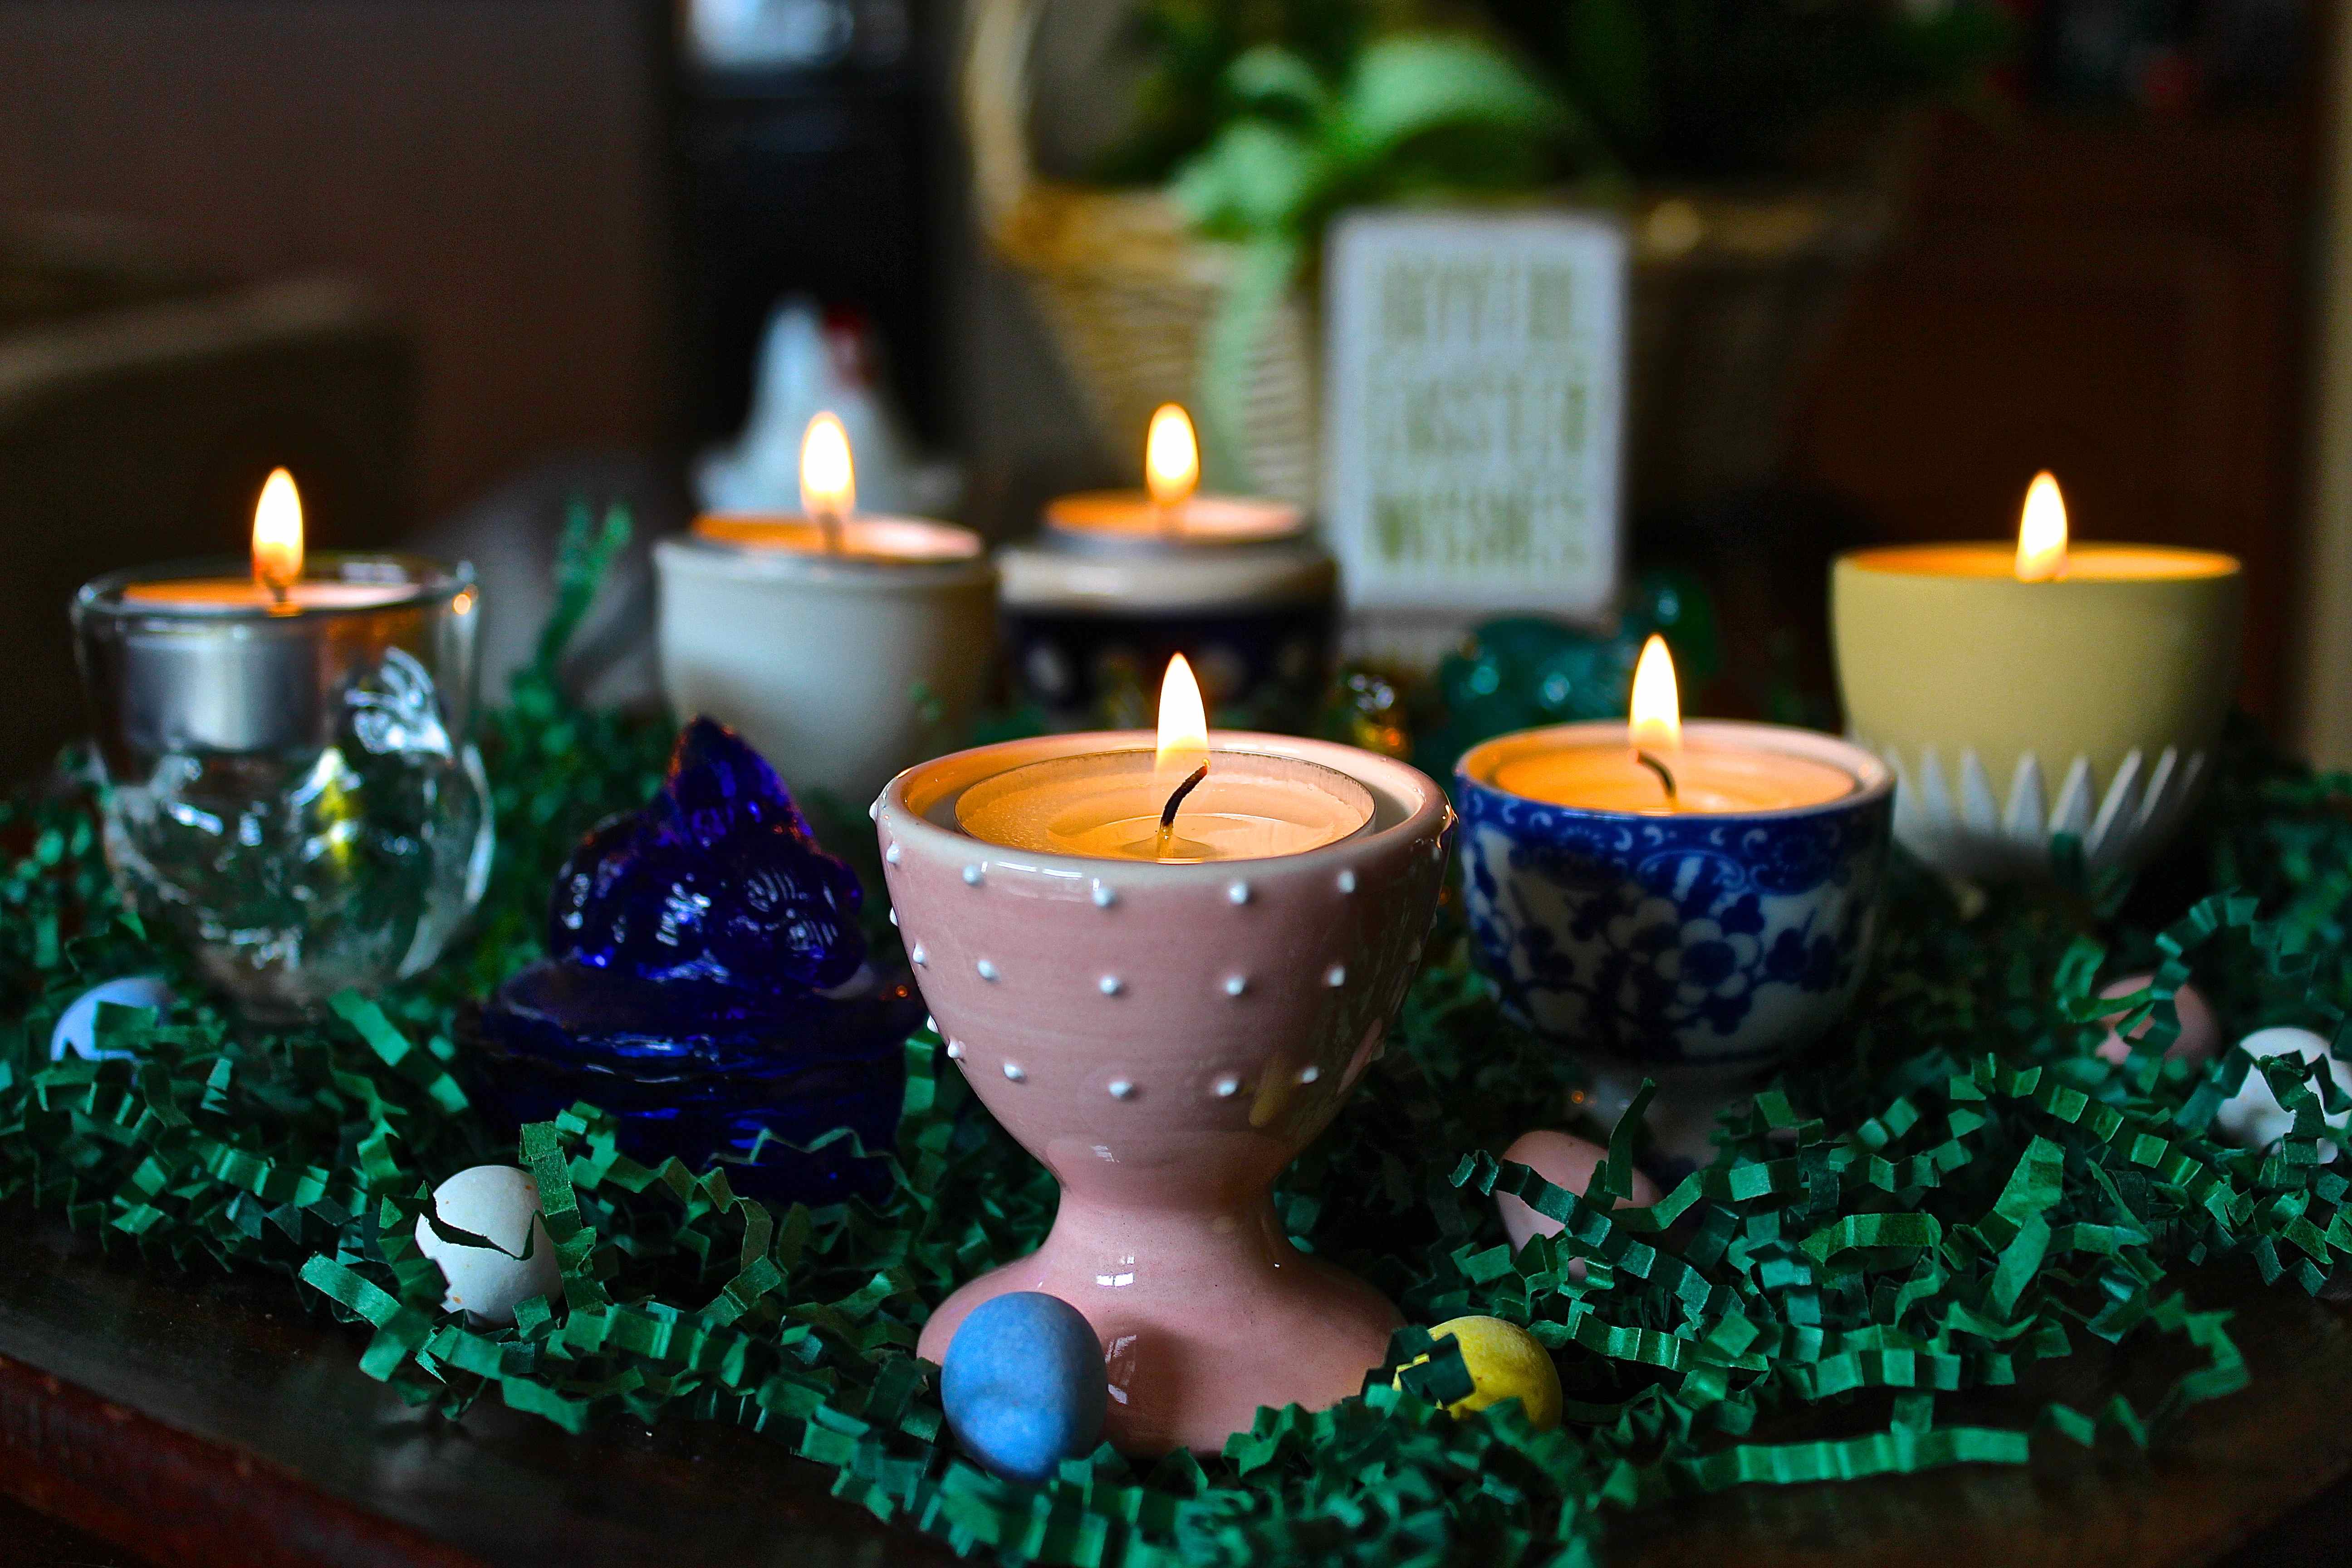
Start by spreading a small amount of paper grass on a platter, tray, or serving dish. Arrange your egg cups on the platter, trying to vary the heights and colors of the cups. Put tea lights inside each of the egg cups. If desired, sprinkle Easter egg candy on the grass around the egg cups. I particularly like Cadbury’s Mini Eggs!

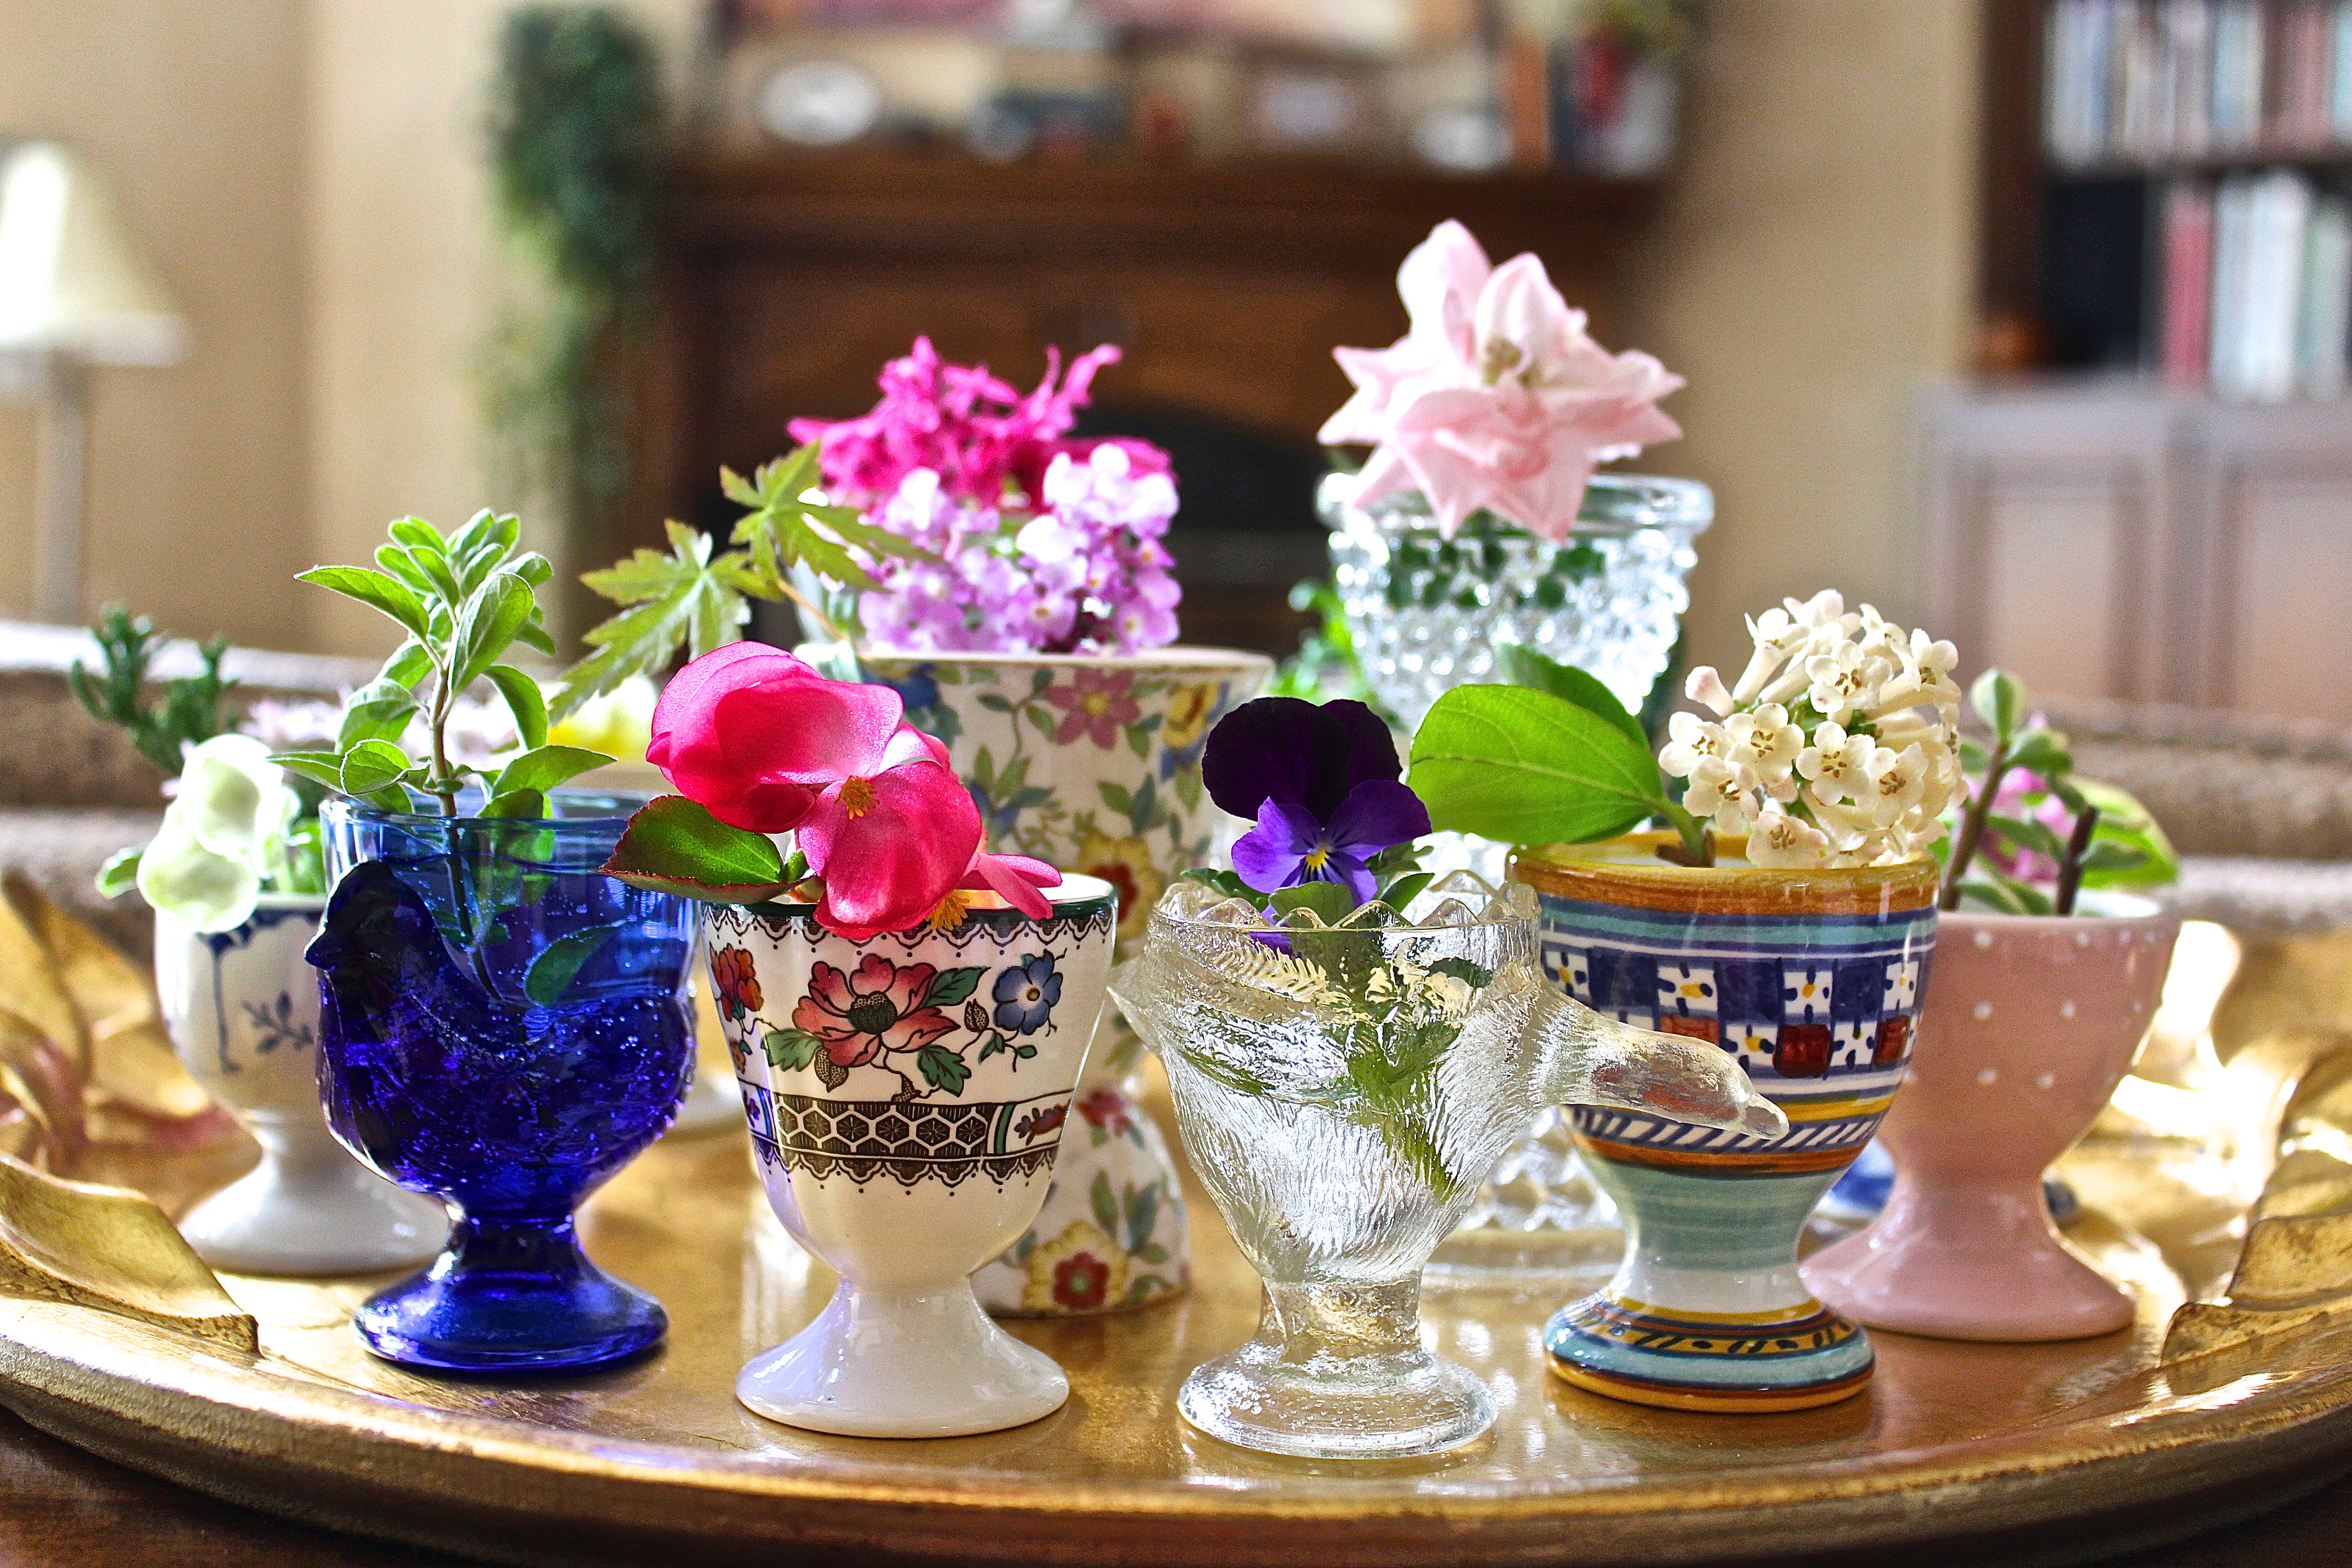
Egg Cups as Mini Vases:
Egg Cups as Mini Vases 
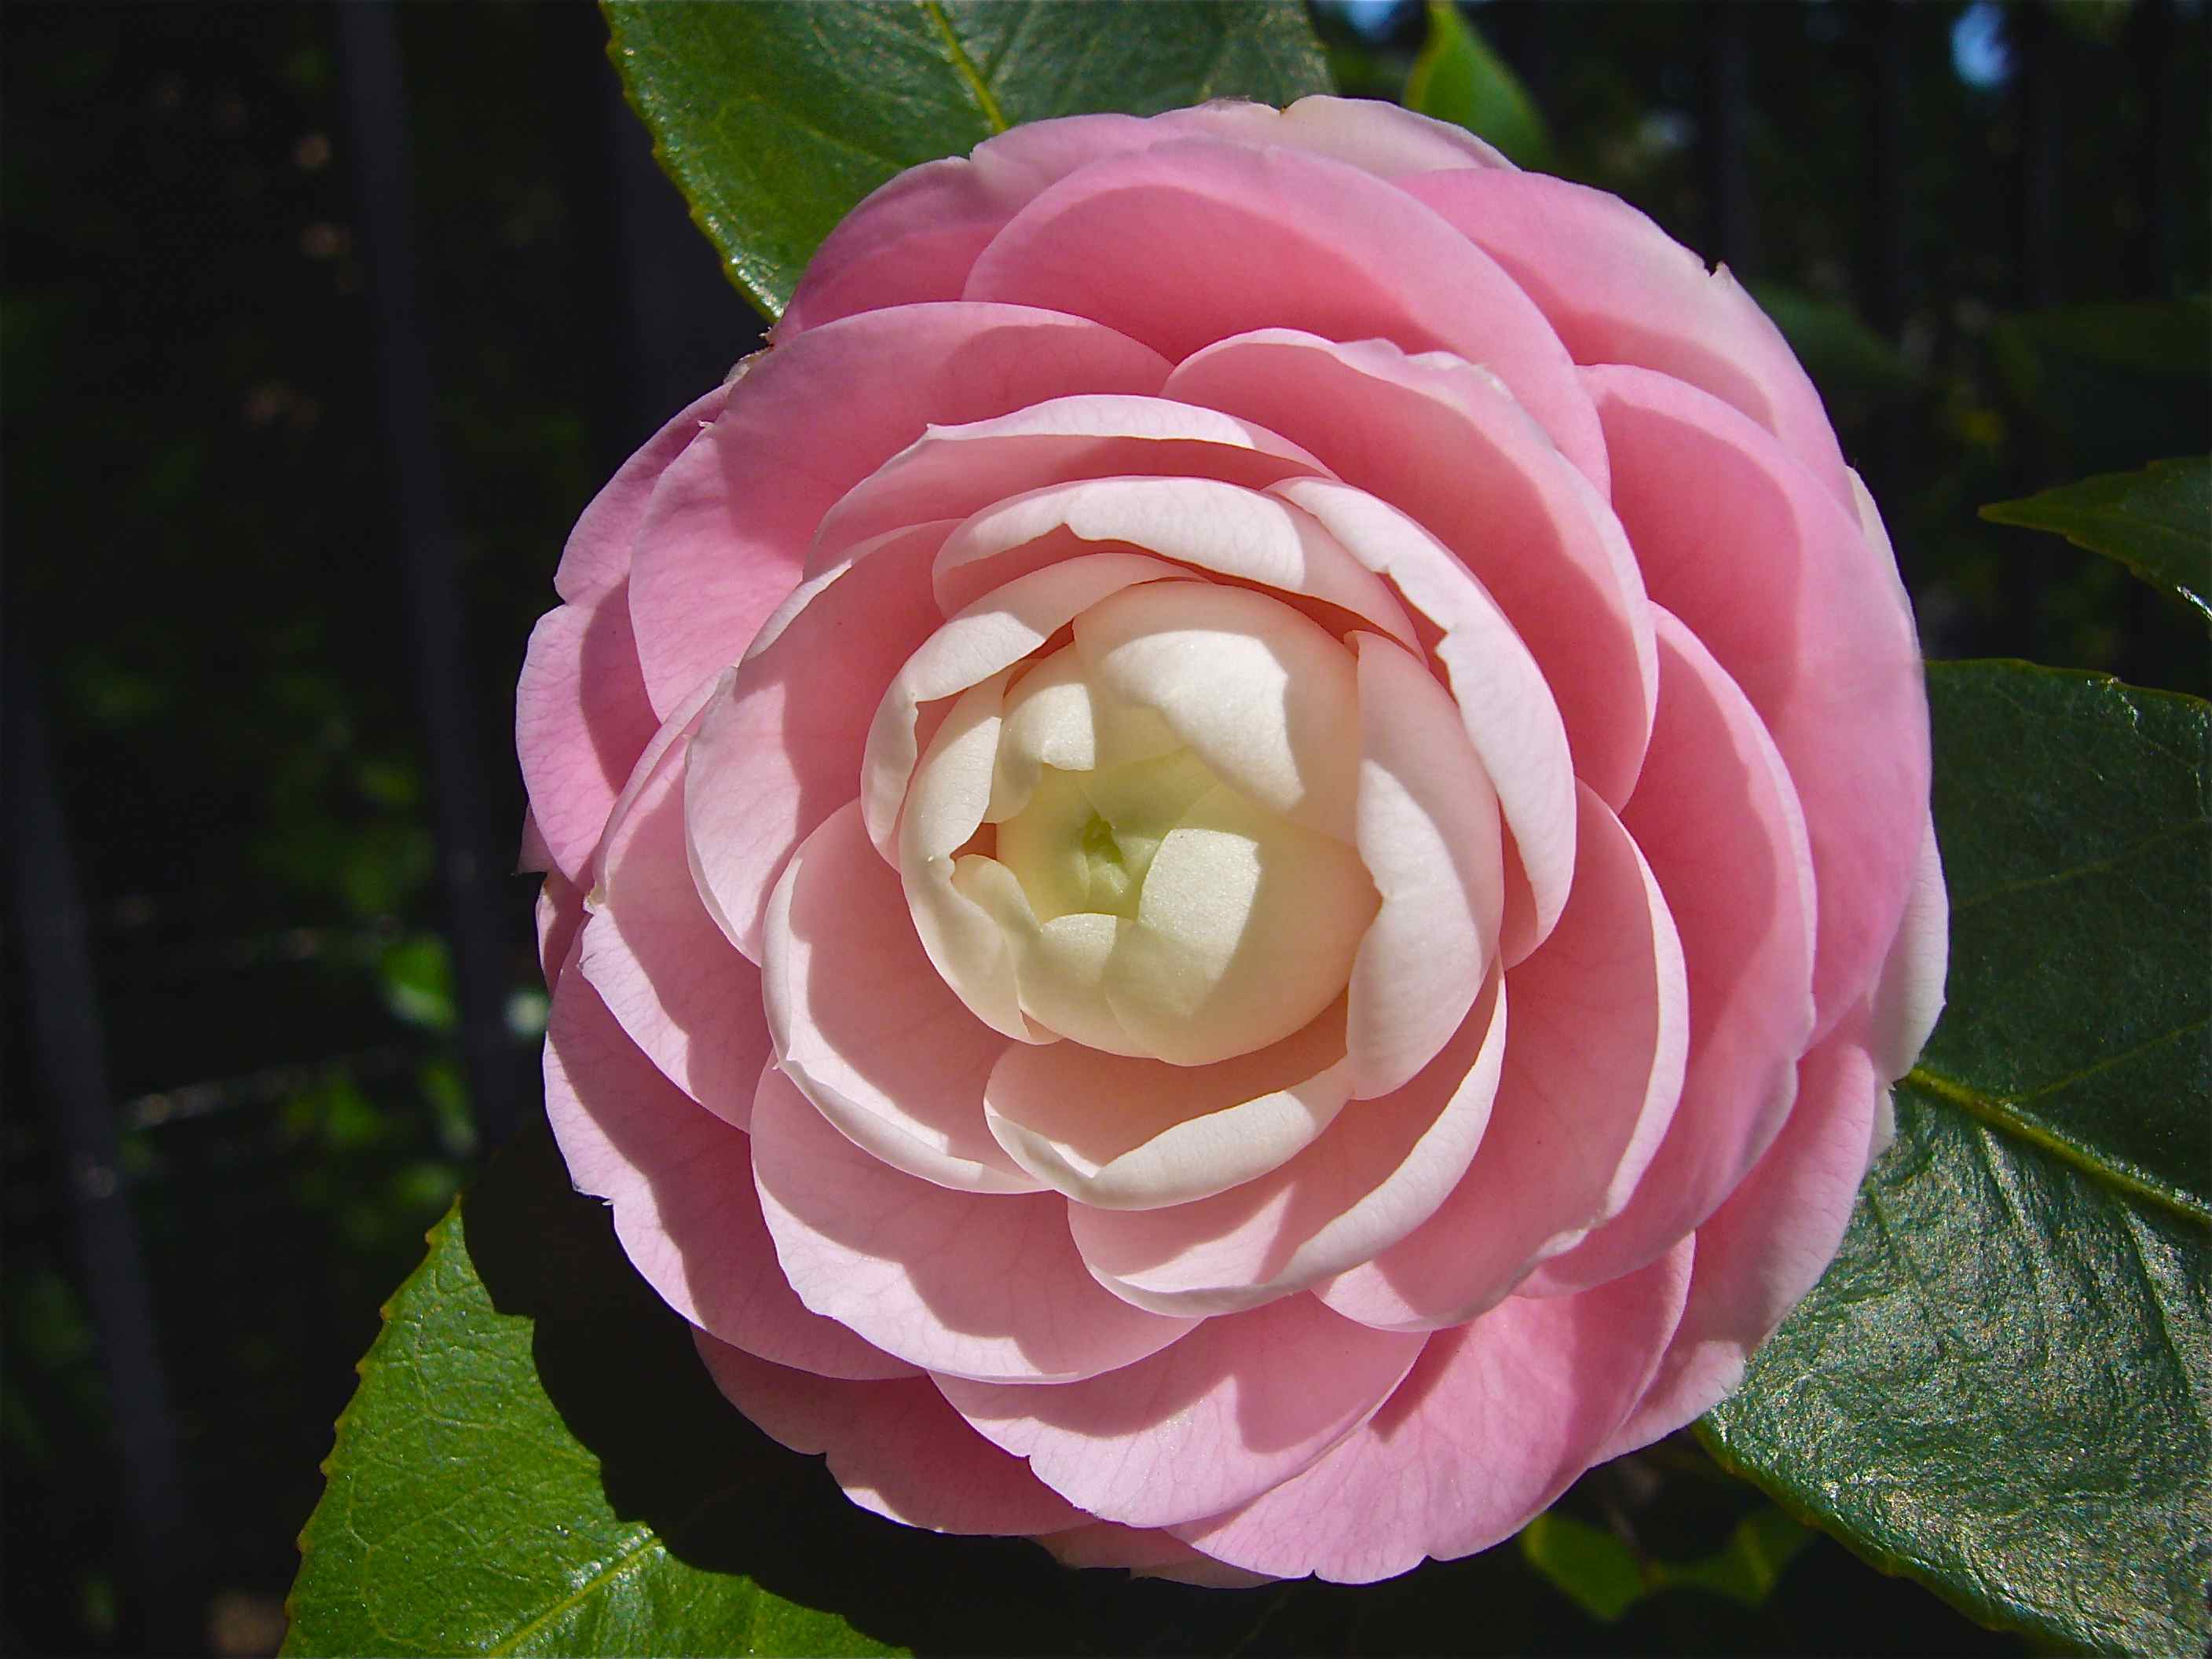
This is my favorite way to use my collection of egg cups. After arranging the egg cups on a tray, again placing the taller ones in the center and surrounding those with shorter ones, I use a measuring cup to fill them with water. Then I go out into my yard and look for small flowers and little bits of greenery. I try to keep the flowers and greens to scale with the size of my egg cups. Obviously, putting a camellia blossom inside an egg cup wouldn’t work, because the blossom would topple over. Most herbs work well in this case, because they have small leaves.

Decorating with egg cups is eggs-tremely fun!

Read Full Post »

weeping cherry

Photo by Linnell Chang

Tucked away and wrapped around the scars of sawed off limbs, lays an oasis of flush, verdant growth. Young leaves glow brightly as the sun weaves its way through heavy branches and highlights this little piece of heaven. Despite its injury and its scars, this tree found the strength and the resiliency to prove that it’s still alive and beautiful. Alexander Pope said it best, “Hope springs eternal.”

#1 – From the Brink of Extinction
Imagine your excitement if you were an exploratory botanist and you noticed a tiny plant that had been thought to be extinct for the last 60 years growing on the steep slope of a volcano. Read the article about this amazing discovery on Mother Nature Network.

#2 – A Poet Who Knows It  
Whether you have a daughter or not, you will appreciate poet Sarah Kay’s heartfelt, sometimes rambling, but always thought-provoking TED presentation titled “If I Should Have a Daughter . . . “

Here are some examples of her thoughtful prose:

“Getting the wind knocked out of you is the only way to remind your lungs how much they like the taste of air.”

“Put the star in starting over . . . and over.”

“There’s nothing more beautiful than the way the ocean refuses to stop kissing the shoreline no matter how many times it’s sent away.”

#3 – Art and Nature

Artwork by Moki

Painting by Moki

German-based artist Moki combines humans with nature in some of her artwork. Learn about this talented artist and see more of her incredible art by clicking here.

#4 – With a String of Lights . . .
With a string of lights you can do a ton of fun and interesting things – well, at least the 46 Awesome String-Lights DIYs For Any Occasion that are shown on BuzzFeed. I really think the doily wedding garland is cute, but there are just too many clever ideas for me to choose a favorite!

#5 – The Negative Is the Positive
“Life is like photography. You need the negatives to develop.”
– Unknown

Have a wonderful weekend!

Read Full Post »

Irish Cream Bundt Cake

Stout? Liqueur? Guinness? Baileys? Stout? Liqueur? Guinness? Baileys? The debate went back and forth as I tried to decide which Irish beverage to highlight in a recipe for St. Patrick’s Day. The moment I found this recipe, for a cake that has Irish cream in the cake batter and the glaze, the decision was made. Want a better visual of this culinary delight? Click on the photo above and you’ll get a tempting close-up of a moist cake soaked with a buttery glaze that glistens over toasted pecans. It’s so rich, the leprechauns in your home will surely think they found a pot of gold!

Irish Cream Bundt Cake
Recipe by RecipeNut on Food.com

Ingredients for the Cake:
1 cup chopped pecans
1 (18½ ounce) package yellow cake mix
1 (3½ ounce) package vanilla instant pudding mix
4 eggs
1/4 cup water
1/2 cup vegetable oil
3/4 cup Irish cream

Ingredients for the Glaze:
1/2 cup butter
1/4 cup water
1 cup white sugar
1/4 cup Irish cream

Directions:
1. Preheat oven to 325 degrees F (165 degrees C).
2. Grease and flour a 10-inch bundt pan.
3. Sprinkle chopped nuts evenly over bottom of pan.
4. In a large bowl, combine cake mix and pudding mix.
5. Mix in eggs, 1/4 cup water, 1/2 cup oil, and 3/4 cup Irish cream liqueur.
6. Beat for 5 minutes at high speed.
7. Pour batter over nuts in pan.
8. Bake in preheated oven for 60 minutes, or until a toothpick inserted into the cake comes out clean.
9. Cool for 10 minutes in the pan, then invert onto a serving platter.
10. Prick top and sides of cake.
11. Spoon glaze over top and brush onto sides of cake.
12. Allow to absorb glaze. Repeat until all glaze is used up.

To Make Glaze:
1. In a saucepan, combine butter, 1/4 cup water, and 1 cup sugar.
2. Bring to a boil and continue boiling for 5 minutes, stirring constantly.
3. Remove from heat and stir in 1/4 cup Irish cream.

Serves 8

Linnell’s Notes:
1. To bring out the flavor of the pecans, toast them in the oven first.

2. Thanks to deceptive shrinking packaging, both the cake mix and the instant pudding did not contain the specified number of ounces required in the recipe. The cake mix had only 16.5 ounces and the instant pudding box contained only 3.4 ounces. I used these down-sized portions with good results, though.

3. Instead of using butter and flour separately to grease the pan, I sprayed the pan with a cooking spray that contains flour – so fast and easy!

4. My cake was done at the end of 50 minutes, so you may want to set your oven timer to check the cake after 45-50 minutes.

5. Temporarily place strips of waxed paper under the cake/on top of the serving platter to catch dripping glaze and to help keep the serving platter clean.

6. This cake serves way more than the 8 servings the recipe states!

Enjoy!

Read Full Post »

pink spring bud

Photo by Linnell Chang

Spring promises hope with its mix of weather. Rain washes away dusty days and dim outlooks. The sun hastens growth and invigorates. Renewal and rebirth for all  – inside and out. Life is transformed on many levels.

#1 – Women Unite!
Global Mom Relay Women unite! We have the power to change the world! By sharing a daily post on the Global Mom Relay site everyday, we are helping a woman or a child somewhere in the world.

The United Nations Foundation states this about its Global Mom Relay:
From now until May 8, moms are powering an online conversation about motherhood to unlock donations. Every time you share a relay post on Facebook, Twitter, or email or donate $5 or more as part of the relay, a $5 donation (up to $8,000 per day) will be donated by Johnson & Johnson and the Bill & Melinda Gates Foundation to one of four initiatives that are helping women and children lead healthy and happy lives – Girl Up, the Global Alliance for Clean Cookstoves, Mobile Alliance for Maternal Action (MAMA), and the Shot@Life campaign. Led by co-chairs, Arianna Huffington, Jennifer Lopez, Lynda Lopez, Elizabeth Gore, and Sharon D’Agostino, the relay is in support of Every Woman Every Child, a movement launched by UN Secretary-General Ban Ki-moon to save the lives of 16 million women and children by 2015.

The first step is easy. Read this article, Mothers Rewriting the Future and share it!

#2 – The Joy of Books
Hey book lovers – you know how books have a way of coming alive? This video is for you!

#3 – An Eight Letter Game
Get those cobwebs out of your head. Play Eight Letters!  It’s a little like playing Boggle. You must create as many words as possible with the eight letters you are given, in the allotted amount of time. There are extra challenges, too. Each level has a target amount of points for you to reach, plus after every five levels there is a bonus anagram to solve.

#4 – Find Your Passion
find your passion test There are only ten questions in the Find Your Passion exercise. The first one reads, “When I was a kid, I dreamed of _______.” Working through these questions, I surprised myself with some of my answers. The answers were so obvious, but evidently not to me, until now. It’s taken me decades to come around full circle and to finally see that the things I have passion for are the same things I enjoyed doing as a kid. The Find Your Passion exercise is part of O’s 4-Step Guide to Discovering Who You’re Meant to Be.

#5 – Dare to Bloom
And the day came when the risk to remain tight in a bud was more painful than the risk it took to blossom.
Anais Nin

 Enjoy your weekend! Bloom!!

Read Full Post »

whitebean, shrimp, and arugula salad

In my best “Fretalian,” my own blend of French and Italian, I asked my waiter “Scuzi, qu’est-ce que c’est?” as I pointed to the menu. He obviously did not understand “Fretalian,” because he looked at me questioningly. While traveling through Italy, I noticed an oft-appearing item on menus and I wanted to find out what it was. I tried again, this time in English. “What is rocket?” The young Italian waiter continued to give me a puzzling look, so I tried gesturing. I pointed to the menu and then shrugged my shoulders with my palms facing up to the ceiling. “Ah,” he said and motioned for me to wait and then ran off to the kitchen. A minute later he came out with a green leaf in his hand. I looked at the leaf and smiled as I nodded my head in recognition. “Rocket,” the mysterious menu item, was none other than arugula. “Grazie,” I said to him as I placed my dinner order. This little story came to my mind, while I was preparing this low fat and impressively nutritious salad. The arugula or “rocket” adds a nice peppery punch to the salad and it texturally balances the other ingredients.

White Bean, Shrimp, and Arugula Salad
From the Essential Low Fat Cookbook by Antony Worrall Thompson

1 (14 oz) can cannellini beans, drained
1 Tbsp extra-virgin olive oil
Juice and zest of one lemon
1 tsp honey
1/2 tsp black pepper
1 mild long red chili, seeded and finely chopped
1 garlic clove, mashed to a paste with a little sea salt
1 red onion, thinly sliced
1 stick celery, thinly sliced
6 button mushrooms, thinly sliced
16 cooked jumbo shrimp, peeled
2 handfuls of arugula leaves

Directions:
1. Heat beans with a little salted water for 3 minutes. Drain and then tip into a bowl.

2. While they are still warm, combine beans with olive oil, lemon juice and zest, honey, pepper, and chili.

3. Allow to cool and then combine with remaining ingredients.

Serves 4

Linnell’s Notes:
1. Instead of using a mild long red chili, I chopped up half a red jalapeno to give the recipe a little kick.

2. Not being a big fan of raw onions, I used less than half of a red onion and found this amount to be perfect for my taste.

3. I used large shrimp that came de-veined.  I cooked them in water and Old Bay seasoning, drained them, and then peeled off their shells. Do not overcook the shrimp or else they will be dry and tough.

4. You might have noticed in the photograph, that there are no mushrooms. I had a mental “blip” and totally forgot to add them. It’s too bad because the mushrooms would have been delicious in this salad, not to mention the added nutrients they would have supplied!

Enjoy!

Read Full Post »

pink camellia

Photo by Linnell Chang

The sun, like a shot of whiskey, warms my face and soothes my bones. My old dog Romeo sits on the deck and squints his eyes to block out the bright light of morning. A choir of birds provides background music, while a red-bellied worm snake slithers slowly across the pavement. And providing color to an otherwise monochromatic canvas, camellia blossoms command attention. With the spring equinox only a few weeks away, spring’s potential is poised to reveal its splendor. I appreciate this lovely first day of March and hope that the month brings many more joyful moments.

#1 – Life’s Detours
“A truly happy person is one who can enjoy the scenery on a detour.” This anonymous quote opens an essay titled, “Circumnavigating Life’s Detours,” written by Alina Williams, M.SC. Everyone faces detours in life, but some people seem to navigate around them more skillfully. What characteristics and skills are needed to help us navigate challenging moments? Read the article and find out.

#2 – Re-Purpose Those CD Cases!
CD case wall art I love this DIY CD Jewel Case Frame project I found on the site Photojojo. Who doesn’t have a stash of CD cases taking up space somewhere in his home? I think the key to this wall art is to have a cohesive element in the CD cases, whether it be color or subject.

#3 – Beautifully Imperfect
This three-minute promotional film, made for Think Family, reminds us to appreciate the small imperfect things that exist in a relationship. The message is told through a humorous and touching eulogy a wife gives for her husband.

#4 – Go Fly A Kite!

kite festivals

Semaphore Kite Festival

It’s almost spring, so get your kites ready! To get in the mood, check out these 23 Huge Kite Festivals Around The World.

#5 – Open Your Mind
“The mind is like a parachute. It doesn’t work if it is not open.”
Frank Zappa

Enjoy your first March weekend of the year!

Read Full Post »

Three envelopes with photo transfers

Print, cut, dip, rub, dry, and voilà you’ve just made custom tape! Use your custom tape to personalize greeting cards and envelopes. I first learned about the process of transferring photocopy ink from my oldest son when he was in high school. Back then I thought it was a pretty cool artistic process, but one that I could never see myself using. Now fifteen years later, I’m personalizing envelopes using a technique similar to his. Thanks to the site Lil Blue Boo for the inspiration. I can’t wait to experiment more with this technique and to try using it in other ways.

Supplies:
Supplies 1. Photo images on paper
2. Scissors
3. Clear packing tape
4. Straight edge
5. Bowl of water

Directions:
1. Select the photo image you want to use. Make a photocopy of the photo or print it up using a laser printer, not an ink jet printer. Larger images work better than smaller images that contain a lot of details. Images with a fair amount of contrast will also show up better. If printing the image from your computer, you can format it to have multiple copies on one page, thus creating a strip of photos. This technique also works with images from a magazine. Black and white wedding photos

2. Cut out your image and lay it face up on your work surface. Cut off a piece of packing tape about four inches longer than your piece of paper. Center the tape over the paper with sticky-side down and 2 inches of extra tape at each end. Press tape down gently on paper. Rub a straight edge, a ruler, or a paper boning tool over the entire surface of the tape-covered paper to ease out any bubbles and to make sure the ink is evenly and securely adhered to the adhesive.

Place tape over photos

Place tape over photos

3. Holding the two ends of the tape, immerse the paper-side of the tape into a bowl of water until the paper absorbs water and softens.

place tape with photos in bowl of water

Place tape with photos in bowl of water

4. Using your fingers, gently rub off all the paper from the tape. You may need to dip the paper in the water several times to remove all of it.

Rub paper off of tape

Rub paper off of tape

5. When all the paper is removed, the tape will resemble a clear photo negative (even though it is a positive). Hang to dry.

6. Press the dry tape to your desired surface.

Linnell’s Notes:
1. I made custom tape to decorate Valentine’s Day cards for my favorite couples and for anniversary cards, but I think personalized tape would be cute for other occasions, such as baby showers, birth announcements, etc.

2. You are not restricted to photos. You could also create personalized text. Again, just make sure you use either a photocopy or a print out from a laser printer.

3. I also transferred a color image from a page out of a magazine. That opens a whole new realm of possibilities!

4. This process would be a fun activity to do with children!

Enjoy!

Read Full Post »

Daphne

Daphne by Linnell Chang

If you walk up to my front door right now, there’s a gift waiting for you. For, at this very moment, the sweet fragrance of Daphne flowers infuse the air. Such a delightful way to be greeted, but how will you reply? Will you bask in the moment or will you move on?

#1 – Tolkien’s Ents?

Methuselah tree

Photo by Rick Goldwasser

From a flower-strewn bush of Daphnes to the sky-high tops of trees, nature’s gifts always impress. Mother Nature Network assembled this photo series of “The World’s 10 Oldest Living Trees.” Looking at these photos of ancient trees, one has to wonder if any of them were the inspiration for Tolkien’s wise Ents?

#2 – A Bright Idea
DIY project: Aluminum Lanterns Here’s a really clever decorating idea that was inspired by a creative person’s shopping trip to Home Depot. These lanterns are made from aluminum sheets and require minimal supplies to construct them. Looks like a fun project for the weekend!

#3 – The Skinny on Salad Dressings
Eating a salad for lunch or dinner is a nutritious and low-calorie meal, right? Well, that all depends on the salad dressing you’re pouring over those fresh greens. Not only do many salad dressings contain fat, many of them are also high in sodium. Here’s registered dietician Joy Bauer’s recipe for a low calorie (59 calories per 2 tablespoons) and low sodium (40 mg per 2 tablespoons) salad dressing:

Joy’s Skinny Balsamic Vinaigrette
Ingredients:
1/2 cup balsamic vinegar
3 Tbsp olive oil
1/4 cup water
1 Tbsp mustard
1 tsp honey
1 tsp garlic powder

Directions:
In a jar, combine all ingredients. Shake until everything is well combined. It’ll stay fresh in the fridge for five days.

Makes eight 2-Tbsp servings

#4 – Made Me Smile
Made Me Smile Just looking at this graphic made me smile, but I loved the introduction to Marc and Angel Hack Life‘s post “7 Things Happy People Say Every Day.” The introduction reads, “You have the right words within you to make every day a happy one.” Words have power – say the right ones!

#5 – Flowery Thoughts
Couldn’t decide, so here are two:

“The earth laughs in flowers. ”
e.e. cummings

“Every flower is a soul blossoming in Nature. ”
Gerard De Nerval

Get out and smell the flowers this weekend!

Read Full Post »

spiced chocolate krinkle cookies

Add a little spice to your life and tantalize your taste buds with one of these cookies. At first bite, you’ll discover a rich chocolate flavor with a touch of sweetness, but then, as you’re about to swallow this little bit of naughtiness, a warm and spicy sensation floods your mouth. Ground ginger, freshly-grated ginger, and cayenne pepper provide the cookie with a surprising “afterglow.” A perfect treat anytime, but especially on a cold and rainy day like today!

Spiced Chocolate Krinkles
From The Sweet Spot by Pichet Ong

Ingredients:
2 tablespoons canola, vegetable, or other neutral oil
1 ounce (28 grams) bittersweet chocolate, chopped
1 teaspoon grated fresh ginger
1/4 teaspoon ground ginger
1/4 teaspoon ground cardamom
1/8 teaspoon cayenne pepper
1/8 teaspoon salt
1/3 cup (2 ounces/54 grams) all-purpose flour
2 tablespoons almond flour or coconut powder
2 tablespoons unsweetened cocoa powder
1/2 teaspoon baking powder
1 large egg
1/2 cup (3¾ ounces/106 grams) sugar
1/2 teaspoon vanilla extract
1/2 cup (2 ounces/55 grams) confectioners’ sugar

Directions:
1. Put the oil, chocolate, both gingers, the cardamom, cayenne, and salt in a double boiler or in a heatproof bowl set over a saucepan of gently simmering water and melt the chocolate, stirring occasionally. Remove from the heat, transfer to a bowl if necessary, and cool completely.

2. Sift together the flours, cocoa powder, and baking powder and set aside.

3. When the chocolate mixture has cooled to room temperature, add the egg, sugar, and vanilla extract and stir just until combined. Gently fold in the flour mixture until well incorporated. Transfer the dough to a large sheet of plastic wrap, flatten into a 1-inch-thick disk, and wrap tightly in the plastic. Chill until hard, at least 2 hours or up to 5 days.

4. When ready to bake, preheat the oven to 375 degrees F. Line two baking sheets with parchment paper.

5. Put the confectioners’ sugar in a small bowl. Pinch off a piece of dough, form it into a 1/2-inch ball, roll in the confectioners’ sugar until well coated, and place on a prepared baking sheet. Repeat with the remaining dough, putting the coated balls 1 inch apart on the baking sheets.

6. Bake the cookies until the tops look cracked and are dry to the touch, about 10 minutes. Transfer to a cooling rack to cool completely. The cookies can be stored in an airtight container for up to 2 days.

Makes 3 dozen cookies

Linnell’s Notes:
1. An easy way to peel fresh ginger is to scrap off the “skin” with a teaspoon.

2. The cookbook author noted, “Don’t be tempted to make these cookies bigger. They look more appealing when small and the flavors and texture are best enjoyed in a single bite.”

3. My cookie dough turned out to be more loosely formed than a dough. I attribute this to using an extra large egg. The dough did firm up a bit after chilling it for a couple of hours.

4. To prevent the dough from sticking to my hands while rolling it into balls, I repeatedly wet the palms of my hands with water. Keep a small bowl of water nearby.

ENJOY!

Read Full Post »

DIY jar and jute candleholders

Get out those skeins of macrame cord you’ve been saving since the 1970s and pull out those empty glass jars from underneath your kitchen sink. It’s time to upcycle them into retro-chic candle holders! I made these candle holders in just one morning. Their relaxed vibe makes for great centerpieces (outdoor or indoor) or thoughtful gifts. For a morning coffee gathering or a brunch, put a base layer of coffee beans in the jars and let the candles help release the aroma of freshly-roasted coffee!

Materials:
Glass jars (for a more interesting arrangement, choose jars of different heights)
Jute, twine, or macrame cord
Hot glue gun
Assorted lace trim
Bamboo skewers
Tealights
Nonflammable base material such as rice, beans, coffee beans, sand, etc.
Scissors

General Directions:
1. Remove labels from jars. If some adhesive remains, use a solvent such as Goo Gone to remove it.
2. Wash and try jars thoroughly.
3. Heat up your glue gun.
4. Place a little bit of glue on the twine and press it down on the glass jar using a bamboo skewer or your fingers. Using a bamboo skewer prevents burning your fingers on the hot glue. Putting the glue on the twine versus directly on the glass prevents globs of glue from showing up on the glass or getting all over the glass.
5. Because you’re not using a lot of glue, it will set quickly, so work fast. It helps to have a design in mind before you start.
6. Rub off stray glue “threads,” fill jars with base material, and insert tealights.
7. Tie a bow or wrap twine several times around the top of the jar for a more finished look.

Heart Jar:
Laying down a little glue at a time, create a heart-shape perimeter with the twine. Gradually, coil the twine around and around inside the heart-shape, putting down small spots of glue on the back side of the twine as you go. I coiled small circles in between the hearts to balance the design.

Lace Jar:
Starting at the “back” of the jar, I tacked one end of lace to the jar, wrapped it around the jar cutting off the right length, and glued it down on top of where I started. Twine was then centered on the ribbon in between the lace and glued down on the back of the jar. Lace jars in of themselves are pretty, but I felt twine had to be incorporated into the lace design to create a cohesive design grouping.

Loopy Jar:
I started at the bottom of the jar and just looped the jute in a free-form pattern around the jar. When making the loops, it is easier to glue the contact points of a loop before tacking it to the jar.

Love Jar:
This was created in a similar fashion as the loopy jar, except I spelled out the word “love” on the front and back of the jar.

candle holders made from glass jars and jute

Enjoy your candle holders!

Read Full Post »

« Newer Posts - Older Posts »