Feeds:
Posts
Comments

Posts Tagged ‘food’

Kachumbari Salad: A Kenyan Tomato Salad Sweet vine-ripened tomatoes, the gems of summer, make the perfect base for salads. From Kenya comes this recipe that pairs tomatoes with red onions, cilantro, chile, and lime juice. Visually attractive and packed with flavor, this salad is the perfect side dish for summer entertaining. Tonight, those incredible flavors will marry beautifully with the fish tacos I’m serving!

Kachumbari Salad
Share: The Cookbook that Celebrates Our Common Humanity

INGREDIENTS
1 lb firm and ripe tomatoes, sliced or diced
1-1½ red onions, very thinly sliced
4 tablespoons fresh cilantro, chopped
1/4 cup extra virgin olive oil
1 chile, sliced (optional)
1-2 tablespoons lemon or lime juice
Salt and freshly ground black pepper

DIRECTIONS
1. Place the tomatoes into a medium salad bowl with the onions. Stir in the chopped cilantro.

2. Drizzle with the olive oil and stir in the chile, if using. Season and gradually add the lemon or lime juice to taste.

Serves 4

LINNELL’S NOTES
1. One pound of tomatoes is approximately 2.5 large tomatoes. For this recipe I used about two pounds of assorted tomatoes (cherry, heirloom, and beefsteak).

2. I cut the cherry tomatoes in half from top to bottom, but the larger tomatoes, I sliced crosswise into rounds.

3. Because I sliced them into rounds, I gently mixed the salad in a large pan instead of a bowl. This salad is attractive when arranged on a platter.

4. I used half of a red onion instead of a whole one and I’m glad I did. Even with this reduced amount, there were a lot of onions in this salad.

5. Here are some tips from Craig Kielburger, the contributor of this recipe to the cookbook: If you prefer a milder onion flavor, rinse the onion slices in hot salty water before putting them in the salad. This will ensure the onion is less harsh on the palate. Squeeze the lemon or lime juice into the salad just before serving to avoid sogginess. If the tomato and onion are chopped more finely, this recipe also works well as a homemade salsa.

6. The chile is optional, but its heat adds a nice flavor dimension to the salad.

ENJOY!

Read Full Post »

Homemade Ice Cream: Almond Butter Crunch Ice Cream The subject line of an email to my husband read, “Make this for me.” The body of the email was blank, except for a link to an online recipe. Possessing a sweet tooth and being the thoughtful man that he is, my husband came home from work with a shopping bag filled with necessary ingredients. In our family, not only does he bring home the bacon, he makes the ice cream, too!

Almond Butter Crunch Ice Cream
The Noble Pig

INGREDIENTS
1 cup almond butter
3/4 cup sugar
1/2 teaspoon table salt
2 cups heavy cream
2 cups whole milk
2 teaspoons vanilla bean paste or regular vanilla
1 cup vanilla almond crunch granola (large almonds removed) or your favorite granola

DIRECTIONS
1. Add almond butter, sugar and salt to the bowl of a stand mixer. Blend on medium speed for at least 5 minutes.

2. Add cream, milk and vanilla and mix another 2 minutes until fully incorporated.

3. Add cream mixture to the freezer bowl of your ice cream maker and freeze according to manufacturer’s directions. Right before removing, add your favorite granola and let mix in. (If your granola has large chunks, just stir it in rather than pour into the ice cream maker while it’s running.)

4. Place into a container when it’s done and freeze for 3 hours in the freezer.

Makes 1¼ quarts

LINNELL’S NOTES
1. To me this had the saltiness of salted-caramel. Next time, I’ll ask my husband to cut back on the salt and we’ll see which version we like better.

2. I chopped up some toasted almonds that I had on hand and added it to the leftover granola. The additional nuts and granola made a great topping for this ice cream.

3. For those of you wondering if the granola remained crunchy, I can positively say it did–down to the very last spoonful!

Enjoy!

Read Full Post »

Sweet Potato Fries For Dogs Hold the ketchup! Hold the salt! These baked sweet potato fries are perfect just the way they are! Perfect for dogs, that is. If most people could adjust their palates to accept baked fries with no added sodium, these would be perfectly delicious for humans, too!

Sweet Potato Fries For Dogs
Adapted from a recipe from Food.com

INGREDIENTS
Uncooked sweet potatoes or yams

DIRECTIONS
1. Preheat oven to 250 degrees F.

2. Wash the skins of the sweet potatoes thoroughly and blot dry.

3. Cut the sweet potatoes in half lengthwise.

4. Cut the halves in lengthwise slices.*

5. Place the slices on a cookie sheet in a single layer.

6. Bake in the oven for about 3 hours.

7. After the fries cool down, it’s time for a taste test! Romeo keeps his eyes on the prize and he lifts his paw to a begging position . . . sniff, sniff . . . yes, he likes it! Romeo's Taste Test

LINNELL’S NOTES
1. I experimented with two varieties of sweet potatoes. My dog liked them both, but obviously the orange variety is more attractive-looking.

2. Try cutting the sweet potatoes as uniformly as possible for consistent baking. Leave the skin on for added fiber and micronutrients.

3. I set my oven to 280 degrees F. and baked the fries for 3 hours. Some of the fries were crunchy and some were chewy at this point. If your dog likes them crunchier, remove the crunchy ones from the sheet and continue to bake the chewy ones a little longer.

4. *As the slices bake and lose moisture, they will shrink. Take this into account when you are slicing the sweet potatoes and make the slices the appropriate size for your dog.

5. Sweet potatoes will release a sticky syrup as they bake, so I covered my baking sheets with parchment paper.

WOOF! WOOF! ENJOY!

Read Full Post »

Salted Butter Breakups Food always tastes better when it’s shared. But here’s the dilemma: Would you actually want to share a super-sized butter cookie that contains the perfect balance of flavors – not too sweet and not too salty – and the perfect balance of textures – crispy on the outside and delightfully soft and chewy on the inside? Its name, Salted Butter Breakups, indicates that this big delicious cookie is meant to be broken up and shared. Bake one up to share with friends or succumb to temptation and eat the entire sweet glory all by yourself. You choose.

Salted Butter Breakups
Adapted from From Around My French Table, by Dorie Greenspan

INGREDIENTS
1¾ cups all-purpose flour
2/3 cup sugar
3/4 to 1 teaspoon sel gris or kosher salt
1 stick plus 1 tablespoon (9 tablespoons) cold unsalted butter, cut into 18 pieces
3 to 5 tablespoons cold water
1 egg yolk, for the glaze

DIRECTIONS
1. Put the flour, sugar and salt in the workbowl of a food processor and pulse to combine. Drop in the pieces of butter and pulse until the mixture looks like coarse meal – you’ll have big, pea-size pieces and small flakes. With the machine running, start adding the cold water gradually. Add just enough water to produce a dough that almost forms a ball. When you reach into the bowl to feel the dough, it should be very malleable.

2. Scrape the dough onto a work surface, form it into a square and pat the square down to flatten it a bit. Wrap the dough in plastic and chill it for about 1 hour (or as long as overnight).

3. When you’re ready to bake, center a rack in the oven and preheat the over to 350 degrees F. Line a baking sheet with a silicone mat or parchment paper.

4. Remove the dough from the fridge and, if it’s very hard, bash it a few times with your rolling pin to soften it. Put the dough between sheets of plastic film or wax paper and roll it – or pat it – into a rectangle that’s about 1/4-inch thick and about 5-x-11 inches; accuracy and neatness don’t count for a lot here. Transfer the dough to the lined baking sheet.

5. Beat the egg yolk with a few drops of cold water and, using a pastry brush, paint the top surface of the dough with the egg wash. Using the back of a table fork, decorate the cookie in a cross-hatch pattern.

6. Bake the cookie for 30 to 40 minutes, or until it is golden. It will be firm to the touch, but have a little spring when pressed in the center – the perfect breakup is crisp on the outside and still tender within. Transfer the baking sheet to a rack and allow the cookie to cool to room temperature.

Serving: If fun is what you’re after, bring the breakup to the table whole and let everyone break off pieces big and small; if order suits you better, break the cookie in the kitchen and serve the pieces on a plate.

Storing: The baked cookie will keep in a container for about 3 days. You can make the dough up to 3 days ahead and keep it in the refrigerator, or you can wrap it airtight and freeze it for up to 2 months. Don’t brush the dough with egg wash until you’re ready to bake it.

Makes 4 servings

LINNELL’S NOTES:
1. Sel gris means gray salt in French. It is a coarse-textured flavorful salt harvested in France.

2. My husband liked the salty bite this cookie had, so the next time I make this cookie, I will try adding 1 teaspoon of salt instead of the 3/4 teaspoon that I used.

3. I baked the cookie for about 30 minutes. Because I thought the edges were the tastiest part, next time I will bake it a little bit longer to get more of the crispy browned-butter flavor throughout.

4. Although the cookie can be stored in an airtight container for a few days, it loses its crispiness. It’s best when consumed within a couple of hours after baking.

5. This cookie alone makes an easy dessert, but if you accompany it with some fresh seasonal fruit, such as peaches or berries, it becomes a fabulous dessert treat.

ENJOY!

Read Full Post »

Pizza Hummus Pizza-flavored hummus? As a lover of hummus, this recipe caught my eye. I thought of all the wives and mothers out there who constantly battle to get their loved-ones to eat a more healthy diet. Why not be clever and sneak this healthy dip onto the table under the guise of a tasty “PIZZA” dip? It’s worth a try!

Pizza Hummus
Food Network Magazine

INGREDIENTS
1 tablespoon extra-virgin olive oil
1/4 cup tomato paste
2 teaspoons dried oregano
1 teaspoon dried basil
2 to 3 cloves garlic
3 cups canned chickpeas, drained and rinsed, 1/2 cup liquid reserved
1/4 cup tahini
1/4 cup fresh lemon juice
Kosher salt

DIRECTIONS
1. Heat the olive oil in a small skillet over medium-high heat.
2. Add the tomato paste, oregano and basil and cook until slightly toasted, about 2 minutes.
3. Transfer the tomato paste mixture to a food processor. Add the garlic, chickpeas, chickpeas liquid, tahini, lemon juice and 1 teaspoon salt.
4. Purée until smooth and creamy.

LINNELL’S NOTES
1. Tahini is a paste made from ground sesame seeds. To learn about the “Nutritional Facts for Roasted Sesame Tahini,” read this article from SFGate.

2. Two 15.5 oz. cans of chickpeas equaled 3 cups of drained and rinsed beans for me.

3. I used 2 cloves of garlic, but the next time I make this, I will try adding 3 cloves of garlic for a little bit more flavor.

4. Next time I will also add a little bit more basil and oregano. I may even try adding fresh basil and fresh oregano. The conversion for dried to fresh herbs is about 1 teaspoon of dried to 1 tablespoon of fresh.

5. I also will try sprinkling a little bit of diced sun-dried tomatoes (packed in olive oil) on top of the hummus before serving.

6. Obviously it is more nutritious to serve this dip with vegetables, but pita chips would be great with it, too.

ENJOY!

Read Full Post »

Creamed summer Corn Ears of sweet summer corn require little embellishment to be fully enjoyed, but for a change of pace try this refreshing version of a traditional creamed corn dish. Just a little bit of lime zest, lime juice, and cayenne pepper transforms a normally predictable dish into a bright, surprisingly-sophisticated summer side dish.

Produce man Michael Marks gives this advice on selecting and storing fresh corn: When you’re picking your corn, make sure the husk is bright green and looks fresh. If it’s tanned and shriveling, it’s old or heat has gotten to it. Feel the top end. Fully mature ears of corn will have a rounded top. If the top feels pointy, it’s likely immature. Then pull down the husk and take a peek. There should be no cracks between those plump kernels. If you see any dimples in those kernels, step away from the corn. It’s old; the sugars will have turned to starch and it won’t be pleasant to eat. As soon as you get your corn home, refrigerate it and try to enjoy it within a couple of days.

Creamed Summer Corn
Torie Ritchie’s adaptation of a recipe from Ad Hoc at Home by Thomas Keller

INGREDIENTS
6 ears white or yellow corn, shucked
1 large lime
3 tablespoons unsalted butter
Kosher salt
3/4 to 1 cup heavy cream
Pinch cayenne
1-1/2 tablespoons snipped fresh chives

DIRECTIONS:
1. With a chef’s knife, cut down each ear of corn to remove kernels. Place kernels in a bowl. (To remove excess silk see note below.)

2. Holding one cob over the bowl at a time, use the back of a knife or a spoon to scrape any remaining corn and “milk” (corn juices) from the cob into the bowl. Repeat with remaining cobs.

3. Grate the zest from the lime onto a small plate and set aside. Cut lime in half. Juice lime into a ramekin and have a tablespoon measure handy.

4. Melt the butter in a large fry pan over medium heat. Add corn kernels and 1 tablespoon of lime juice. Season to taste with salt.

5. Reduce heat to medium-low and cook the corn, stirring occasionally, until the liquid evaporates and the corn starts to sizzle, about 12 minutes.

6. Stir in 3/4 cup of the cream, cayenne and lime zest. and bring to a boil. Adjust heat to medium and simmer until cream is thickened and almost absorbed, 6-8 minutes.

7. Taste and add more lime juice, salt, or cayenne as desired and stir in remaining cream for a creamier texture, if desired.

8. Remove from heat, stir in chives and serve.

Serves 4 to 6

LINNELL’S NOTES:
1. The easiest way to cut kernels off a corn cob is to stick the stem end into the hole of a Bundt pan. Holding the cob carefully, run your knife down the cob to remove the kernels. As you cut off the kernels, they will fall into the Bundt pan. Kitchen Tip: How to cut kernels off a corn cob

2. Here is Torie Ritchie’s note on removing corn silk: To remove any last bits of silk from the corn kernels in the bowl, set another bowl of water next to it. Swish your hands through the corn kernels in a circular motion to let your fingers pick up most of the remaining silk strands. Rinse your hands in the water bowl as you work to remove the silks. Repeat this a couple of times. I tried her technique and it worked for the most part — I still had to pick out a few strands of silk.

3. At step #7, I added a tiny bit more cayenne and the rest of the lime juice.

4. I keep an 8-ounce box of shelf stable whipping cream from Trader Joe’s in my pantry for convenience. No last minute dash out to the market to purchase whipping cream for me!

5. This recipe would go well with any tropical-type menu.

ENJOY!

Read Full Post »

Sugar Snap Peas with Sesame Seed Dressing Hot summer days evolve into lovely summer evenings. The sun mellows in the sky and temperatures drop to a comfortable warm. It’s the perfect time of day to dine al fresco and to entertain company. Keep the evening enjoyable and effortless, by preparing a simple menu that can be made ahead. Sugar Snap Peas with Sesame Seed Dressing is just such a recipe. It’s easy to prepare and it can be made earlier in the day. Plus, it’s delicious, visually appealing, and a great accompaniment to grilled meats.

Sugar Snap Peas with Sesame Seed Dressing
The Loaves and Fishes Party Cookbook by Anna Pump and Sybille Pump

INGREDIENTS
4 pounds sugar snap or snow peas
1/3 cup sesame seeds
1/2 cup sesame seed oil
2 teaspoons red pepper flakes
2 teaspoons coarse salt

DIRECTIONS
1. Blanch the peas in a large quantity of boiling water just until they turn bright green, about 1 minute. Drain and plunge the peas into very cold water to stop the cooking process. Drain again. Transfer the peas to a mixing bowl.

2. Place the sesame seeds in a large skillet over medium heat. Tossing lightly, toast until golden brown, and add to the sugar snap peas.

3. In the same skillet, heat the sesame oil until smoking hot. Remove from heat and add the red pepper flakes. Let stand for 5 minutes.

4. Pour the oil over the peas, add the salt, and toss to blend.

5. Transfer the peas to a deep bowl or platter and serve hot.

Serves 16

LINNELL’S NOTES
1. I purchase jars of pre-toasted sesame seeds at Asian markets and store them in my freezer. No need to defrost them. Just add them directly from the jar to whatever you are making. If you are toasting your own, keep an eye on them while they are in the skillet. Because they contain oil and because they are small, they can burn quickly.

2. Sesame seed oil is a thick and heavy oil. A little bit goes a long way. That being said, I felt the recipe called for too much of it. The next time I make this recipe, I will start with half the amount.

3. Stir the red pepper flakes into the hot oil and keep stirring. Some of my pepper flakes burned as they sat in the hot oil. Stirring them might have helped prevent burning.

4. Although the recipe says to serve this hot, it also says that it can be served cold. In my opinion, room temperature is best.

5. The recipe can be prepared without the red pepper flakes if you prefer, but I think the little added “kick” really makes the dish.

Enjoy!

Read Full Post »

Cavatappi withSpinach, Beans, and Asiago Cheese

Part green salad and part pasta salad, but all parts delicious and fresh! Pair this Italian-influenced salad with rustic artisan bread for a quick and healthy meatless supper or throw it together for easy entertaining. With only nine simple ingredients, this salad is big on taste and big on convenience.

Cavatappi With Spinach, Beans, and Asiago Cheese
The Best of Cooking Light

Ingredients:
8 cups coarsely chopped spinach
4 cups hot cooked cavatappi (about 6 ounces uncooked spiral-shaped pasta)
2 tablespoons olive oil
1/4 teaspoon salt
1/4 teaspoon black pepper
1 can cannellini beans or other white beans, drained
2 garlic cloves, crushed
1/2 cup (2 ounces) shredded Asiago cheese
Freshly ground black pepper (optional)

Directions:
Combine first 8 ingredients in a large bowl, and toss well. Sprinkle with freshly ground black pepper, if desired.

Yield: 4 servings.

Linnell’s Notes:
1. Cavatappi is also known as cellentani, spirali or tortiglione.
2. Maybe I packed too much chopped spinach into each cup while measuring it out, but this made much more than 4 servings.
3. I thinly shaved the Asiago instead of shredding it.
4. In a side note, the recipe states, “The warm cavatappi slightly wilts the spinach and softens the cheese during tossing.”

Enjoy!

Update (6/24/13): I made this salad again, but with some substitutions and additions.  I used cavatelli instead of cavatappi and replaced the regular olive oil with Meyer lemon infused olive oil. Cherry tomatoes, fresh off the vine, were sliced in half and added to the salad along with some toasted pine nuts. Very nice!

Read Full Post »

Java-Style Cauliflower Salad Like an artist’s blank canvas, cauliflower’s subtle flavor provides the perfect background to let dynamic flavors shine. Cauliflower is rich in nutrients, low in calories, and high in fiber, so by adding the bright and zesty flavors of coconut, lime, cilantro, and cayenne pepper, you’ve got a winning combination. In addition, this cauliflower salad can be served hot or at room temperature which makes it a great make-ahead dish.

Java-Style Cauliflower Salad
Adapted from Living Low-Carb by Fran McCollough

Salad Ingredients:
1 medium head cauliflower, cut into small florets
Half a small red bell pepper, cored, seeded, and diced
2 tablespoons chopped fresh cilantro
2 tablespoons shredded coconut

Dressing Ingredients:
1 garlic clove, chopped
4 teaspoons fresh lime juice
1 teaspoon dark brown sugar
1/4 teaspoon cayenne pepper
1/4 teaspoon salt
3/4 cup coconut cream

Directions:
1. Drop cauliflower florets into a large pot of well-salted boiling water. Boil just a few minutes, until barely tender. Drain and dry on a kitchen towel.
2. Dice the red pepper and set aside.
3. Wash and chop the cilantro and set aside.
4. Chop garlic and put in blender.
5. Add lime juice, brown sugar, cayenne pepper, salt and coconut cream to blender. Pulse until well-blended.
6. Pour dressing over the hot cauliflower. Toss well and transfer to a serving bowl, scattering the red pepper, cilantro, and coconut on top.
7. Toss before serving.

Serves 4

Linnell’s Notes:
1. Make sure the cauliflower florets are well-drained and reasonably dry before adding the dressing. If they still contain a lot of moisture, the dressing will become diluted and runny.
2. I had to rework the dressing recipe. The original recipe called for 1 cup of freshly-grated coconut and 4 tsp lime juice. There was just not enough liquid to make a dressing. I added some coconut cream I had in my pantry to make the dressing “flow.” The grated coconut became a topping, rather than part of the dressing.
3. Because of time constraints, I substituted shredded coconut in a bag instead of grating fresh coconut. Also, toasting the coconut first can bring out its flavor and give it more “crunch.” I will do this the next time I make this salad.
4. Adjust the seasonings to taste – more or less lime juice, sugar, cayenne pepper, and salt.
5. The cookbook author says, “Don’t be tempted to skip the tiny amount of brown sugar; it’s a secret ingredient that pulls everything together.”
6. The addition of coconut cream does not significantly raise the amount of carbohydrates in the recipe. The coconut cream has only 3 grams of carbohydrate per 1/3 cup.

Enjoy!

Read Full Post »

Sushi Casserole Creating extraordinary sushi requires great skill and passion. After watching Jiro Dreams of Sushi, a documentary about Jiro Ono, an 87-year-old sushi master, I’m almost embarrassed to share the following recipe. This recipe is far removed from the precise art of sushi-making, but the rumblings of my imagination wouldn’t let go of the idea of creating a sushi casserole. I searched online, sorted through my notes and newspaper clippings, and reread my sushi cookbooks to figure out what layers I wanted for the casserole. My experiment began and, after a fair amount of improvising, I ended up with a tasty casserole that yielded bite-sized squares of “sushi” that were served with roasted Nori. There are endless possibilities to a layered recipe such as this. And, yes, it is possible to stick a square peg into a round hole!

Sushi Casserole
Sushi Rice
The ratio of vinegar solution added to sushi rice varies with the type of sushi being made. In this case, I’m using a vinegar solution used for making maki-sushi. Normally, the vinegar solution is added to the rice after the rice is cooked. The rice is usually fanned while cooling to give the grains a lustrous or shiny appearance. I cheated by adding the vinegar solution into the rice cooker at the beginning and didn’t fan the rice at all.

Ingredients:
4 cups of uncooked sushi rice (rice must be short or medium grain only)
1/2 cup (8 tablespoons) of plain rice vinegar
5 tablespoons sugar
1 teaspoon salt
Water (approximately 4 cups plus 4 tablespoons)

Directions:
1. Wash and drain rice.
2. Put the rice in the rice cooker.
3. Combine vinegar, sugar, and salt in a small bowl.
4. Add vinegar solution to rice in rice cooker.
5. Add water up to the specified cup level.
6. Start the rice cooker.
7. After the rice is cooked, let it cool to body temperature.

Crab Layer
Ingredients:
1 pound imitation crab
3/4 cup mayonnaise
1 cup sour cream

Directions:
1. Chop the imitation crab or place it in a food processor and pulse. Small chunks are desired, not large chunks nor a smooth paste.
2. Combine mayonnaise and sour cream in a medium-sized bowl.
3. Add crab to mayo-sour cream mixture and stir until thoroughly combined.

Spicy Sauce
Ingredients:
1/2 cup mayonnaise
2 tablespoons Sriracha sauce

Directions:
1. Blend both ingredients together.
2. Pour into a squeeze bottle with a small nozzle tip.

Additional Toppings
Smoked salmon slices
Shrimp tempura
Cucumber sticks
Avocado slices
Aji Nori Furikake (a seasoned mix in a jar)

Assembling Casserole
1. In a small bowl, mix 1 cup of water with 2-3 tablespoons of vinegar. Rub this solution on your hands and on any utensils you use to prevent the rice from sticking.
2. Take handfuls of rice and gently and evenly press it into the bottom of a 9-inch by 13-inch pan. This layer should be at least 1/2-inch thick, but no more than 3/4-inch thick. There may be leftover rice.
3. Spread the crab layer over the rice.
4. At this point I put a thin layer of smoked salmon slices over the crab mixture.
5. The next layer, I alternated between the shrimp tempura, avocado slices, and cucumber strips.
6. Finally, I sprinkled some Aji Nori Furikake over the top of the casserole and then drizzled the spicy sauce up and down the rows of toppings.

To Serve
Ingredients:
Nori/sheets of seaweed
Wasabi
Pickled ginger

Directions:
1. Cut the casserole into small squares. You can either serve the sushi squares directly from the pan or you can plate them on a serving platter.
2. Accompany sushi casserole with squares of roasted Nori, wasabi, and pickled ginger.

Linnell’s Notes:
1. Sushi should not be put in the refrigerator, because the rice will become hard. It’s most delicious when served just after making it.

2. I made my rice base too thick, so I recommend using enough rice to form a solid base, but not so much that each bite is all rice.

3. I used frozen shrimp tempura from Costco and baked it in the oven while the rice was cooling.

4. For easier cutting and serving, the shrimp tempura could be cut into bite-sized pieces and placed intermittently in rows across the casserole. Another consideration might be to place the shrimp tempura under the crab layer. The same goes for the cucumber sticks. The cucumber sticks could be diced and sprinkled over the casserole.

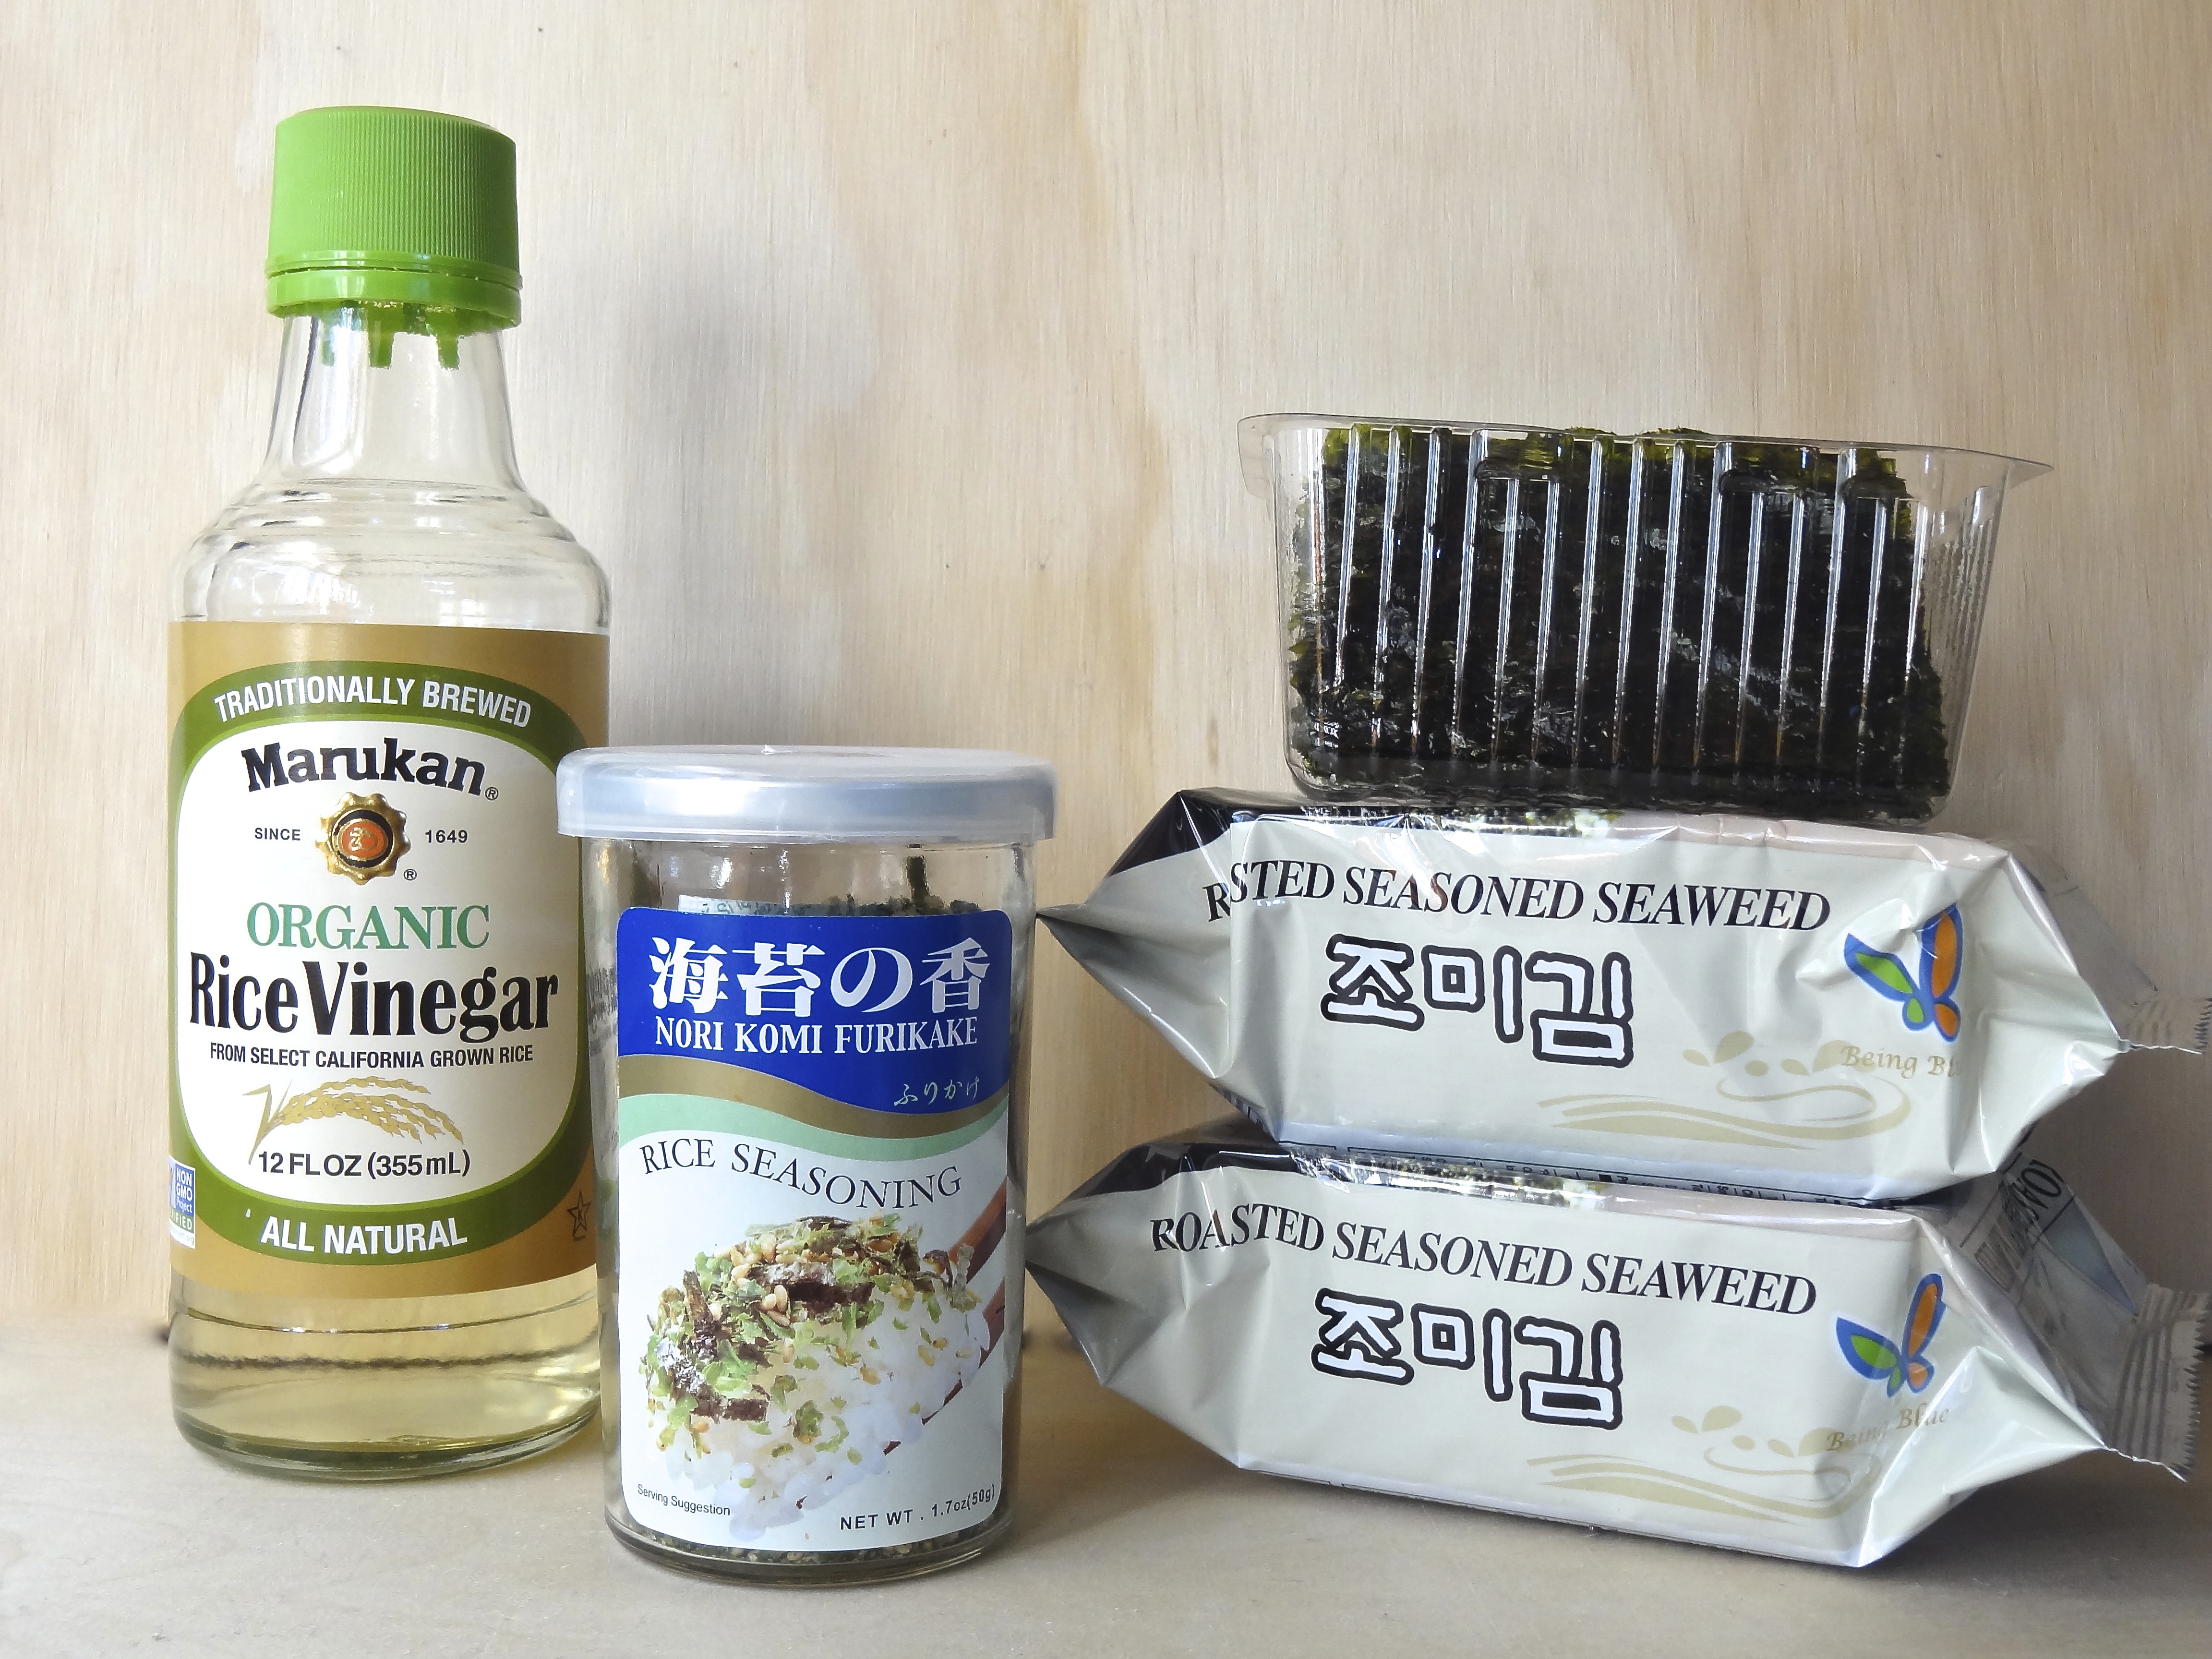
5. Instead of toasting sheets of Nori/seaweed and cutting them into squares, I cheated and opened several roasted-seasoned seaweed snack packs. See packages in photo along with Furikake and rice vinegar: Partial Ingredients for Sushi Casserole

Enjoy!

Read Full Post »

« Newer Posts - Older Posts »